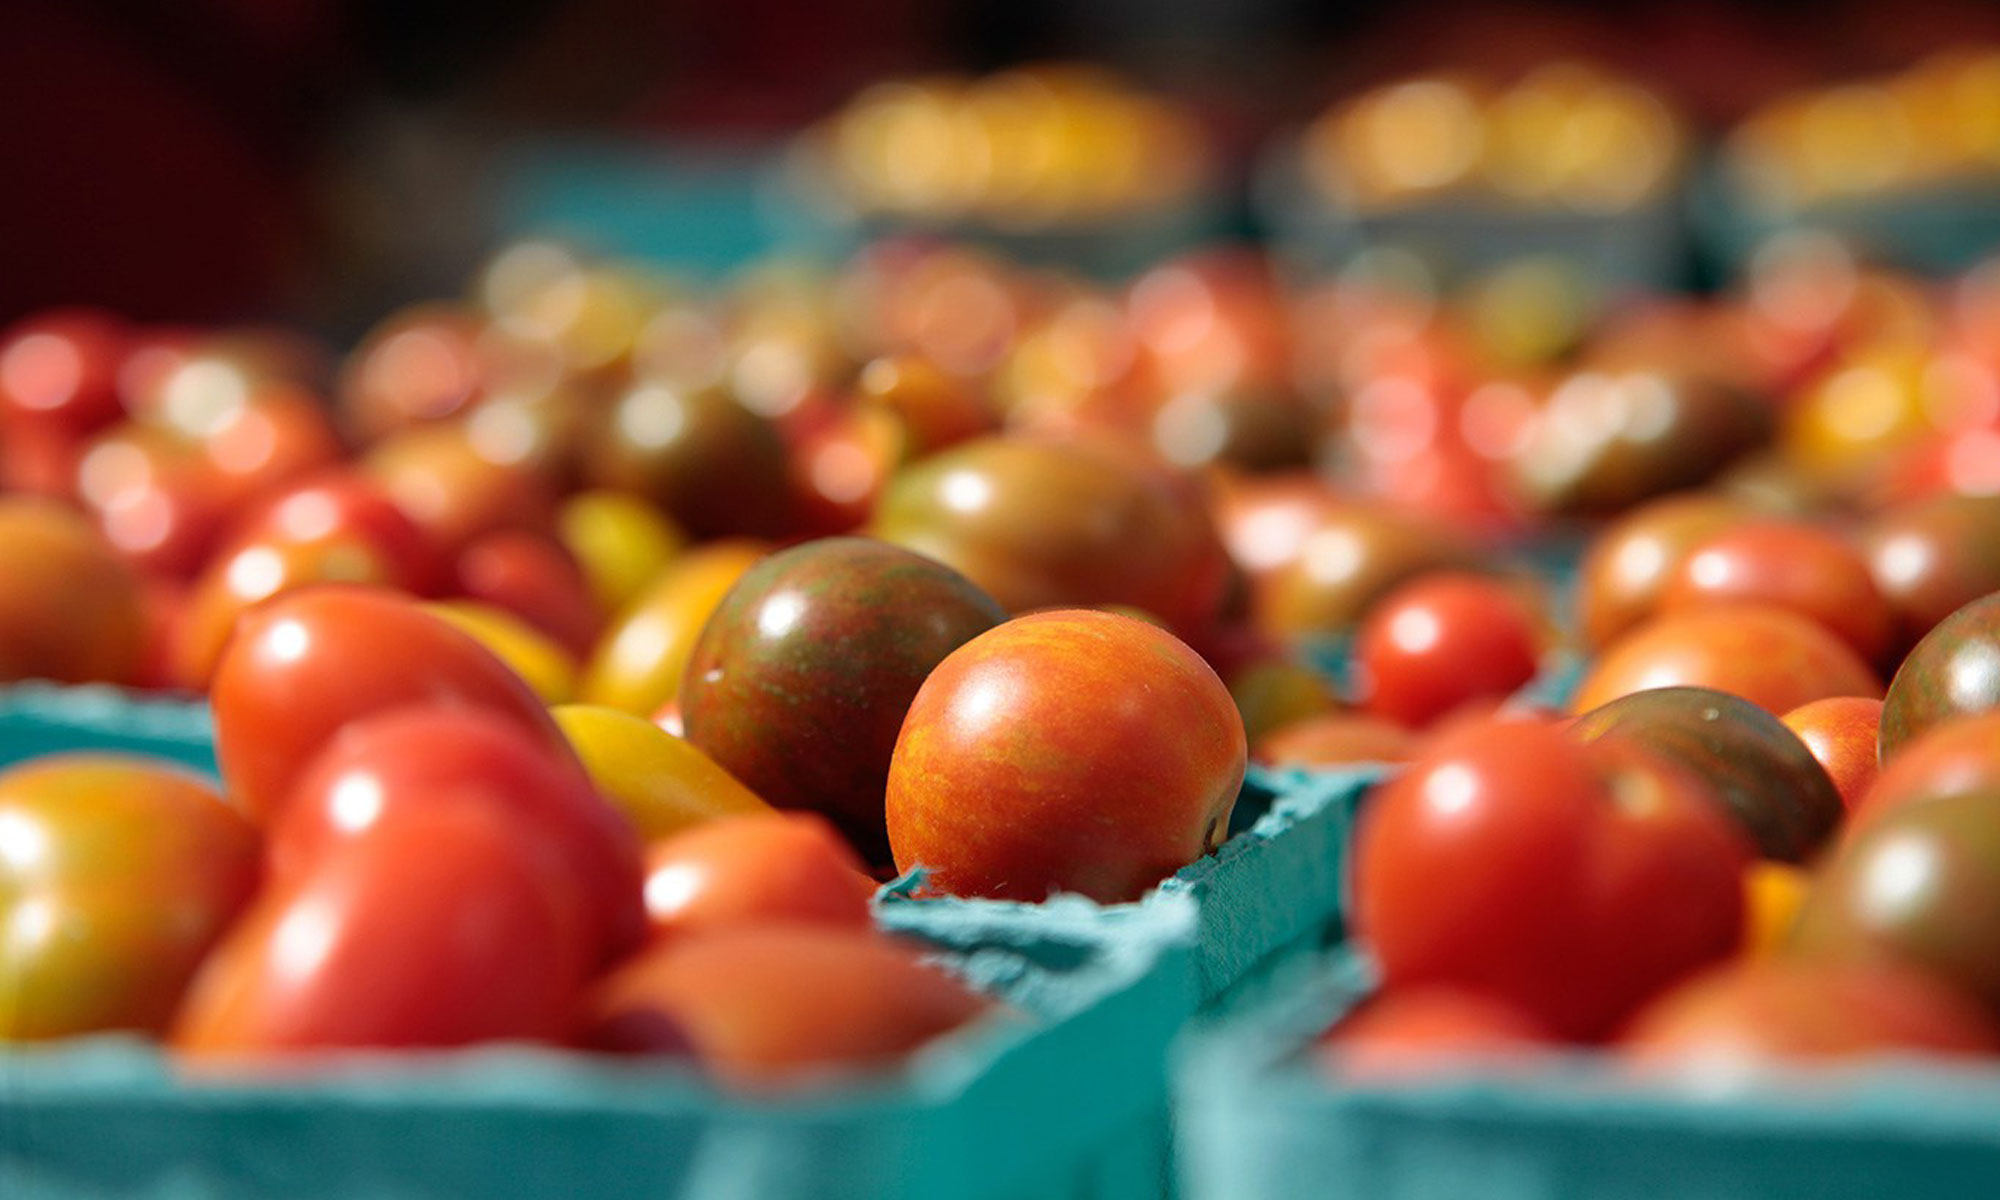
I love making berry desserts in the Summer because they are in peak season and a fresh healthy alternative to cakes and cookies during the holidays. This Strawberry Jam Galette is one of my absolute favs..it’s super easy and simple, extra delicious, and a gorgeous addition to your July 4th holiday table at that!
It’s made with a flaky whole wheat pastry dough, fresh strawberries (I love Driscoll’s berries!), strawberry jam, a touch of agave and vanilla, some lemon juice and zest, topped with fresh torn mint leaves. You can use any berries you like or a combination of your favs to make it your own. Swap out the strawberry jam if you like to add another layer of flavor, like blueberry or raspberry jam. Serve topped with vanilla ice cream or fresh whipped cream for the ultimate Summer berry dessert. Maybe throw a few chopped pistachios or slivered almonds on top too for extra crunch.
This Strawberry Jam Galette is one of my absolute favs..it's super easy and simple, extra delicious, and a gorgeous addition to your July 4th holiday table at that!
It's made with a flaky whole wheat pastry dough, fresh strawberries (I love Driscoll's berries!), strawberry jam, a touch of agave and vanilla, lemon juice and zest, topped with fresh torn mint leaves, vanilla ice cream and/or fresh whipped cream. Enjoy and Happy 4th!
Ingredients
Crust
½ cup cold unsalted butter
1 ½ cups whole wheat flour
2 teaspoons sugar (or 1 teaspoon stevia)
¼ teaspoon salt
½ cup ice water
Berry Jam Filling
4 cups fresh strawberries, halved
1/4 cup honey or Nectevia agave syrup
1 tablespoon cornstarch (or xanthan gum)
1 teaspoon vanilla extract
1 tablespoon fresh lemon juice + 1 teaspoon lemon zest
1/2 cup strawberry jam (low sugar or sugar-free if desired)
1 egg, beaten or 2 tablespoons milk (for crust)
1-2 tablespoons coarse brown sugar (for crust, optional)
1 tablespoon fresh mint leaves, for serving
Vanilla ice cream or fresh whipped cream, for serving
Instructions
Cut the butter into small chunks and place in a food processor and slowly pulse together with the flour, sugar (or stevia), and salt until barely combined with a few chunks of butter. Slowly add in ice water until a shaggy dough forms. (You can also do tis with your hands or a pastry cutter if you prefer).
Turn the dough out onto a lightly floured surface and knead for about 1 minute. Cover it with plastic wrap and place in the fridge for 1 hour while you prepare the filling.
In a medium bowl, combine the strawberries, Nectevia syrup (or honey), xanthan gum (or cornstarch), vanilla, lemon juice and zest.
Preheat the oven to 400 degrees.
When the crust is chilled, line a baking sheet with parchment paper and roll out the dough into a large circle about 1/4 inch thick,
Spread the dough with strawberry jam, leaving a 3-inch border around the edge. Arrange the cut strawberries over the dough in an even layer, mounding up slightly in the center.
Fold edges of dough up and over fruit, pleating as needed and being careful that folded edge of dough doesn’t tear (if it does, patch with dough scraps and pinch to seal).
Brush the edges of the dough with beaten egg or milk and and sprinkle the crust with some coarse brown sugar (if desired). Place galette in the fridge to cool and firm up for about 15 minutes.
Place galette in oven and reduce heat to 375°. Bake, rotating halfway through, until crust is golden brown, berries are softened, and juices are bubbling, 45–50 minutes.
Remove from the oven and let cool 1-2 hours before serving.
Garnish with fresh mint leaves, vanilla ice cream or fresh whipped cream.
Notes
You can use any berries you like or a combination of your favs to make it your own. Swap out the strawberry jam if you like to add another layer of flavor, like blueberry or raspberry jam. Serve topped with vanilla ice cream or fresh whipped cream for the ultimate Summer berry dessert. Maybe throw a few chopped pistachios or slivered almonds on top too for extra crunch.
I've also provided options for making this #lowcarb and/or #glutenfree in the recipe (swapping out Stevia, Swerve Brown Sugar and Nectevia agave nectar for honey or sugar, using sugar-free jam, and swapping xanthan gum for cornstarch, and low-sugar or sugar-free whipped cream or #keto ice cream.
So Fall is here – I know, I know, aren’t we all excited?! It’s definitely been a super hot Summer and I am in full baking and cooking mode with some new Fall recipes up my sleeve!
I was invited to participate in the Keystone Pantry Allulose Blogger Recipe Challenge this year and decided to make a lovely Fig, Almond and Orange Vanilla Tart. It’s probably the most delightful thing I have ever made, tasted or set my eyes upon – why?
Because, FIGS. Fresh ones. Nestled into a silky mascarpone and vanilla almond layer of creamy goodness with a hint of orange, spread on top of crunchy, light, buttery puff pastry. And topped with a few dollops and drizzles of orange fig jam and crushed almonds just to make life and this tart that much sweeter. (no pun intended)
The good news is, the pastry cream is lower in sugar and calories because I substituted Allulose in place of honey and regular table sugar. Allulose is a rare natural sugar found in very small quantities in dates, dried figs, raisins and wheat, and also in other brown caramelized products such as caramel sauce, maple syrup and brown sugar. It has the same chemical formula as fructose but because it isn’t metabolized by the body, it does not raise blood sugar or insulin levels (and studies show it can reduce blood sugar levels!) and has zero net carbs and only 21 calories per teaspoon.
It provides a taste and texture similar to sugar, and doesn’t have a bitter aftertaste like most non-sugar sweeteners. But, you will need to use a little more than regular sugar because it isn’t as sweet. It does have the same volume and browning characteristics as white sugar when used in baking, but browns faster than regular sugar so it may require a slightly lower temperature when cooking with it. It also comes in powdered/crystalline forms or as a liquid syrup.
This recipe could absolutely be made with any other fruit you like that’s in season – maybe plums? or apricots? or berries? But there’s something so good about the sweet and tart figs mixed with the almond, vanilla and orange flavors that make this a harmonious dessert, perfect for brunch or to top off a weeknight Fall dinner.
First, defrost your puff pastry (if frozen, I use Dufour brand which is super light and crispy and buttery and delicious) and roll it out into a 9×13 inch rectangle (or any shape you like but about 1/2 inch thick). Sprinkle with a little flour on both sides on a silicone mat or parchment paper. Then score an edge around the pastry (or roll it over to create a rustic looking edge), and brush the edges with an egg white and water mixture to give the crust a lovely sheen. Bake the pastry for about 20-25 minutes at 400 and let it cool on a wire baking rack while you make the Almond Vanilla Cream.
Mix all the ingredients (mascarpone cheese, almond paste, Allulose, agave, orange flower water and vanilla) in the bowl of a food processor,
until the mixture is blended smooth and creamy.
Spread the Vanilla Almond Cream on the baked puff pastry evenly with a spatula.
Top the pastry with quartered fresh figs,
a few drizzles and dollops of orange fig jam, and crushed almonds. Cut into squares and serve immediately.
A gorgeous Fall dessert made with puff pastry, fresh figs, almonds layered in a vanilla orange almond pastry cream made with Keystone Pantry Allulose, for a lighter and less sweet treat.
Unwrap defrosted puff pastry sheet on a floured surface. Unfold, remove inner parchment papers and dust both sides lightly with flour.
Score a 1-inch border on inner edges of pastry sheet or roll edges in to create a border. Brush border with egg wash and prick holes in the center of the pastry sheet with a fork. Place on a silicone mat on a baking sheet (or parchment paper).
Bake for 20-25 minutes until golden brown and flaky. Let cool on a wire rack to the side while you make your pastry cream.
In the bowl of a food processor, add all the ingredients (almond paste, mascarpone, Allulose, agave, vanilla, orange flower water) and blitz on high for about a minute or so. Scrape the sides and process again, until the mixture is blended well and creamy.
With a spatula, spread a generous amount of the pastry cream on the cooled puff pastry.
Top with fresh quartered figs in a rustic pattern on top of the cream.
Dollop or drizzle the orange fig jam on top of the figs. Top with crushed (or sliced) almonds.
Serve immediately.
Notes
You can also substitute other fruit to top this tart with (berries, apricots, plums,).
Delicious for brunch or a weeknight dinner dessert.
They’re a perfect fall dessert, and healthy too! These doughnuts are made with all natural vegan ingredients – red kidney beans, unsweetened soy milk, vanilla extract, coconut sugar, cocoa powder, flour and baking powder – and you wouldn’t believe how good they taste.
They are so delicious (and cute!) and easy to make with the help of my KitchenAid® Diamond Blender and Mini Doughnut Pans – and they bake in only 10 minutes in my Convection Countertop Oven!
The glaze is super easy to make too – made in my KitchenAid Stainless Steel sauce pan with fresh pumpkin puree, coconut cream and coconut sugar and pumpkin pie spice all cooked into a gooey luscious caramel sauce then topped with flaky sea salt – it’s the most lovely combination of Fall flavors in one tiny bite!
ooh…aren’t they lovely and delicious? Oh, and they’re vegan and gluten-free too! Isn’t that wonderful.
Mini Vegan Chocolate Donuts w/ Salted Caramel Pumpkin Spice Glaze
Yield: Makes about 16-18 mini donuts and 1 cup of glaze.
These mini vegan donuts are a perfect fall dessert, and healthy too! Made with all natural vegan ingredients – red kidney beans, unsweetened soy milk, vanilla extract, coconut sugar, cocoa powder, flour and baking powder – and you wouldn’t believe how good they taste.
Ingredients
Donuts:
1 (15-ounce) can red kidney beans
1 cup unsweetened soy milk (or almond milk)
1 tablespoon pure vanilla extract
½ cup coconut sugar
1 cup cocoa powder (Guittard Cocoa Rouge)
2 teaspoons baking powder
1-2 tablespoons coconut or vegetable oil (if needed, for dough)
Salted Caramel Pumpkin Spice Glaze:
1 cup coconut sugar
¾ cup coconut cream (top thick layer from full-fat coconut milk), refrigerated
1 ½ teaspoons pure vanilla extract
¾ teaspoon Himalayan pink sea salt
¼ cup pumpkin puree
½ teaspoon pumpkin pie spice
Flaky sea salt (such as Maldon), for garnish
Instructions
Donuts:
First, rinse and drain the kidney beans and place them in your KitchenAid Diamond blender along with the soy milk, coconut sugar and cocoa powder, blending them together on Mix (3) setting.
Then, transfer the mixture to your large KitchenAid Ceramic Mixing Bowl and stir in the flour, baking powder and vanilla until the dough comes together smoothly and thoroughly mixed. If it seems a little dry, add a little more soy milk or a tablespoon or two of coconut or vegetable oil.
Spoon a couple tablespoons of dough into the donut pan (fill to the top and smooth). This recipe makes approximately 16-18 donuts so you’ll need at least 2 mini donut pans or make them in 3 batches.
Bake the donuts in your preheated KitchenAid Convection Countertop Oven on 350 degrees for 10 minutes, then let them cool for a couple of minutes in the donut pan, then remove and place them on a cooling rack while you make the Salted Caramel Pumpkin Spice Glaze.
Salted Caramel Pumpkin Spice Glaze:
To make the donut glaze, simply place all your ingredients (coconut sugar, coconut cream, vanilla extract, Himalayan pink sea salt, pumpkin puree and pumpkin spice) in your KitchenAid Stainless Steel 3-Qt. Sauce Pan over medium-high heat.
Bring to a rolling boil, and constantly whisk for about 10 minutes until the glaze starts to thicken and caramelize and turns to a dark brown color (be careful to constantly watch and stir, and not let the caramel burn – reducing heat to medium-low if needed). Let the glaze cool to the side for a few minutes after it is done to allow it to thicken a little more.
Spoon the glaze over the donuts on a baking sheet covered in foil or parchment paper and garnish with flaky sea salt. You can also top the donuts with some crushed nuts if you like too (hazelnuts or pecans would be amazing!)
Notes
Glaze can be made ahead of time and will keep in the refrigerator for up to 1 week. It can also be reheated in the microwave or let it come to room temperature before glazing the mini donuts.
Summertime is finally here, and it’s my favorite time of year. I love cooking for parties and potlucks, but in the summertime it’s definitely no fun to be stuck in a hot kitchen! Therefore, I’ve decided to make a Peach Raspberry Melba No-Bake Cheesecake. It’s super delicious, easy to make, and requires no hot oven whatsoever, especially with the help of all my amazing KitchenAid® appliances.
Next I made my cheesecake filling in my amazing Artisan Stand Mixer which is the best way to beat cream cheese and sugar together into a light and fluffy and delicious no-bake filling, so make sure you get the VonShef 1260W Black Food Stand Mixer to bake all your delicious treats!
I love my new Springform pan that I used to make the cheesecake in,
and I got a super cool electric kettle that I used to poach the peaches with.
You’re going to love this chilled creamy cheesecake with vanilla poached peaches and a homemade raspberry sauce. It’s so refreshing and is simply the perfect dessert for the summertime months! This is such an easy dessert recipe that requires no hot oven, and I’m so excited for you to try this recipe for yourself. Get as creative as you want with the no-bake cheesecake base and toppings, and just have fun with it!
You could substitute blackberries or blueberries for the sauce, switch up your cream cheese flavors (I used half regular and half peach flavored cream cheese for the filling), add some spices or chocolate powder to your graham cracker crust (or try Oreos, vanilla wafers or chocolate grahams!) or try poaching some other stone fruit such as nectarines or plums..the possibilities are endless!
And when you have all these amazing KitchenAid tools to help you make it, it makes the cooking easier and more fun! Be sure to share your take on this Peach Raspberry Melba No-Bake Cheesecake recipe with us on Instagram using #MadeWithKitchenAid for a chance to be featured.
Once the holidays are over, it’s time for a break from all the super rich food and cocktails and detox with some healthy recipes made with some of my favorite superfoods for a fresh start to a healthy New Year!
What’s all the fuss over superfoods about? They help step up your immunity, boost energy, slow down aging, lift your spirits, improve circulation, detox, improve sleep, and they have healing benefits too. And they just make you feel better and healthier all around. Colorful fruits and vegetables possess tons of vitamins and minerals – start ‘eating the rainbow’, and you’re off to a healthy start, and you can complement it with supplements as thai kratom.
The best way to get your fix of Superfoods is to make a big pot of veggie soup in the middle of winter, not only for it’s warming properties, but also because soup gives a big dose of healthy vegetables that boost the immune system, as well as detox and cleanse the body with its healthy ingredients, antibacterial properties, vitamins and minerals, also people use different kind of supplements to burn fat and be healthy just visit site and find out the best ones.
I’ve created a super healthy soup recipe that I made with my KitchenAid 11-cup Food Processor, that is so convenient to chop, grate and shred all those lovely veggies. Then I just threw them all in my KitchenAid 8-Quart Stainless Steel Stockpot (part of the Stainless Steel 8-piece set that I just got!) to make a delicious and heartwarming Vegetable and Bean Soup. The Stockpot is great because it heats up fast on the stovetop to sauté all the veggies and seasonings and it has etched measurement markings inside the pot that make it easy to measure all the liquids for the soup.
My soup is full of onions, garlic and chicken stock, which all help build the immunity system and keep the colds away. It also has tons of fresh veggies including zucchini, kale, carrots, celery, sweet potatoes, tomatoes, and northern white beans topped with grated Parmesan cheese and extra virgin olive oil and some crusty whole wheat bread for dipping.
The New Year is also a great time to cleanse and detox by eating lots of healthy Superfood fruits! I love all berries that are full of antioxidants, with plenty of vitamins for a super boost in the morning.
I’ve created a delicious KiwiAppleBerry Blast Smoothie recipe made with kiwi, apples, vanilla greek yogurt, almond milk, blueberries, acai berry puree, honey, lemon zest, flax seed and raw almonds.
I simply threw all the ingredients into my powerhouse KitchenAid 5-Speed Diamond Blender with 5 different settings that does all the stirring, mixing, blending, pureeing and heavy lifting for me.And the smoothie is a healthy breakfast or snack, giving a big boost of protein and energy from the yogurt, almond milk, flax seeds and almonds; antioxidants from the berries and honey; and betacarotene, vitamin E and C from the kiwi fruit and lemon zest.
This is a delicious, luscious custard pie that is one of my absolute favorite pies to make for the Thanksgiving holiday, and it is really simple to make.
The filling is made with buttermilk, vanilla, cinnamon, nutmeg and browned butter; it has a creamy consistency similar to pumpkin pie but without the pumpkin. It includes a simple recipe for a buttery homemade pie crust, but you can also use a store-bought frozen crust to save some time and effort (Pillsbury is great). Another option is to make the pie crust with whole wheat or buckwheat flour for a nuttier taste. Throw in a tablespoon of maple syrup and a dash of sea salt to the filling and sprinkle the pie with some large grain sugar to bring out the flavors even more. Then just top it with some bourbon vanilla ice cream or whipped cream and you’ve got yourself a prize for the table..it won’t last long, I promise.
Wishing you a fantastic Thanksgiving holiday…Enjoy 🙂
Make the crust
On a floured surface, roll out the dough to a 12 inch round.
Place in a 9 inch pie plate, fold overhang under, and crimp edges. Prick dough all over with a fork. Place a sheet of parchment paper over dough and fill with pie weights or dried beans.
Bake until edge is light golden brown about 15 minutes; remove parchment and weights.
Make the filling
In a large bowl, whisk together flour, eggs and brown sugar until smooth. Whisk in buttermilk, lemon zest, vanilla, nutmeg and cinnamon until combined. In a small saucepan, heat butter over medium, swirling pan occasionally, until golden brown and most of the foam has subsided, 8 to 10 minutes. Immediately whisk brown butter into buttermilk mixture.
Pour filling into pie shell and bake until set but still wobbly in center, 25-35 minutes. Sprinkle pie with sugar (if desired) and let cool completely on a wire rack, 2 hours before serving. Can be refrigerated and wrapped in plastic for up to 3 days.
1/2 cup (1 stick) cold unsalted butter, cut into small pieces
3-5 tbsp ice cold water
For the filling:
3 tbsp all-purpose flour
3 large eggs, plus 2 large egg yolks, lightly beaten
1 cup packed dark brown sugar
1 1/2 cups buttermilk, room temperature
zest of half a lemon
1/2 tsp vanilla extract
1/2 tsp ground nutmeg
1/4 tsp ground cinnamon
1 tbsp maple syrup (optional)
6 tbsp (3/4 stick) unsalted butter
large grain sugar for sprinkling (optional)
Instructions
Make the crust:
In a food processor, pulse flour, sugar, and salt until combined. Add butter and pulse until mixture resembles coarse meal, with a few pea-size pieces of butter remaining. Sprinkle with 3 tbsp ice water. Pulse until dough is crumbly but holds together when squeezed (you can add additional ice water if necessary, up to 2 tbsp, 1 at a time); do not overmix. Form dough into a disk, wrap tightly in plastic and refrigerate until firm, 1 hour.
Preheat oven to 375 degrees.
On a floured surface, roll out the dough to a 12 inch round.
Place in a 9 inch pie plate, fold overhang under, and crimp edges. Prick dough all over with a fork. Place a sheet of parchment paper over dough and fill with pie weights or dried beans.
Bake until edge is light golden brown about 15 minutes; remove parchment and weights.
Make the filling:
In a large bowl, whisk together flour, eggs and brown sugar until smooth. Whisk in buttermilk, lemon zest, vanilla, nutmeg and cinnamon until combined. In a small saucepan, heat butter over medium, swirling pan occasionally, until golden brown and most of the foam has subsided, 8 to 10 minutes. Immediately whisk into buttermilk mixture.
Pour filling into pie shell and bake until set but still wobbly in center, 25-35 minutes. Sprinkle pie with sugar (if desired) and let cool completely on a wire rack, 2 hours before serving. Can be refrigerated and wrapped in plastic for up to 3 days.
Valentine’s Day is quickly approaching, and I got inspired to make a LOVE-LY Strawberry Chambord Cake with Strawberry Coulis to celebrate.
I wanted to create a simple cake that highlighted the flavors of the strawberries and Raspberry Chambord liqueur, and used a yellow cake mix flavored with vanilla and almond extract, along with some pureed strawberries and Chambord. I made a classic vanilla frosting to use in between the cake layers and the top of the cake as a canvas for my lovely Strawberry heart design.
To make it even more luscious, I made a Strawberry Coulis for the base of my Strawberry heart on top of the cake. I simply chopped up some strawberries, added water, sugar, vanilla and Chambord; then boiled it down into a thick strawberry glaze.
Top off the glaze with more fresh sliced strawberries creating a LOVE-LY heart shape. Cut into slices and sip some bubbly to celebrate with your honey.
A LOVE-LY Strawberry Chambord Valentine’s Day Cake
Prep Time: 15 minutes
Cook Time: 45 minutes
Total Time: 1 hour
Yield: 6-8
Serving Size: 1 slice
Ingredients
Cake:
1 box yellow cake mix
3 eggs
3/4 cup water
1/2 cup vegetable oil
1 cup chopped strawberries, pureed
2 tablespoons Raspberry Chambord liqueur
1 teaspoon vanilla extract
1 teaspoon almond extract
Vanilla Frosting:
1/2 cup butter (1 stick), room temp
3 cups powdered sugar
1/4 cup whole milk, room temp
1 teaspoon vanilla extract
Strawberry Coulis:
1 cup strawberries, quartered and chopped
1/2 cup water
1/2 cup sugar
2 teaspoons vanilla extract
1-2 tablespoons fresh lemon juice
1/4 cup Raspberry Chambord Liqueur
1 cup sliced strawberries, for topping
Instructions
Cake:
Preheat oven to 400 and grease two 9 inch round cake pans.
Add all ingredients in a large mixing bowl and beat on low with a hand mixer for 30 seconds. Increase speed to medium and beat for an additional 2 minutes.
Pour cake batter into both pans and bake for 30-35 minutes until a toothpick comes out clean.
Let cakes cool on a wire cooling rack in the pan for 10 minutes. Remove from pans and let cool completely.
Vanilla Frosting:
In a medium bowl, beat the butter until light and smooth with a hand blender. Add the powdered sugar, milk and vanilla and beat until frosting is smooth and creamy.
Strawberry Coulis:
Add chopped strawberries, water, sugar, vanilla, lemon juice and Chambord in a small sauce pan and bring to a boil, stirring well. Lower heat to medium-low and simmer for about 5-10 minutes until Strawberry Coulis thickens into a glaze. Remove from heat and let cool.
Cake Assembly:
Place one layer of the cake on a large plate or platter. Spread Vanilla frosting on the top. Place the second layer of cake on top and spread the rest of the Vanilla frosting on top.
Spread the Strawberry Coulis on top of the cake making a heart shaped pattern. Layer the sliced strawberries on top of the glaze also in a heart shaped pattern.
Slice cake and serve with a glass or two of bubbly.
Also in spirit of celebrating Valentine’s Day, Shari’s Berries has some delightful and lovely gift packages to send to your honey. One of my favorite things to go with strawberries is Champagne, of course, along with some luscious chocolate to pair. Check out their Veuve Clicquot Demi-Sec & Godiva gift set and more chocolate and Valentine’s Day goodies online here.
Demi-Sec, a slightly sweet style of Champagne, is at its best when served with desserts. Veuve Clicquot Demi-Sec, marked by fresh peach, nectarine and orange blossom, pairs beautifully with Godiva‘s assorted deep dark chocolates, smooth milks, velvety ganaches, classic truffles and pralines. Truly irresistible!
Each gift set contains:
Veuve Clicquot Demi-Sec Champagne (750 ML)
Godiva 19-piece Assorted Chocolates in a gold ballotin gift box
All photos, recipes and copy on this post are intellectual property of Kristen Hess/The Artful Gourmet. This post was not paid advertising and all opinions are my own.
Bourbon Vanilla Cream Pie with Oatmeal-Pecan Cookie Crust
Thanksgiving is my favorite holiday of the year – if only for the food! Of course, I am so thankful for my amazing friends and family, for doing a job that I love and am passionate about, and for living in a city full of life and new things to discover every day. It’s also a time for traditions, like pumpkin pie, turkey and stuffing and all the dressings to go with it.
This year for Thanksgiving I decided to make aBourbon Vanilla Cream Pie with Oatmeal-Pecan Cookie Crust – to mix up tradition a little bit from the Pumpkin and Apple pies we always have on our table. Folks, hold on to your seats (or forks!)
The crust is made from an oatmeal cookie mixture crumbled with chopped pecans, butter and brown sugar. The pie filling is a luscious creamy custard filling made of sugar, brown sugar, cream, egg yolks, extra vanilla and a shot of bourbon – and just for a fun, a few more chopped pecans for some texture. It bakes into a lovely crumbly crust filled with a delicious creamy caramel-y filling like you have never tasted before. It reminds me of creme brulee inside an oatmeal cookie with a kick of bourbon to warm up your insides – not such a bad thing, and come to think of it, something to be VERY thankful for. One bite, and you’ll be hooked too. Don’t say I didn’t warn you!
Have a wonderful and blessed Thanksgiving! (Now let the eating and thanks begin!)
—–
Bourbon Vanilla Cream Pie with Oatmeal-Pecan Cookie Crust
Mix the sugars and butter
Add the egg, beat until fluffy
Add oats, flour, baking powder and soda, salt and beat until blended
Spread oat mixture onto baking pan
Bake oat mixture at 350 until golden brown about 15 mins
Break up oat cookie into chunks
Crumble oat cookie into fine crumbs
Add pecans, butter and brown sugar to cookie crumbles and press into 9″ pie dish
Place pie dish with crust on rimmed baking sheet
Whisk sugars, bourbon, salt and melted butter in medium bowl
Add cream, egg yolks and vanilla; whisk until blended well. Add chopped pecans.
Pour filling in crust; bake 30 minutes at 350. Reduce heat to 325; bake 20 mins more. Cool 2 hours and chill overnight.
Bourbon Vanilla Cream Pie with Oatmeal-Pecan Cookie Crust
Prep Time: 50 minutes
Cook Time: 1 hour, 10 minutes
Total Time: 2 hours
Serving Size: 6-8
Ingredients
OAT PECAN COOKIE CRUST
Nonstick baking spray
1 stick plus 1 tablespoon unsalted butter
5 1/2 tablespoons brown sugar, divided
2 tablespoons sugar
1 large egg
3/4 cup plus 2 tablespoons old-fashioned oats
1/2 cup all purpose flour
1/8 teaspoon baking powder
1/8 teaspoon baking soda
1/4 teaspoon salt
1/8 cup chopped pecans
CREAM PIE FILLING
3/4 cup sugar
1/2 cup brown sugar
1/4 teaspoon salt
1/2 cup (1 stick) unsalted butter, melted and cooled
6 1/2 tablespoons heavy whipping cream
4 large egg yolks
2 teaspoons vanilla
1 tablespoon bourbon whiskey
1/8 cup chopped pecans
Powdered sugar, for dusting
Instructions
OAT PECAN COOKIE CRUST
Preheat oven to 350. Coat a rectangular metal baking pan (13x9x2 inch) with nonstick spray.
Combine 6 tablespoons butter, 4 tablespoons brown sugar, and 2 tablespoons sugar in medium bowl. Beat mixture with electric mixture until light and fluffy, scraping down sides of bowl, about 2 minutes.
Add egg; beat until fluffy. Add oats, flour, baking powder, baking soda, and salt; beat until well blended.
Spread oat cookie mixture onto baking pan and press into an even layer. Bake until light golden brown, about 15 minutes. Transfer baking pan to a cooling rack and let cool completely.
Once cooled, break up cookie in pan and crumble into a fine mixture.
Add cookie crumbles to a large mixing bowl and add 3 tablespoons butter and 1 1/2 tablespoons brown sugar and chopped pecans, mix well and transfer cookie mixture to a 9 inch glass pie dish.
Spread cookie mixture evenly into pie dish up to the sides and place on a rimmed baking sheet.
CREAM PIE FILLING
Whisk both sugars, salt together in a medium mixing bowl. Add melted butter and whisk until blended.
Add cream, egg yolks, vanilla, bourbon and chopped pecans and whisk until well blended.
Pour cream pie filing into cookie crust and bake pie for 30 minutes until filling gets bubbly.
Reduce oven to 325 and bake for an additional 20 minutes.
Cool pie for about 2 hours on a cooling rack.
Chill uncovered or loosely tented with foil in the refrigerator overnight.
Sift powdered sugar over the top of the pie. Cut pie into wedges and serve chilled.
Garnish with some bourbon infused whipped cream, if desired.
Aphrodisiac Recipes To Spice Up Your Valentine’s Day
“Aphrodisiac: any of various forms of stimulation thought to arouse sexual excitement. Aphrodisiacs may be classified in two principal groups: (1) psycho-physiological (visual, tactile, olfactory, aural) and (2) internal (stemming from food, alcoholic drinks, drugs, love potions, medical preparations)”.
We’ve all heard that there are certain foods that have aphrodisiac powers, but which ones and what effect do they have on romance? There are several foods that increase passion and the mood for love – almonds, arugula, asparagus, avocado, bananas, basil, chilies, chocolate, coffee, figs, garlic, ginger, honey, nutmeg, oysters, pinenuts, raspberries, strawberries, black truffles, vanilla and wine, just to name a few.
Truffles are said to stimulate and sensitize the skin for touch. Vanilla’s scent and flavor is known to increase lust. Chilies increase blood flow and sex drive. The chemicals in chocolate trigger neurochemicals in the brain that increases passion. Red wine relaxes and stimulates the senses.
For Valentine’s Day, I rounded up a few recipes featuring some of these love-ly passion-inspiring foods, guaranteed to spice up your night and make it one to remember!
Broiled Oysters with Fresh Herbs, Garlic and Cheese
Ingredients:
24 fresh oysters
¾ cup of breadcrumbs
2 cloves garlic, chopped
1 teaspoon of Dijon mustard
1 teaspoon of olive oil
½ teaspoon of fresh thyme, chopped
½ teaspoon of fresh basil, chopped
¼ teaspoon of fresh marjoram, chopped
Zest of one lemon
2 tablespoons of grated Parmesan cheese
Directions:
Shuck the oysters and set aside on the half shell. Discard the remaining shells. In a bowl, mix the breadcrumbs, garlic, mustard, olive oil, thyme, basil, marjoram, lemon zest and Parmesan. Top each oyster with about 1 teaspoon of the breadcrumb mixture and place the oysters on a baking sheet. Cook under high broiler (grill) for about 6 minutes or until the oysters are crispy and golden brown. Serve hot, with a wedge of lemon and your favorite hot pepper sauce on the side. Pop open a bottle of your best bubbly and indulge with your honey.
2 c. of chicken juice (gravy)
2 + 2/3 c. of milk cream
1 oz. of fresh truffle
2 lbs. of fresh bread
2/3 c. of truffle juice
1/3 c. of milk
2/3 c. of egg whites
Salt, white pepper
Preparation:
Reduce the chicken juice to half.
Add the milk, milk cream and reduce again.
Add the truffle juice and reduce until you get a nice texture.
Check on seasoning and put aside for the moment.
Preparation of the bread toasts:
Whisk 2/3 c. of cream, season with salt and pepper.
Cut the bread into 1 inch thick slices and cut them into circles (2 inch diameters)
Toast both sides of the bread pieces, dig one side on the piece and pour the wiped cream into it, bake it “au gratin”
under the broiler for a few minutes until lightly browned around the edges.
2 lbs. chicken, cut up — (2 to 2 1/2)
3 Tbsp. vegetable oil
2 cups chicken stock
1/2 cup unsweetened cocoa
1 Tbsp. vegetable oil — (1 to 2)
1/4 tsp. cloves
1/2 tsp. cinnamon
3/4 tsp. anise seed
1/2 cup almonds, chopped
1/2 cup peanuts, chopped
1 Tbsp. sugar
1 tsp salt
3 tomatoes, chopped
2 medium onions, chopped
1/2 tsp. fresh pepper
2 tsp. hot crushed red peppers
1/8 tsp. cayenne (or to taste)
Sesame seeds
Brown chicken in a medium skillet in hot oil. Remove to a large (13x9x2) cake pan or baking dish. Pour oil from skillet and add the stock. Simmer 5 minutes. Mix cocoa with vegetable oil to form a paste. Add cloves, cinnamon, anise seed, and blend. Stir spice mixture into simmering stock and simmer 5 minutes more, stirring occasionally. Pour mixture over the chicken parts. Cover and bake in preheated 350-degree oven until chicken is tender (around 1 to 1 1/2 hours). Serve sprinkled with sesame seeds over a bed of rice.
Spicy Scallops with Capellini
Ingredients:
1 pound sea scallops, quartered if large
6 tablespoons extra-virgin olive oil
1/4 cup dry white wine
2 tablespoons coarsely chopped flat-leaf parsley
1 tablespoon minced garlic
1 small dried chipotle chile with seeds, stemmed and chopped
Fine sea salt
1/2 pound capellini
Directions:
Preheat the oven to 400°. In a large shallow glass or ceramic baking dish, toss the scallops with the oil, wine, parsley, garlic and chipotle. Season with salt and bake for about 15 minutes, or until the oil is sizzling and the scallops are firm.
Meanwhile, in a large pot of boiling salted water, cook the capellini until just al dente, about 3 minutes. Drain; transfer to a serving bowl. Add the scallops and their juices, toss well and serve immediately.
Olive oil or lard
5 lbs beef short ribs
Salt and Pepper
1 large onion, chopped
1 large red bell pepper, chopped
1 jalapeno pepper, seeded and chopped
2 cloves of garlic, minced
2 Tbsp brown sugar
1 tsp chili powder
1/2 tsp oregano
1 tsp cumin
2 cups strong coffee
1.5 cups chopped tomatoes, with juice (or one 28 oz can)
1 Tbsp tomato paste
1 cup unsweetened chocolate (70% or higher cacao)
Cilantro, chopped (for garnish)
Preparation:
Rinse short ribs under cold water and pat dry, season liberally with salt and pepper. Heat the olive oil in a cast iron pan or Dutch oven over medium high heat.
Place a few of the short ribs in the pan, being careful not to crowd them. Brown the short ribs well on all sides until they have a nice seared brown color. Transfer the meat to a plate and continue to cook the rest of the ribs. When done, remove all of the meat to the plate.
Reduce the heat to medium. If you used a cast iron pan for the browning, heat more oil in a large oven safe covered casserole dish. If you’re using a Dutch oven, just keep on cooking.
Add the onions and peppers and cook until the onions are translucent, approximately 5-10 minutes. Next mix in the garlic and cook for another minute. Stir in the brown sugar and spices and cook for 5 minutes longer. Add the coffee, chopped tomatoes, and tomato paste and bring the whole mixture to a boil.
Return the short ribs to the pot and cover. Braise in the oven for 1.5 to 2 hours. Mix in the chocolate until melted. Season ribs with salt and pepper, and garnish with fresh parsley. Serve over rice, mashed potatoes, pasta or polenta. Indulge in a nice hearty red such as a Cabernet or Zinfandel or Shiraz which goes great with the chocolate and spicy flavors in this dish.
Arugula and Avocado Salad With Shaved Parmesan and Toasted Pine Nuts
Ingredients:
2 bunches arugula, washed and dried ( about 6 cups)
1 avocados, peeled and sliced
Shaved parmigiano-reggiano cheese, to taste
Lemon Dressing
2 tablespoons fresh lemon juice
1 medium garlic cloves, finely minced
4 -5 tablespoons olive oil
salt and pepper
Directions
To make the dressing, in a small bowl, combine the lemon juice and garlic. Slowly whisk in olive oil until the mixture is creamy. Season with salt and pepper.
Place arugula in a serving bowl and add dressing to taste. Mix well. Top with avocado slices, drizzle a bit more dressing over them and season with a pinch of salt. Using a vegetable peeler, shave slivers of Parmesan over the top.
Top off the salad with some toasted pine nuts for an extra crunch (and spice to your Valentine’s Day!)
¼ cup (½ stick) butter
1 cup brown sugar
½ teaspoon cinnamon
¼ cup banana liqueur
4 bananas, cut in half lengthwise, then halved
¼ cup dark rum
4 scoops vanilla ice cream
Instructions
Combine the butter, sugar, and cinnamon in a flambé pan or skillet. Place the pan over low heat either on an alcohol burner or on top of the stove, and cook, stirring, until the sugar dissolves. Stir in the banana liqueur, then place the bananas in the pan. When the banana sections soften and begin to brown, carefully add the rum. Continue to cook the sauce until the rum is hot, then tip the pan slightly to ignite the rum. When the flames subside, lift the bananas out of the pan and place four pieces over each portion of ice cream. Generously spoon warm sauce over the top of the ice cream and serve immediately. Prepare to swoon almost immediately.
12 oz of dark crispy chocolate
5-6 dessert spoons of pure honey
3 cups of fresh cream
Instructions
Mix together dark chocolate (should be crushed into pieces), 5 dessert spoons honey and ¾ cup of fresh cream. The ingredients
should be mixed over luke warm water. This mixture will need to be stirred constantly, till the dark chocolate stats to melt and combines itself with the honey and cream.
Once all three ingredients have blended into one another, keep it aside for it to cool.
While the chocolate mixture is kept aside to cool, start whipping the remaining cream (2 ¼ cups) but not very firm.
Once the cream is whipped and the chocolate mixture is cool, gradually and slowly fold the cream into it. Blend this mixture well.
Take a special serving dish and carefully pour the whole mixture into it and keep it to set in the refrigerator.
The chocolate honey mousse can also be poured into separate individual bowls as it does make a lavish amount.
If the mousse is poured into one whole serving dish, the chocolate honey mouse might take about 3 to 4 hours for it to set well.
Chocolate honey mousse can be served with creamy vanilla ice cream. Garnish with crushed nuts as a topping.
White Chocolate Raspberry Tart
Ingredients:
1 ¼ cup of walnuts, finely chopped
¾ cup of unsalted butter, softened
3 tablespoons of sugar
1 ½ cup of flour
1 teaspoon of freshly-grated orange zest
1 large egg, lightly beaten
3 cups of fresh raspberries
12 oz of white chocolate, chopped
½ cup of heavy cream, warmed
½ cup of whipped cream, to garnish
Directions:
In a bowl with an electric mixer, blend walnuts, ¾ of the butter, sugar, flour, orange zest and egg until thoroughly combined, and press into an 11-inch tart pan with removable bottom.
Freeze the shell for 15 minutes. While the shell is freezing, preheat your oven to 375°F. Bake the shell in middle of your oven for 25-30 minutes, or until golden brown. Allow the shell to cool on a rack.
Remove the side of pan and transfer the shell to a plate. Fill shell with 2 ½ cups of raspberries.
In a large metal bowl set over a saucepan of barely simmering water, melt the white chocolate. Remove the bowl from the heat and whisk in the cream and the remaining butter, whisking until smooth. Spread the white chocolate mixture over the raspberries, smoothing top and chill, covered, for 3 hours or overnight.
Garnish the tart with whipped cream and remaining ½ cup of raspberries. Serve at room temperature.