Valentine’s Day is quickly approaching, and I got inspired to make a LOVE-LY Strawberry Chambord Cake with Strawberry Coulis to celebrate.
I wanted to create a simple cake that highlighted the flavors of the strawberries and Raspberry Chambord liqueur, and used a yellow cake mix flavored with vanilla and almond extract, along with some pureed strawberries and Chambord. I made a classic vanilla frosting to use in between the cake layers and the top of the cake as a canvas for my lovely Strawberry heart design.
To make it even more luscious, I made a Strawberry Coulis for the base of my Strawberry heart on top of the cake. I simply chopped up some strawberries, added water, sugar, vanilla and Chambord; then boiled it down into a thick strawberry glaze.
Top off the glaze with more fresh sliced strawberries creating a LOVE-LY heart shape. Cut into slices and sip some bubbly to celebrate with your honey.
A LOVE-LY Strawberry Chambord Valentine’s Day Cake
Prep Time: 15 minutes
Cook Time: 45 minutes
Total Time: 1 hour
Yield: 6-8
Serving Size: 1 slice
Ingredients
Cake:
1 box yellow cake mix
3 eggs
3/4 cup water
1/2 cup vegetable oil
1 cup chopped strawberries, pureed
2 tablespoons Raspberry Chambord liqueur
1 teaspoon vanilla extract
1 teaspoon almond extract
Vanilla Frosting:
1/2 cup butter (1 stick), room temp
3 cups powdered sugar
1/4 cup whole milk, room temp
1 teaspoon vanilla extract
Strawberry Coulis:
1 cup strawberries, quartered and chopped
1/2 cup water
1/2 cup sugar
2 teaspoons vanilla extract
1-2 tablespoons fresh lemon juice
1/4 cup Raspberry Chambord Liqueur
1 cup sliced strawberries, for topping
Instructions
Cake:
Preheat oven to 400 and grease two 9 inch round cake pans.
Add all ingredients in a large mixing bowl and beat on low with a hand mixer for 30 seconds. Increase speed to medium and beat for an additional 2 minutes.
Pour cake batter into both pans and bake for 30-35 minutes until a toothpick comes out clean.
Let cakes cool on a wire cooling rack in the pan for 10 minutes. Remove from pans and let cool completely.
Vanilla Frosting:
In a medium bowl, beat the butter until light and smooth with a hand blender. Add the powdered sugar, milk and vanilla and beat until frosting is smooth and creamy.
Strawberry Coulis:
Add chopped strawberries, water, sugar, vanilla, lemon juice and Chambord in a small sauce pan and bring to a boil, stirring well. Lower heat to medium-low and simmer for about 5-10 minutes until Strawberry Coulis thickens into a glaze. Remove from heat and let cool.
Cake Assembly:
Place one layer of the cake on a large plate or platter. Spread Vanilla frosting on the top. Place the second layer of cake on top and spread the rest of the Vanilla frosting on top.
Spread the Strawberry Coulis on top of the cake making a heart shaped pattern. Layer the sliced strawberries on top of the glaze also in a heart shaped pattern.
Slice cake and serve with a glass or two of bubbly.
Also in spirit of celebrating Valentine’s Day, Shari’s Berries has some delightful and lovely gift packages to send to your honey. One of my favorite things to go with strawberries is Champagne, of course, along with some luscious chocolate to pair. Check out their Veuve Clicquot Demi-Sec & Godiva gift set and more chocolate and Valentine’s Day goodies online here.
Demi-Sec, a slightly sweet style of Champagne, is at its best when served with desserts. Veuve Clicquot Demi-Sec, marked by fresh peach, nectarine and orange blossom, pairs beautifully with Godiva‘s assorted deep dark chocolates, smooth milks, velvety ganaches, classic truffles and pralines. Truly irresistible!
Each gift set contains:
Veuve Clicquot Demi-Sec Champagne (750 ML)
Godiva 19-piece Assorted Chocolates in a gold ballotin gift box
All photos, recipes and copy on this post are intellectual property of Kristen Hess/The Artful Gourmet. This post was not paid advertising and all opinions are my own.
It’s that time of year again to start planning menus and recipes for the holidays. But instead of just serving traditional turkey or ham, mashed potatoes and green bean casserole, why not mix it up a little bit and serve your holiday meal with an international flair? I had the opportunity to go behind the scenes and interview several Top Chefs and restaurants in NYC to get some creative ideas for non-traditional holiday menus for the holidays. Whether it have a Spanish, French, Asian, Jewish or Italian twist; here are some great international menu ideas and recipes for a fabulous holiday meal with family and friends that break the norm.
Spanish Holiday Menu – Alex Raij, Executive Chef at Txikito NYC
Executive Chef Alex Raij from the Spanish restaurant Txikito in NYC always makes a classic, festive dish for the holidays. This Canelones de Bakalao Recipe (Salted Cod Fish Canneloni with Crème Fraiche) feeds a crowd and references Basque, Catalan and Argentine family holiday traditions that Chef Raij grew up with in Spain. Serve with other traditional Spanish hot and cold tapas such as: Pikillos: roasted Navarran sweet peppers with ajoarriero; Kroketas: crispy creamy croquettes; Boquerón: marinated white anchovy with eggplant and piquillo; Cogollos: butter lettuce, Basque anchovy, and Bonito del Norte and Tutera: gratin of artichoke, Roncal, Jamón.
Canelones de Bakalao
Photo Credit: Kristen Hess
Canelones de Bakalao Recipe (Salted Cod Fish Canneloni with Crème Fraiche)
Executive Chef Alex Raij, Txikito
Serves 6
1 9×9 inch baking dish, preferably earthenware
12 – 4 inch square pieces fresh pasta sheets boiled and shocked in ice water (The Chef recommends cooking longer sheets and then cutting them after they are cooled in ice bath so they are more uniform)
Filling and topping
2.5 pounds cod
2 tablespoons Kosher salt, plus more for seasoning
2 cups olive oil
1.5 cup tomato pulp pref. pomi brand
2 cups Creme fraiche
2 tablespoons finely chopped chives
50 grams hackleback or other high quality caviar
Preheat oven to 375 degrees.
Salt the cod with the 2 T. kosher salt and let stand 10 minutes.
Rinse and pat dry.
Place the cod in a small pot and cover with olive oil.
Place on medium low heat and poach the cod in the oil until it flakes when prodded
Remove the fish to a mixing bowl to cool.
Pour 1/2 cup of the poaching oil over the cooling cod to cool with it.
Heat remaining oil add the tomato fry the tomato until cooked and a little sweet, season with salt.
Pour the tomato oil mix I the bottom of the baking dish.
Break up the cooled cod and flake it with clean hands.
Whip it up with the oil with a spatula or wooden spoon.
Place 6 pasta sheets side by side and place 1/12 of the filling at the end of each sheet.
Roll away from you and place on the tomato.
Repeat with the rest of the filling and next 6 sheets.
Season the crème fraiche with salt and pour over the caneloni.
Bake at 375 until bubbly.
Sprinkle with chives and top with caviar just before serving.
Serve 2 pieces per person.
Printed with permission of Alex Raij. All rights reserved.
—–
French Holiday Menu – Olivier Quignon, Executive Chef at Bar Boulud
Even as Chef Olivier Quignon of Bar Boulud prepares to celebrate his seventh Christmas in NYC, he hasn’t lost touch with the French holiday traditions of his hometown, the Northern French town of Beauvais. Christmas in the Quignon household, and in the restaurant he helms on behalf of renowned French Chef Daniel Boulud, Bar Boulud, is traditional to a tee, lasting up to six hours and spanning just as many courses. What does a typical French holiday meal entail?
Oysters “Always oysters. We shuck them at lunch and the eating begins.”
Cured or Smoked Fish
Foie Gras “This can be hot, seared, or served as a terrine.”
Hot Fish or Pasta
Poultry
Beef or Game
Cheese “ALWAYS cheese. French people eat cheese at practically every meal. We may sometimes skip dessert, but we never skip cheese.”
Pastry “At Christmas this is often a Bûche de Noel. But my wife is a pastry chef, so there are usually many desserts.”
Tournedos Rossini with Truffles and Foie Gras
Photo Credit: Kristen Hess
Traditionally, Tournedos Rossini is a French steak dish, purportedly created for the composer Gioachino Rossini by French master chef Marie-Antoine Carême. The dish comprises a tournedos (beef tenderloin) pan-fried in butter, served on a crouton, and topped with a hot slice of fresh whole foie gras briefly pan-fried at the last minute. A few slices of black truffle and Madeira demi-glace sauce garnish the dish.
At Bar Boulud New York, ‘Rossini’ is a dish that makes an appearance on the menu every holiday season, and on the tables at many French holiday meals. It is rich in ingredients and flavors, hearty, and the perfect celebration dish. There are several way to prepare Rossini, but Bar Boulud sticks to the traditional preparation—seared beef tenderloin atop a brioche toast, topped with seared foie gras and Madeira-beef jus, served with Pommes Macaire dotted with a celery root puree.
Tournedos Rossini with Truffles and Foie Gras and Pommes Macaire
Executive Chef Olivier Quignon, Bar Boulud
Serves 4
Pommes Macaire
Kosher salt, as needed
4 yellow gold potatoes
Salt and freshly ground white pepper
Black truffle butter or oil
2 egg yolks
Canola oil for frying
½ cup flour
Celery Root Puree
1 small (about 3/4 pound) celery root, peeled
Salt
1 tablespoon butter
1 cup milk
Freshly ground white pepper
To Finish
1 ½ lbs angus beef tenderloin, tied with butchers twine
12 ounces fresh grade A foie gras
6 tablespoons beef jus or demi glace
2 ounces Madeira
1 Tablespoon chopped shallot
4 ¼ thin slices of brioche, cut into 3 ½-inch circles, toasted
8 small light green celery leaves
1 small black winter truffle
For the Pomme Macaire
Preheat the oven to 350°F. Make a bed of salt on an aluminum foil-lined baking sheet and place potatoes on top. Bake potatoes for 45 minutes, or until tender.
Remove from the oven, and when cool enough to handle, cut potatoes in half and scoop the flesh into a bowl. Mash the potato with a fork, season to taste with salt, pepper, and truffle butter (or oil). Stir in the egg yolk to combine. Press mixture into a bread loaf pan and chill overnight.
Turn the potatoes onto a cutting board and cut into (at least 8) 3 x ½-inch batons. Lightly coat the batons in the flour and shake off excess.
Fill 1/3 of a saucepan with canola oil and heat to 350°F. When ready to serve, fry the potatoes in batches until golden brown. Strain onto a paper towel-lined tray, sprinkle with salt.
For the Celery Root Puree
Cut the celery root into medium dice. Place the butter in a medium saucepan over medium heat and cook until browned. Add the celery root, milk, and water to cover; bring to a simmer. Cook until tender, about 12 minutes. With a slotted spoon, transfer the celery root to a blender and puree with enough of the cooking liquid to make a smooth puree. Pass through a fine-meshed sieve into a bowl.
When ready to serve, transfer to a small saucepan and stir over medium heat to heat through.
To Finish
Slice the tenderloin into four portions and season on all sides with salt and pepper.
Cut the foie gras into four slices and season on all sides with salt and pepper.
Place a large sauté pan over high heat. Once very hot, sear the foie gras on both sides to brown, about 2 minutes on each side. Transfer to a platter, cover with foil and set aside.
Reduce the heat to medium and return the pan with the foie gras fat to the heat. Sear the beef on all sides, about 3-4 minutes each, basting the meat constantly with the fat. Brown the beef on all sides while basting the constantly with the fat in the pan, about 10 minutes, or until the internal temperature reaches 120°F for medium rare. Transfer the beef to the platter with the foie gras, cover, and rest in a warm place.
Add the shallots to the same pan over medium low heat, and cook, stirring until translucent. Add the Madeira and simmer to reduce by 2/3. Stir in the beef jus and adjust seasoning with salt and pepper if needed.
For each serving, place a brioche toast on a plate and top with a portion of beef. Top the beef with a piece of roasted foie gras, and shavings of black truffle. Place two pommes macaire next to the beef and top each with a spoonful of celery puree. Garnish puree with two celery leaves. Spoon the sauce from the pan around and serve.
—–
Asian Holiday Menu – Hung Huynh, Executive Chef at Catch Restaurant NYC
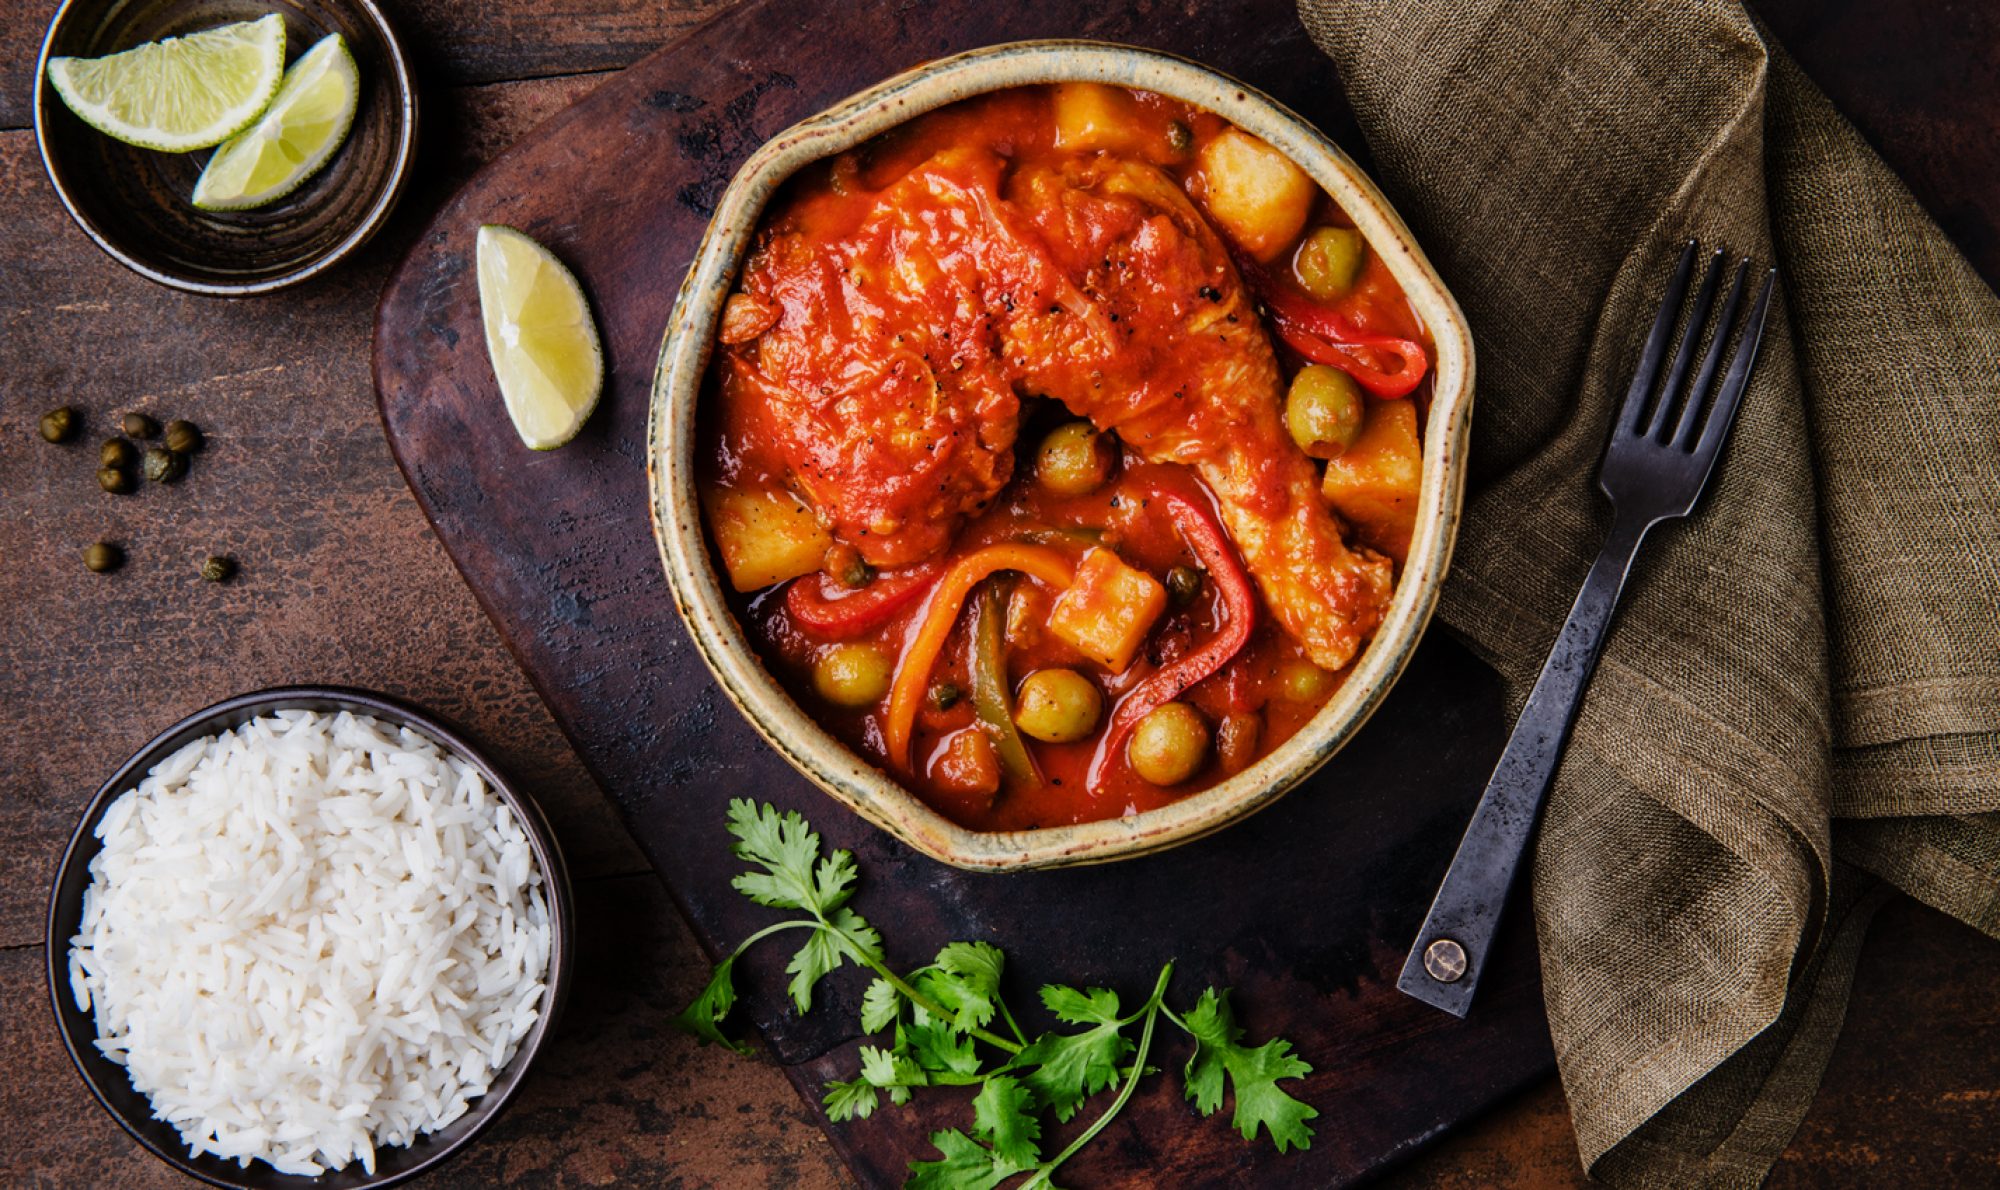
Whole Roasted Branzino is a favorite recipe of Chef Hung Huynh of Catch NYC for the holidays. It’s simple, delicious and easy to make and great for feeding a crowd. Chef Hung also recommends adding some miso, ginger, soy and lemongrass to the seasonings to amp up the Asian flavors in this beautiful seafood holiday dish. His Asian inspired holiday menu includes:
Roasted Whole Branzino
Sautéed Green beans with EVOO and Soy Sauce
White or Brown Steamed Rice
Miso Soup
Fresh fruit
Roasted Whole Branzino
Photo Credit: Kristen Hess
Roasted Whole Branzino
Executive Chef Hung Huynh
Serves 2-4 people
Ingredients:
1.5 to 2 pound Branzino
1 tablespoon of Aged Balsamic
Seasoning Rub:
1 tablespoon of salt
1 teaspoon of ground black pepper
1 teaspoon of picked chopped thyme
3 cloves of minced garlic
3 tablespoons of olive oil
Zest of one lemon
Zest of one lime
Directions:
Before cooking, the Branzino must be scaled, gutted and scored.
Combine all the seasoning rub ingredients.
Rub entire fish with seasoning including the cavity, distributing evenly.
Make sure that the entire fish is covered in the rub.
Take a half sheet pan and roast at 450 degrees for about 15 minutes.
Reserve the remaining olive oil in the sheet pan.
Place the fish on a platter and drizzle with the reserved olive oil and aged balsamic vinegar.
—–
Jewish Holiday Menu – Zach Kutsher, Proprietor, Kutsher’s Tribeca
Zach Kutsher, Chef and Owner of Kutsher’s Tribeca, always serves Latkes for the Hanukkah holiday. These crispy potato latkes are a traditional Jewish dish made of grated potatoes, onion, eggs and matzo meal, shaped into round potato pancakes and fried to a crispy golden brown. The traditional way to serve them is with a spoonful of sour cream, but Zach likes to also add ½ ounce of caviar (salmon roe, paddlefish caviar and wasabi flying fish roe) to the latkes to give them a special holiday touch. Some other fun ideas that Chef Zach does to dress up the latkes are to use some non-traditional savory toppings such as:
Peking Duck with Cucumber, Scallions and Sesame Hoisin
Wild Hen of the Woods Mushrooms and Herbed Ricotta
Gravlax and Dilled Creme Fraiche
Pastrami Reuben (pastrami, sauerkraut, emmentaler and thousand island dressing)
VLT – Veal Bacon, Lettuce and Tomato
To make it a complete Jewish holiday menu, serve the latkes with: Chopped Duck and Chicken Liver, Seasonal Pickles, Golden and Red Beet Salad with Lemon Ricotta, Arugula and Pecans, Turkey or Brisket with Challah Chestnut Stuffing, Cheesy Spaetzle Kugel, Brussels Sprouts and Pumpkin Shlishkas with Amaretto Matzo and Sage Brown Butter and Babka Sticky Buns for dessert.
Grate onion on the fine side of a cheese grater and then line a strainer with some paper towels and let drain in sink as dry as possible.
Mix egg, yolk, matzo meal, salt, lemon juice, and drained onion together, set aside.
Julienne the potatoes (cut into thin small matchsticks) or grate on the large side of cheese grater, and periodically put the potato in the egg mix to prevent browning. Do not wash potato after it is cut.
Mix all together, fry in schmaltz (rendered/clarified chicken or goose fat – or you can substitute canola oil)
Take one handful of mix, twisted in the palm of your hand like you would spaghetti on a fork, till golden brown and crispy, then flip.
Finish in oven if necessary.
Season with salt and pepper to taste.
—–
Italian Holiday Menu – Gabe Thompson, Executive Chef of Epicurean Group (dell’anima, L’Artusi, L’Apicio, and Anfora)
Grilled Pork Chop
Photo Credit: Epicurean Group
Chef Thompson, Executive Chef of the Epicurean Group in NYC loves creating special menus for the holidays. It is all about the food, flavors and family. His menu below puts his crave-able Italian twist on some fall favorites to make for a classic holiday menu!
Grilled Pork Chop — roasted vegetable and chestnut panzanella, pork sugo
Warm Cranberry-pumpkin Budino – served with apple cider sauce
—–
Roasted Acorn Squash Salad Recipe
Executive Chef Gabe Thompson, Epicurean Group
Serves 4-6
2 acorn squash (1 ½ pounds)
¼ cup extra virgin olive oil
Kosher salt
2 tablespoons butter
8 sage leaves
2 tablespoons maple syrup
Preheat oven to 350 degrees. Cut each squash into 8-9 wedges, each wedge about 1 inch thick. Remove and discard seeds. In a large bowl, toss the squash wedges together with 2 tablespoons olive oil and season generously with salt.
Meanwhile, heat a large sauté pan over medium-high heat. Add 1 tablespoon of olive oil, and 1 teaspoon of butter. As soon as the butter melts, add half of the squash to the pan, arranging the pieces so that they are cut-side down. Sprinkle half of the sage over the squash. Cook undisturbed until it is golden brown on one side, about 2-3 minutes. Turn each squash piece over and cook for another 2-3 minutes until golden brown on the other side. Remove squash from the pan and place on a half sheet tray or cookie sheet. Repeat this process with remaining olive oil, butter, squash and sage leaves.
Drizzle maple syrup over the squash segments. Place in the oven and bake until each piece of squash is easily pierced with a fork, about 25-30 minutes. Remove and set aside.
Whenever the holidays roll around, I love to bake and experiment with luscious pies and savory tarts. Puff pastry is such an easy way to make appetizers fit for a crowd, especially when you buy it pre-made from the grocery store. (I especially like Dufour brand which I get from Whole Foods and Fairway stores in NYC, it’s super flaky and buttery and light.) You simply roll them out on to a floured surface or a non-stick silicone baking mat (try Silpat), score the edges and prick a few holes in it and pre-bake it for about 15 minutes. Then, you can top it with any sweet or savory topping you like and bake it into a buttery, crispy delightful tart (or cut the pastry into smaller rounds with a biscuit cutter) to feed a crowd for brunch or a holiday appetizer.
I decided to top this one with some sauteed baby asparagus and garlic with red chile flakes along with three creamy melty cheeses: ricotta, gruyere and parmesan and a hint of lemon zest. All you gotta do is create your masterpiece, pop it in the oven and cut it into squares and you’ve got a crowd-pleaser waiting to happen and a party in your mouth. If you’re not a big asparagus fan, try experimenting with some other veggies: broccoli, mushrooms, brussels sprouts, butternut squash, spinach – whatever you fancy, and play with other cheeses, as long as they are good for melting such as Monterey Jack, Brie, Gorgonzola or Mozzarella. The ricotta base I wouldn’t substitute though – it gives it a creamy layer of flavor and texture that’s just too good to give up and protects the pastry base from getting soggy from the vegetables and cheese. Throw some cooked bacon, ham or prosciutto on it too if you really want to add some savory flavor. And if you want to go the extra mile and make your own pastry dough, go for it – but it takes a lot longer and a little more elbow grease to get it perfect. Happy Holidays!
Heat olive oil over medium heat and saute asparagus spears with the shallots for about 5-7 minutes until they get soft. Add minced garlic and red pepper flakes and saute for another 1-2 minutes. Remove pan from heat and set aside.
In a large mixing bowl, add ricotta, whisked egg, half of the Parmesan cheese, thyme, lemon zest, sea salt and pepper.
Roll out pastry sheet into a 16"x10" rectangle on to a Silpat (silicone baking mat) or parchment paper. Score around the edges 1 inch border and prick the base of the pastry with a fork in several places. Bake the pastry in oven for 15 minutes. Remove from oven and let cool for a few minutes before adding toppings.
Spread the ricotta and cheese mixture over the base of the puff pastry evenly. Top with sauteed asparagus, shallots and garlic, laying out asparagus spears in a flat row across the pastry.
Sprinkle over the top the shredded Gruyere cheese and the rest of the Parmesan cheese. Sprinkle additional fresh thyme if desired.
Place the tart (on the Silpat or parchment paper base) on a rectangle baking sheet into the oven and bake for 20-25 minutes until pastry is crisp and golden brown and the cheese on top is bubbly.
Remove from oven and let cool for about 5-10 minutes. Cut tart into squares and serve.
Notes
Delicious for a holiday brunch or appetizer (you can always cut tart into bite size pieces to feed a crowd).
Serve with a crisp white wine such as Pinot Grigio or Chenin Blanc.
Today is one of those dreary Fall days where it’s cold and rainy and I’m in need of a little pick me up from some classic comfort food. One that involves BACON. And CHEESE. And PASTA. And all those yummy yums that aren’t that good for you. I was looking through some of my family recipes and this one came up that looked perfect for the mood I’m in today. It’s a sinfully good baked Pierogi casserole that my family used to make around the holidays – I remember sitting around the table with my family devouring this tasty dish with absolutely no shame. It’s not fancy. It’s easy to make. Has layers of flavor from the crispy bacon, earthy mushrooms, creamy sauce and tangy sauerkraut. And it’s so darn GOOD.
Traditional Pierogies are like Polish or Ukrainian Ravioli, made with fresh made dough that is filled with potatoes and cheese, meat or sauerkraut, and usually boiled or sauteed in butter with golden brown fried onions. This recipe takes the main ingredients of Pierogi (butter, mushrooms, sauerkraut, bacon, fried onions, pasta and cheese) and blends them together into a bubbling baked one-pot dish of goodness you’re gonna die for. It’s the ultimate comfort food perfect for a chilly dreary day that will keep you coming back for more…trust me.
1 lb. spiral pasta or Girelle (little spiral tops)
6-8 strips bacon, fried and crumbled
1 large sweet onion (Vidalia), chopped
1 stick (8 ounces) butter, divided
4 oz. fresh mushrooms, chopped
1-14 ounce package sauerkraut, rinsed well
2 cans Cream of Mushroom soup
1 cup 2% milk
1 cup shredded Cheddar cheese
Fresh ground pepper, to taste
Instructions
Preheat oven to 375 degrees.
Boil pasta 7-9 minutes and drain, set aside.
In a large saute pan, fry bacon over medium heat about 6-8 minutes until crispy, drain and crumble, set aside.
Sauté onions in same saute pan with 1/2 stick of butter for another 7-8 minutes until soft and translucent. Remove from pan and set aside.
Add the other 1/2 stick of butter and and sauté mushrooms about 8 minutes until tender.
Stir all ingredients together in large mixing bowl, adding soup and 2% milk, sauerkraut, sautéed onions and mushrooms, shredded cheese, and fresh ground pepper to taste.
Pour mixture over cooked pasta into a greased rectangle casserole dish, mix thoroughly and cover with foil.
Bake at 375 degrees for 45 mins.
Remove foil and turn up oven to 500 degrees, bake for another 5-10 minutes until top gets golden brown.
Pizza is probably one of my most favorite things on the planet. Seriously. Who can resist that crispy crunchy crust topped with melted gooey cheese and fresh, savory baked toppings? A pizza is a creative endeavor that is only limited to your imagination. The pizza dough is like a blank canvas just waiting for the artist to paint a masterpiece on.
Speaking of dough, you can certainly take a stab at making your own – here is a basic pizza dough recipe that’s easy enough to make. If you don’t want to bother making your own and want to save time, you can use pre-made refrigerated pizza dough from the grocery store (I get mine from Fairway stores, or you can try Pillsbury pizza dough which is inexpensive and easy to use. They even have Artisan, thin and gluten-free crusts now which is kinda cool.)
I made these rustic pizzas the other day in an attempt to use up some fresh veggies, pizza dough and ingredients from my kids cooking show I taped last week – we made all kinds of fun pizza on set but i couldn’t bear to waste the leftovers!
So here’s how easy these babies are to make…I divided the pizza dough and patted out the dough on to pizza pans to make four rustic pizzas – one of them topped with sauteed garlic, spinach, olive oil, savory chicken, sun dried tomatoes and plenty of mozzarella gooey cheese. The other one I made with sauteed bell peppers in different colors, broccoli, pepperoni, ham, tomato sauce and two gooey cheeses – mozzarella and muenster, great for melting. The trick to a great pizza in my experience is to saute your veggies in some olive oil and garlic BEFORE you put them on the pizza (the chicken too!). This gives them a deeper flavor and keeps them from drying out in the oven when you bake the pizzas. Throw them in a preheated oven on 400 degrees for about 15-17 minutes, let them cool on a baking rack for about 5 minutes, and then top them with some fresh torn basil, some extra parmesan cheese and pepper flakes and you’ve got some serious deliciousness going on.
Chicken, Spinach, Garlic and Sundried Tomato Pizza
Prep Time: 15 minutes
Cook Time: 15 minutes
Total Time: 30 minutes
Yield: 2-4
This is a tasty and healthy pizza made with sauteed garlic and spinach, red pepper flakes, sauteed chicken breast, sundried tomatoes and Parmesan and Mozzarella cheese.
Ingredients
1 package refrigerated pizza dough (or handmade)
4 tablespoons extra virgin olive oil, divided
1/2 cup shredded Parmesan cheese
1 tablespoon garlic, minced
1 teaspoon red pepper flakes
1/2 package fresh spinach, chopped
6-8 thin chicken cutlets, cut into 1" chunks
1 tablespoon seasoned salt or poultry seasoning
Fresh ground black pepper, to taste
1/4 cup sundried tomatoes, julienned (thin strips)
1 cup shredded Mozzarella cheese
Instructions
Preheat oven to 400 degrees.
Divide pizza dough in half and shape into two oval or rectangular pizzas on a greased pizza pan.
Drizzle 1 tablespoon of olive oil and 1/4 cup of Parmesan cheese on to the base of each pizza dough.
Heat an additional tablespoon of olive oil over medium heat in a large saute pan and saute minced garlic and red pepper flakes for about a minute.
Add chopped spinach and stir. Saute together for another 3-4 minutes until spinach starts to wilt.
Remove spinach garlic mixture from pan and set aside in a mixing bowl.
Heat additional 2 tablespoons olive oil in the same pan, add seasonings and saute the chicken for approximately 8 minutes until golden brown. Remove pan from heat.
Top pizza crusts with spinach-pepper-garlic mixture, sundried tomatoes and sauteed chicken (divided into equal portions for both pizzas).
Top both pizzas with shredded mozzarella cheese and place pizza pan in oven.
Bake for 15-17 minutes until cheese starts to get bubbly and golden brown.
This is a healthy and hearty version of classic pizza made with sauteed garlic, bell peppers and broccoli with diced ham and pepperoni topped with gooey mozzarella and muenster cheese.
Ingredients
1 package refrigerated pizza dough (or handmade)
2 tablespoons extra virgin olive oil, divided
1 tablespoon garlic, minced
1/4 cup red bell pepper, diced
1/4 cup orange bell pepper, diced
1/4 cup yellow pepper, diced
1/4 cup green bell pepper, diced
1/2 cup broccoli florets, chopped
Sea salt and pepper to taste
1 cup tomato sauce or puree
2 tablespoons tomato paste
1 teaspoon Italian seasoning
1 teaspoon garlic salt
1/4 cup pepperoni, chopped
1/4 cup ham, chopped
1 cup shredded Mozzarella cheese
1/2 cup Muenster cheese, torn into pieces
1 tablespoon garlic salt
Instructions
Preheat oven to 400 degrees.
Divide pizza dough in half and shape into two oval or rectangular pizzas on a greased pizza pan.
Heat olive oil over medium heat in a large saute pan and saute minced garlic for about a minute.
Add diced bell peppers, chopped broccoli, salt and pepper and stir. Saute together for 5-7 minutes until vegetables get tender and soft.
Remove pan from heat.
In a small mixing bowl, mix together tomato sauce, tomato paste, Italian seasoning and garlic salt to make tomato sauce for pizzas.
Top pizza crusts with tomato sauce, pepperoni, ham and sauteed vegetables (divided into equal portions for both pizzas).
Top both pizzas with shredded mozzarella and muenster cheeses, sprinkle with garlic salt and place pizza pan in oven.
Bake for 15-17 minutes until cheese starts to get bubbly and golden brown.
Channels: Time Warner 34/ Cablevision 67/ RCN 82/ Verizon 42 and the Internet: Channel 1
BCAT TV Network cablecasts in all five boroughs of NYC on Verizon FIOS cable.
I love Spring. There’s nothing better than a dose of gorgeous sunshine, cherry blossoms in bloom, and the tempting promises of Summer on the way. It’s the perfect time of year to throw open the windows, do some Spring cleaning and celebrate new beginnings. I also love the bountiful selection of fresh seasonal herbs and vegetables that come along with it.
Asparagus is in its prime now, so I wanted to create a light and savory chicken dish to complement it for an easy, healthy weeknight dinner – a twist on classic Chicken Saltimbocca with the addition of some cheesy goodness and bright lemony flavor.
I picked up some fresh lemons, thin chicken breast cutlets at the market along with some Italian Prosciutto, fresh sage and Provolone cheese to stuff them with. To start, I laid out the chicken breasts in a large baking pan and layered the ingredients on top – first a slice of Prosciutto topped with a few sage leaves and thinly sliced cheese. I then folded them over and secured them with toothpicks and seared them in a pan in olive oil to get a nice golden brown crust. Once the chicken breasts were browned, I set them back in the pan, poured the juices on top and finished in the oven for about 15 minutes.
The best part of this dish is the buttery lemon wine sauce for serving. I sliced up some garlic and sautéed it in olive oil for a minute or two, then added some chicken broth, white wine and let it come to a boil, then reduced the heat and simmered it down to reduce the sauce, stirred in some lemon juice, a nob of butter and set the sauce aside for drizzling on the chicken later.
While the chicken was roasting in the oven, I blanched the asparagus for a minute or two and then tossed it with sliced garlic, olive oil and sea salt, roasting it for about 10 minutes or so until tender. So easy and soooo good!
Once the chicken and asparagus were done roasting, I served them on a plate and finished them off with the buttery lemon wine sauce. If you want to add a starch to the meal, simply cook up some orzo, pasta or some crusty bread to go with it. You can also use Fontina cheese for a slightly different flavor, or to make it a vegetarian dish, omit the prosciutto and substitute some sautéed mushrooms or spinach and prepare the same way. Keep it light with a side salad and a lemony vinaigrette, and serve with a glass of Pinot Grigio or Pinot Gris.
Here’s to Spring and the days leading up to Summer – Bon Appetit!
Prosciutto Sage Provolone Stuffed Chicken with Roasted Garlic Asparagus
Prep Time: 15 minutes
Cook Time: 30 minutes
Total Time: 45 minutes
Yield: Serves 4 to 6
Ingredients
4-6 chicken breast cutlets
4-6 thin slices of Italian Prosciutto
12 fresh sage leaves
4-6 slices of Provolone or Fontina cheese
2-3 tablespoons of olive oil
Sea salt and freshly ground black pepper, to taste
2 cloves of garlic, sliced plus 1 clove minced (for sauce)
1 bunch of asparagus
½ cup chicken broth
½ cup dry white wine (Pinot Grigio or Pinot Gris)
juice from half a lemon, plus 1 tablespoon zest for garnish
1 tablespoon butter
lemon wedges and additional torn sage leaves for garnish
Instructions
Preheat oven to 350 degrees.
Spread out the chicken cutlets flat in a large baking dish, and season with sea salt and pepper, to taste.
Layer on top of each chicken breast a slice of prosciutto, two sage leaves, and a slice of provolone or fontina cheese, then fold over the chicken in half and secure with a toothpick to secure.
Heat 1 tablespoons of olive oil in a large sauté pan over medium-high and sauté chicken breasts approximately 1-2 minutes per side until golden brown.
Remove the chicken and juices from pan and place back into the baking dish and roast in the oven for another 15 minutes until cooked through. You might want to baste the chicken in its juices once or twice to make sure the chicken doesn’t dry out in the oven.
Meanwhile, slice 2 cloves of fresh garlic, mince 1 clove and set aside. Trim the ends off the asparagus and blanch in boiling salted water in a large pot for about 1 minute. Drain, place asparagus in a baking dish and drizzle with a tablespoon of olive oil, a sprinkle of sea salt and pepper and sliced garlic. Place in oven and roast for about 10-15 minutes until fork tender and slightly browned (be careful not to overcook or the asparagus will get dark and mushy – aim for tender yet crisp and green).
In the same sauté pan for the chicken, heat another tablespoon of olive oil. Sauté the additional clove of minced garlic for about 1 minute until lightly golden and soft. Add the chicken broth, white wine, lemon juice and bring to a boil, then lower the heat to a simmer. . Let sauce reduce to about half, then add 1 tablespoon of butter, swirling in to finish the sauce.
When chicken and asparagus are done roasting, plate them and top off with the lemon butter wine sauce.
Garnish with lemon wedges, torn sage leaves, lemon zest, and salt and pepper to taste. Serve with a side of cooked orzo or pasta, crusty bread or a green salad with a lemon vinaigrette and a dry white wine, such as Pinot Grigio.
So here is my award winning Mac and Cheese recipe that I am proud to share with all of you! I was awarded as a Grand Prize Winner in the Challenge Dairy Real Heritage Recipe Contest for my Amazing Macaroni and Cheese! Although this was a few years ago, I am still so grateful for this opportunity to submit my winning recipe and to be a part of this amazing recipe contest. Check out the story I wrote and winning recipe below, andmore contest winners on Challenge Dairy’s website.
There’s No Place Like Home
Growing up I always associated food with a sense of comfort, warmth, fulfillment and stability. This is something I attribute to my Mom’s home-cooked meals and nights around the dinner table with my family as we discussed the events of our day, bonded through sharing the heartwarming, delicious meals together and after the meal was done, cleaned the kitchen with our Mom and bonded by watching a television show together before going to bed and getting ready for school the next day. Mom would make Pot Roast with Mashed Potatoes and Green Beans, homemade Lasagna with a salad and garlic bread, Grandma’s Beet Soup with homemade Polish potato noodles, or a yummy, savory Meatloaf with Mushroom Gravy – these were all of our favorites and also heirloom recipes that were handed down from my grandparents and generations past.
That was a long time ago, or so it seems, and since those days I have lived in numerous cities and another country, and still cherish enjoying good food with good people. But nothing compares to those home cooked meals and the sense of comfort they gave me when I was young – those days gave me a solid ground to stand on for life.
One gloomy, dark day last January, I was cooped up in my tiny New York studio apartment feeling completely miserable from the freezing cold weather and had a serious case of the Winter blues. I felt an undying urge to make a home-cooked meal like Mom used to make to cheer me up and get me out of the dismal mood I couldn’t seem to shake. New York can do that to you sometimes – it is one of the greatest cities in the world, but can also take you to the depths of darkness on those dark, freezing, nasty days in the middle of Winter. That day I decided to go on a quest for comfort. Something warm. Something cozy. Something heartwarming. Something that would fill my soul and renew my spirit.
My head started spinning, and I immediately felt energized and motivated with this new task at hand. What would cheer me up and transport me back in time? After furiously searching through all of my recipes, I found the perfect remedy to ail my blues – a big whopping batch of luscious Macaroni and Cheese. Not just an ordinary one (like the kind you get in a blue box with packets of dried chemical-laden cheese dust), but one that called for some delicious gourmet ingredients to take this kid-friendly recipe and turn it into a serious pot of adult-sized comfort.
I hopped in a cab to Zabar’s (my favorite gourmet store on the Upper West Side) with thrill and anticipation. The freezing rain was coming down sideways and beat against the windows. Once I arrived, I headed straight for the cheese department and was in my glory with their selection of international cheeses that pierce your nose as soon as you walk in the door. I picked up a creamy Italian Mascarpone, some fresh grated Parmesan Reggiano, a chunk of Gruyere and a block of Fontina. Then I found some fresh garlic, heavy cream, premium real butter, smoked thick cut bacon and of course, imported Italian pasta – this was a recipe for a mean Mac and Cheese. Definitely not your Mama’s.
I prepped my ingredients and carefully crafted my dish of gourmet deliciousness. The pot was brimming with a melted creamy cheese concoction and I poured the luscious ingredients into my baking dish, watching with anticipation as the warm, savory smells filled my kitchen. After an hour of waiting anxiously to savor my creation, I scooped up the bubbly goodness into a bowl and upon tasting the first bite with its brown crispy crust and tangy creamy cheese, was transported back to a time of comfort and bliss, when I didn’t have a care in the world, a simpler time and place that seemed long gone from today in my stressful, fast-paced city life.
Who cares about the weather, I thought – I had arrived. I was home.
Amazing Macaroni + Cheese > There’s No Place Like Home
Prep Time: 20 minutes
Cook Time: 50 minutes
Total Time: 1 hour, 10 minutes
Yield: Yields 6-8 servings.
Serving Size: 1 cup
This is a super luscious and decadent grown up Mac and Cheese! Filled with Gruyere, Fontina and Mascarpone for extra creaminess, a little cooked bacon and a Parmesan buttery bread crumb topping for extra crunch. Definitely worthy of a special occasion or the holidays to impress your guests!
Ingredients
4 slices bacon or pancetta, cooked and crumbled
5 ½ tablespoons Challenge European Style Butter (salted), divided
¾ cup Japanese Panko breadcrumbs
¼ cup Parmigiano-Reggiano cheese, grated
6 tablespoons all-purpose flour
2 cups whole milk
1 cup heavy cream
1 tsp kosher salt
1/2 tsp ground black pepper
dash of nutmeg (? teaspoon)
dash of ground cayenne pepper (? teaspoon)
1 ½ cups Gruyere or Comte cheese, grated (3 oz.)
1 cup Fontina cheese, chopped into small pieces (5¼ oz.)
1/2 cup Mascarpone cheese
1 ½ cups dry elbow macaroni (6 oz.)
1/4 cup fresh parsley, chopped fine, plus extra for garnish
Instructions
Preheat the oven to 350°F.
Cook the bacon or pancetta, drain and crumble and set aside.
In a small sauce pan, melt 2½ tablespoons of the butter over low heat. Add the bread crumbs and Parmigiano-Reggiano cheese, toss well, and set aside.
Melt the remaining 3 tablespoons butter in a 2-quart, heavy-bottomed saucepan over low heat. Add the flour and cook for 5 minutes, stirring constantly, do not let the flour burn. Pour in the milk and cream; cook for 5 minutes, stirring constantly. Add salt, pepper, nutmeg, cayenne, Gruyère, Fontina , Mascarpone. Continue to stir until the cheese is melted and incorporated. Remove the pot from the heat.
Prepare pasta according to package directions for al dente (7 - 8 minutes). Drain the macaroni and combine with the cheese sauce. Add crumbled bacon and parsley; mix well.
Pour the macaroni mixture into an 8-inch square baking dish. Sprinkle the breadcrumb mixture evenly over the top of the macaroni and cheese. Bake 30-35 minutes, until golden brown and bubbly. Serve hot immediately and garnish with additional fresh parsley, if desired.
Notes
You can also substitute the meat using some baked ham or prosciutto, or make it vegetarian and just add extra cheese or some veggies like zucchini, squash, brussels sprouts or mushrooms.
This recipe is also delicious with a little drizzle of truffle oil in the cheese sauce or topped with white or black truffle salt as a garnish.
With all the cooking I’ve been doing lately, I’ve decided to mix it up and experiment with some baking. I’m obsessed with savory tarts and quiches – perfect comfort food for this cold Winter we’re having in New York. I also haven’t played with puff pastry too much, so I though a free-form Spinach, Artichoke & Ricotta tart would be fun to make for my sweetie on Valentine’s Day.
This recipe is fairly easy to make and healthy with all the veggies loaded on top. The light and creamy ricotta base has lemon zest, thyme and fines herbs to give it a bright, fresh flavor. It’s topped with sautéed fresh spinach and artichokes with a little bit of garlic and chile flakes, and I also used a combination of two flavor-infused oils by Tavern Direct – one with Lemon and Pepper, and the other with Chile Pepper and Garlic to give it a little more kick. You could also substitute the veggies with some zucchini and yellow squash and some shallots or sweet potato with bacon and kale. The tart is topped off with four shredded Italian cheeses, then baked to a flaky, golden brown perfection. I used a frozen puff pastry, which is convenient to use, but if you prefer you can make your own puff pastry dough, which is a bit more time and effort but delicious all the same – Martha Stewart has a great recipe on her site. This scrumptious, savory tart is great served with a green salad and a crisp glass of white wine.
Ingredients
1 15 oz container Ricotta cheese
2 tbsp fresh thyme leaves
1/2 tbsp fines herbes, dried
1 egg yolk
Rind of 1 lemon, finely grated
1 tbsp butter
1 tbsp garlic, finely minced
2 tbsp olive oil (can substitute lemon, garlic or chile-infused oils for more flavor)
3 handfuls fresh spinach, roughly chopped
1 pkg frozen artichokes, drained and chopped into large chunks
1 garlic clove, finely minced
1/2 tbsp red pepper flakes (add more or less to adjust heat)
1 puff pastry sheet
1 cup shredded Italian cheeses (Fontina, Parmesan, Romano, Mozzarella)
Kosher or Sea Salt, to taste
Fresh ground garlic and black pepper seasoning, to taste
Preparation
Preheat oven to 400 degrees F.
Ricotta and Lemon and Herbs
In a medium bowl, mix ricotta, thyme, fines herbes, lemon rind and egg yolk until smooth. Set aside.
Spinach and Artichokes
Heat oil in a large saute pan over medium-high heat. Add artichokes and saute for 1-2 minutes. Add spinach and saute until it begins to wilt, another 1-2 minutes. Add minced garlic and red pepper flakes and saute 1 additional minute. Remove from heat, cover with saucepan lid and set aside.
Floured Pastry
Roll out pastry dough and sprinkle with a little bit of flour. Score around the edges with a sharp knife to make a 1 inch border and transfer to a baking sheet lined with parchment paper.
Garlic Butter Wash
Melt the butter and minced garlic on the stove or in the microwave for about 1 minute. With a pastry brush, coat the entire pastry sheet with the garlic butter.
Ricotta Mixture on Tart
Spread the ricotta mixture within the border on to the pastry sheet.
Spinach and Artichokes on Tart
Top with spinach, artichoke, garlic and red pepper topping.
Sprinkle Four Cheese Topping
Scatter the grated cheeses over the entire tart and season with salt and pepper or garlic pepper seasoning to taste.
Flaky, Buttery, Creamy Goodness
Place the tart in the oven and bake for approximately 20-25 minutes until pastry is golden brown and cheese is melted. Remove from oven and place on a cooling rack for about 5-10 minutes.
Slice and serve warm with a green salad and a glass of crisp white wine. Delectable.
This is a delicious, luscious custard pie that I made over Thanksgiving holiday, and it was so easy to make. Made with buttermilk, vanilla, cinnamon, nutmeg and butter; it has a creamy consistency similar to pumpkin pie but without the pumpkin. It includes a simple recipe for homemade pie crust, but you can also use a pre-made or refrigerated crust to save some time and effort (Pillsbury is great). Another option is to make the pie crust with whole wheat or rye flour. Throw in a tablespoon of maple syrup and a dash of sea salt to the filling and sprinkle the pie with some large grain sugar to bring out the flavors even more. Enjoy 🙂
For the crust:
1 1/4 cups all-purpose flour
1 tsp sugar
1/4 tsp fine grain sea salt
1/2 cup (1 stick) cold unsalted butter, cut into small pieces
3-5 tbsp ice cold water
For the filling:
3 tbsp all-purpose flour
3 large eggs, plus 2 large egg yolks, lightly beaten
1 cup packed dark brown sugar
1 1/2 cups buttermilk, room temperature
zest of half a lemon
1/2 tsp vanilla extract
1/2 tsp ground nutmeg
1/4 tsp ground cinnamon
1 tbsp maple syrup (optional)
6 tbsp (3/4 stick) unsalted butter
large grain sugar for sprinkling (optional)
Make the crust:
In a food processor, pulse flour, sugar, and salt until combined. Add butter and pulse until mixture resembles coarse meal, with a few pea-size pieces of butter remaining. Sprinkle with 3 tbsp ice water. Pulse until dough is crumbly but holds together when squeezed (you can add additional ice water if necessary, up to 2 tbsp, 1 at a time); do not overmix. Form dough into a disk, wrap tightly in plastic and refrigerate until firm, 1 hour.
Preheat oven to 375 degrees.
On a floured surface, roll out the dough to a 12 inch round.
Place in a 9 inch pie plate, fold overhang under, and crimp edges. Prick dough all over with a fork. Place a sheet of parchment paper over dough and fill with pie weights or dried beans.
Bake until edge is light golden brown about 15 minutes; remove parchment and weights.
Make the filling:
In a large bowl, whisk together flour, eggs and brown sugar until smooth. Whisk in buttermilk, lemon zest, vanilla, nutmeg and cinnamon until combined. In a small saucepan, heat butter over medium, swirling pan occasionally, until golden brown and most of the foam has subsided, 8 to 10 minutes. Immediately whisk into buttermilk mixture.
Pour filling into pie shell and bake until set but still wobbly in center, 25-35 minutes. Sprinkle pie with sugar (if desired) and let cool completely on a wire rack, 2 hours before serving. Can be refrigerated and wrapped in plastic for up to 3 days.
Serves 8.
Recipe adapted from Martha Stewart Everyday Food, November 2011