
Saute veggies

Add chicken

Cook and mix together

Add broth, water

Add noodles and cook 9-11 mins

Garnish with fresh parsley and serve

The Artful Gourmet :: Food Stylist | Photographer | Blogger | Recipe Writer
Celebrating the art of food & cooking through colorful recipes, stories and photography


Sometimes you need to spice things up in life a little. Especially to brighten up those late Winter/early Spring dreary days when you’re craving #BBQ, until the gorgeous grilling weather is back in full swing!

These Sweet and Spicy Chicken Thighs are the perfect remedy – bathed in a gorgeous sticky, spicy and sweet glaze, made with Penzey’s Northwoods Fire Rub and Woodstock Everything Sauce and a little honey and white balsamic vinegar for a great BBQ flavor with the convenience of the broiler.

I made some fresh and easy Roasted Broccolini with Garlic to go with the chicken, but you could also serve them with the typical BBQ fixings: corn on the cob, baked beans, cole slaw, mac and cheese or fries. Black beans and rice would also be a great option for a Caribbean flair. Or shred the chicken and make some Spicy Sweet Chicken Tacos or BBQ Chicken Wraps or Pizza with the roasted broccolini…YUM!

Chef’s Notes: Penzey’s Northwoods Fire Rub is a lovely spicy mixture of salt, chipotle, black pepper, Hungarian paprika, garlic, rosemary, thyme, black pepper, and cayenne. If you aren’t able to find it or buy some, you can make your own by using the following: 2 teaspoons garlic powder, 2 teaspoons chipotle or chili powder, 1 teaspoon paprika, 3/4 teaspoon salt, 1/2 teaspoon cayenne, 1/2 teaspoon black pepper, 1/2 teaspoon dried rosemary and 1/2 teaspoon dried thyme. Get it online here.
Woodstead Hot Anything & Everything Sauce is a sweet and spicy glaze I found in Upstate New York in Naples in the Finger Lakes (it’s made there locally and sold at the farmer’s markets and you can also get it at Arbor Hill winery). It’s key ingredients are ketchup, vinegar, sugar, mustard, salt, turmeric and paprika, orange juice, cayenne pepper, crushed red pepper and brown sugar. It’s super delicious on everything as a bbq glaze or a dip for chips or fries. If you can’t find the sauce or aren’t able to get it to make my recipe then I suggest finding a Carolina-style BBQ sauce (mustard and vinegar based) and mixing it with the honey and white balsamic vinegar per my recipe instructions and it would be just as delicious! Kinda like a Honey BBQ mixed with the spicy rub for an extra kick!
These Sweet and Spicy Chicken Thighs are bathed in a gorgeous sticky, spicy and sweet glaze, made with Penzey's Northwoods Fire Rub and Woodstock Everything Sauce and a little honey and white balsamic vinegar for a great BBQ flavor with the convenience of the broiler. Served with an easy, healthy and delicious Roasted Broccolini with garlic on the side.
Ingredients
Instructions
Notes
Chef's Notes: Penzey's Northwoods Fire Rub is a lovely spicy mixture of salt, chipotle, black pepper, Hungarian paprika, garlic, rosemary, thyme, black pepper, and cayenne. If you aren't able to get the Penzey's spice rub you can make your own by using the following: 2 teaspoons garlic powder, 2 teaspoons chipotle or chili powder, 1 teaspoon paprika, 3/4 teaspoon salt, 1/2 teaspoon cayenne, 1/2 teaspoon black pepper, 1/2 teaspoon dried rosemary and 1/2 teaspoon dried thyme. Woodstead Hot Anything & Everything Sauce is a sweet and spicy glaze I found in Upstate New York in Naples in the Finger Lakes (it's made there locally and sold at the farmer's markets). It's key ingredients are ketchup, vinegar, sugar, mustard, salt, turmeric and paprika, orange juice, cayenne pepper, crushed red pepper and brown sugar. It's super delicious on everything as a bbq glaze or a dip for chips or fries. If you can't find the sauce or aren't able to get it to make my recipe then I suggest finding a Carolina-style BBQ sauce (mustard and vinegar based) and mixing it with the honey and white balsamic vinegar per my recipe instructions and it would be just as delicious! Kinda like a Honey BBQ mixed with the spicy rub for an extra kick!

Sticky..spicy…sweet…all rolled up into a delicious, easy meal – enjoy!
And bring on those Summer dayssssss!!! 🙂 🙂 🙂


Happy Friday friends! I’ve found the perfect pairing for a delicious Sunday Supper – and I present to you my super delish Lasagna Bolognese and Lambrusco.

The Lasagna Bolognese takes a little bit of time to make and a bit of a labor of love, so make sure to set aside a few hours to make this lovely creation over the weekend or when you have some time and patience to make it… It’s totally worth the wait!

My secret ingredient to the bolognese is adding some Concerto Reggiano Lambrusco DOC 2017 (Medici Ermete) to the sauce and letting it cook down for a couple of hours to give a voluptuous flavor. Not only is it absolutely delicious in the sauce, but as a pairing to drink with the Lasagna Bolognese as well.

Concerto is a dry and flavorful red sparkling wine, made in the Emilia Romana region of Italy, and its lively bubbles are achieved through natural fermentation. Concerto is the world’s first single vineyard vintage Lambrusco, intensely brilliant and pure in both its ruby red color and aromatics, the wine shows a fresh strawberry, raspberry and cherry character.

On the palate, it is dry yet fruity, round, fresh and its lively notes are delectably harmonious. Acidity and tannins are perfectly balanced and the finish is clean. For food pairings, it is delicious with cured pork meats such as salami or mortadella or a variety of pasta dishes such as tortellini or lasagna.
A delicious Lasagna made with a red wine Bolognese sauce, rich with layers of three different cheeses.
Ingredients
Instructions

Serve the lasagna with a glass of Concerto Lambrusco, and maybe a simple arugula salad with shaved Parmesan and some toasted garlic bread for the perfect cozy weekend meal.
For more information on Concerto Lambrusco, check out their website and social media pages:

Today I present to you the easiest, cheesiest, most delicious #soup ever, and the perfect remedy for a chilly Winter day – Keto/Low Carb Cheeseburger Soup.

It’s made with ground beef, bacons, sautéed onions, garlic and zucchini with lots of cheddar and Monterey jack cheese (YAY!), cream and beef broth. That’s it!

First, cook the ground beef until no longer pink, drain. Cook the bacon until crispy, drain on paper towels and set aside while you sauté the onions, garlic and zucchini.

Add the cooked ground beef back in to the pot and stir together.

Pour in the beef broth and cream and seasonings and stir together.

Bring to a boil and then reduce the heat and simmer for about 20 minutes over medium-low heat.

Add the shredded cheese in one cup at a time, stirring constantly to melt the cheese into the creamy broth, beef and veggies mixture.

Let the soup cook on low heat for another 5 minutes or so until the cheese is completely melted, add a little no starch thickener or corn starch to thicken it up to your liking. Serve hot, immediately and DEVOUR.

It’s super creamy and cheesy and there’s no guilt because it’s super low carb/high fat which of course is great on #Keto and #Atkins and all the other #LCHF diets out there. This my friends, is Winter Comfort Food in a bowl…filling, satisfying and absolutely deeee-lissshh!

This Keto/Low Carb Cheeseburger soup is the perfect Winter remedy - made with ground beef, bacons, sautéed onions, garlic and zucchini with lots of cheddar and Monterey jack cheese (YAY!), cream and beef broth. Delish!
Ingredients
Instructions
Notes
Note: If you're not on a low carb or keto diet you can always add some pasta or rice or orzo to it, or serve it with a slice of crusty bread to mop up the cheesy delicious soup which would make it over the top awesome too. Or throw in some other veggies to mix it up like sautéed bell peppers or mushrooms or corn. You could even take it a step further and add some hot sauce, mustard and pickles to it and some potatoes or hash browns to the mix if you're really craving a fully loaded cheeseburger in soup form.
Note: If you’re not on a low carb or keto diet you can always add some pasta or rice or orzo to it, or serve it with a slice of crusty bread to mop up the cheesy delicious soup which would make it over the top awesome too. Or throw in some other veggies to mix it up like sautéed bell peppers or mushrooms or corn. You could even take it a step further and add some hot sauce, mustard and pickles to it and some potatoes or hash browns to the mix if you’re really craving a fully loaded cheeseburger in soup form.

Whatever your heart desires, it’s the weekend. Enjoy! xx, Kristen


I was craving some serious comfort food yesterday – specifically some roast beef and potatoes with gravy like my mom used to make when I was a kid. As part of my effort to eat low carb/keto for awhile, I went on a search for a new recipe without all the potatoes, carrots and onions – which although are delicious and healthy, not necessarily low carb.

My friend sent me a link to a low carb Mississippi Pot Roast made in the crockpot which sounded intriguing, because it’s totally zero carbs and I’ve heard rumors that this recipe is the BOMB. I decided to make it with a little twist of my own and seriously guys, you have to try this one.

It’s so easy to make – all you do is get a 3-4 pound pot roast (chuck roast or outside round), throw it in a crockpot with some butter, beef broth, pepperoncini and spices along with some of the pepperoncini juice. I added little bit of Chardonnay white balsamic vinegar to it as well for a touch of sweetness to balance out the tangy, vinegary butter broth.

And instead of using the recommended Hidden Valley Ranch dressing mix (which has a lot of carbs in it), I made my own spice mix with onion powder and garlic salt, some dried Italian seasoning, dried dill seasoning, and freshly cracked black pepper. I added a dash of Everglades Heat seasoning (the spicy one) for little extra flavor and heat but you can totally leave this out if you prefer or just add a little cayenne or Creole seasoning like Tony Chacere’s.

You cook it on low for about 8 hours in the crockpot (or 4-5 hours on high) and then remove the roast from the crockpot, shred it into chunks with a fork, then put it back into the juices (you can add a little cornstarch or xanthan gum to thicken the gravy too) and you have a big pot of melt-in-your-mouth, buttery deliciousness.

And instead of mashed potatoes I made some buttery Cheesy #Cauliflower Mash – which is so easy –

Simply cut your cauliflower into large chunks, then microwave it with some cream and butter for about 12 minutes, stirring to coat halfway through. You can also steam the cauliflower too if you wish.

Then blitz it in a blender with some butter and shredded cheese and you’ll forget what mashed potatoes even are, for reals. So good!

I seriously think I’ve discovered my favorite recipe of the century. OMG. This stuff is crack in a crockpot. I could eat this meal forever. Well, maybe not forever, but repeatedly, with no shame.
Enjoy – and you’re welcome 🙂
This is a melt in your mouth delicious Pot Roast recipe for the slow cooker, made with a buttery, pepper and vinegar beef broth served over mashed cheesy cauliflower. It's totally low carb, keto and gluten-free and absolutely delicious and worth the wait!
Ingredients
Instructions
Notes
You can substitute any cheese you like for the mashed cauliflower, and if you prefer to use pre-made Ranch salad dressing mix you can save time by using that but it has carbs so it won't be low carb if you do.


So the New Year has arrived, and we all know what that means…time for resolutions and committing to good habits and breaking bad ones, including our diets and fitness routines, getting rid of the old and bringing in the new.
So I’ve decided to start with my #lowcarb #keto diet this week and I’m so excited about it – really! Every time I eat this way, everything else seems to fall into place…working out, sleeping better, more energy, better moods, less aches and pains and just feeling fantastic overall.
One of my other goals this year is to cook meals that can last throughout the week so I’m not cooking every meal from scratch every day..and making food with less ingredients (but still quality!), and preferably in one pot for easier prep and cleanup – ovenproof sauté pans, Dutch ovens, my Crock pot and Instant pot. So here goes my recipe for Low Carb/Keto Diet Day 1 – a simple and delicious Bacon, Onion and Cheese Frittata.

This baby will last me at least a couple of days – just cook it up in a big pan, slice it and it’s perfect for breakfast-on-the-go. AND it’s low carb/keto and #gluten-free made with only #eggs, half and half, sweet onion, #bacon, butter, cheddar #cheese, salt and pepper and some dill seasoning. Super delicious, filling and full of protein (and yes, fat, butter, bacon and cheese are totally fine on low carb (like Atkins and South Beach diets) and the Keto diet (which is pretty much the same except super high fat, medium protein and super low carb)…so no shame there, friends 🙂
BOOM! #2019, I’m ready for ya…bring it on!
An easy, delicious frittata made with eggs, cream, bacon, sautéed sweet onions and cheddar cheese, baked in the oven - perfect for breakfast or brunch or an alternative to dinner. Low carb, keto and gluten-free!
Ingredients
Instructions
Notes
You can also substitute prosciutto, pancetta or canadian bacon or ham for the bacon (or turkey bacon!) Feel free to experiment with other cheeses as well such as mozzarella, monterey jack, colby or parmesan. You can also add some sautéed peppers or mushrooms to add more veggies into the mix (or make it totally vegetarian by skipping the bacon altogether!)

Hey guys! Oh my gosh, it’s almost the end of the year! Can you believe it? Where does time fly? I’m so ready for a New Year though – #2019 can’t come soon enough! 🙂
I was invited to participate in the #Steviva #Holiday #Keto #Blogger #Recipe Challenge this year and made a Sweet and Spicy Meyer Lemon Shrimp Stir Fry. With all the #holidays going on and the rich, delectable #food I’ve been enjoying this month, I wanted to make a recipe a little bit lighter and healthier, and on the lower carb side…(before it all happens again this weekend for New Years!)

I love Steviva products because they are lower in carbs, low glycemic, low calorie and they use all natural ingredients in their products. Their line of good-for-you all natural alternative sweeteners are terrific options for cooking and baking without sugar. Whether you need a granulated sweetener to replace table sugar, a powdered sweetener to replace confectionery sugar or a liquid sweetener to replace corn syrup, they have carefully developed safe, low glycemic, low caloric sweeteners that taste and act just like sugar.

This dish is super easy and quick to make and has great flavors using fresh Meyer Lemon juice, soy sauce, sesame, Nectevia Agave Stevia Blend, Steviva Erythritol Blend, a dash of ginger and #Sriracha for some spiciness to make a delicious sticky marinade to go with the shrimp and fresh veggies. And it’s low carb and low cal! BONUS*** 🙂

Simply make your marinade for the shrimp with all the ingredients and put it in the fridge in a ziplock baggie for 1/2 an hour. Then stir fry the shrimp for a few minutes until they are no longer pink and remove the shrimp from the pan.

Add the veggies and stir fry those for about 5-7 minutes until tender crisp and the sauce starts to thicken. Add the cooked shrimp back in and toss together for another minute or so.

Serve immediately over brown or cauliflower rice, zucchini noodles or soba noodles and spoon the rest of the spicy and sweet sauce on top and garnish with a few more sesame seeds and even some green onions if you wish.

A super easy and delicious stir fry made with shrimp and fresh veggies, marinated in a spicy and sweet sauce made with Meyer lemon juice, soy sauce, Sriracha, Steviva Blend and Nectevia. Great for a weeknight dinner or special occasion. Best served over brown rice, cauliflower rice, zucchini noodles or soba noodles.
Ingredients
Instructions
Notes
You can also use this marinade for scallops or chicken or beef, just increasing the cook time appropriate for the protein (about 10-12 mins for chicken or beef until cooked through). Vegetables can be swapped out as well whatever you prefer!

I’d love to hear your comments on this recipe below if you decide to make it! Please make sure to tag @stevivabrands and @artfulgourmet with a link back to this original post on my blog if you do share any recipes or photos on social media!
For more information on #Steviva Brands products and more recipes, please visit their website and social media pages:
—–
Note: I received products from Steviva Brands to experiment with recipes for the Blogger Challenge Recipe Contest. All opinions, recipes, photos and text are my own.

The holidays are here and I’m full swing in baking mode! It’s the best time of year for making dishes for parties and special occasions and one of my favorite things to make is a delicious, cheesy, #pasta dish.

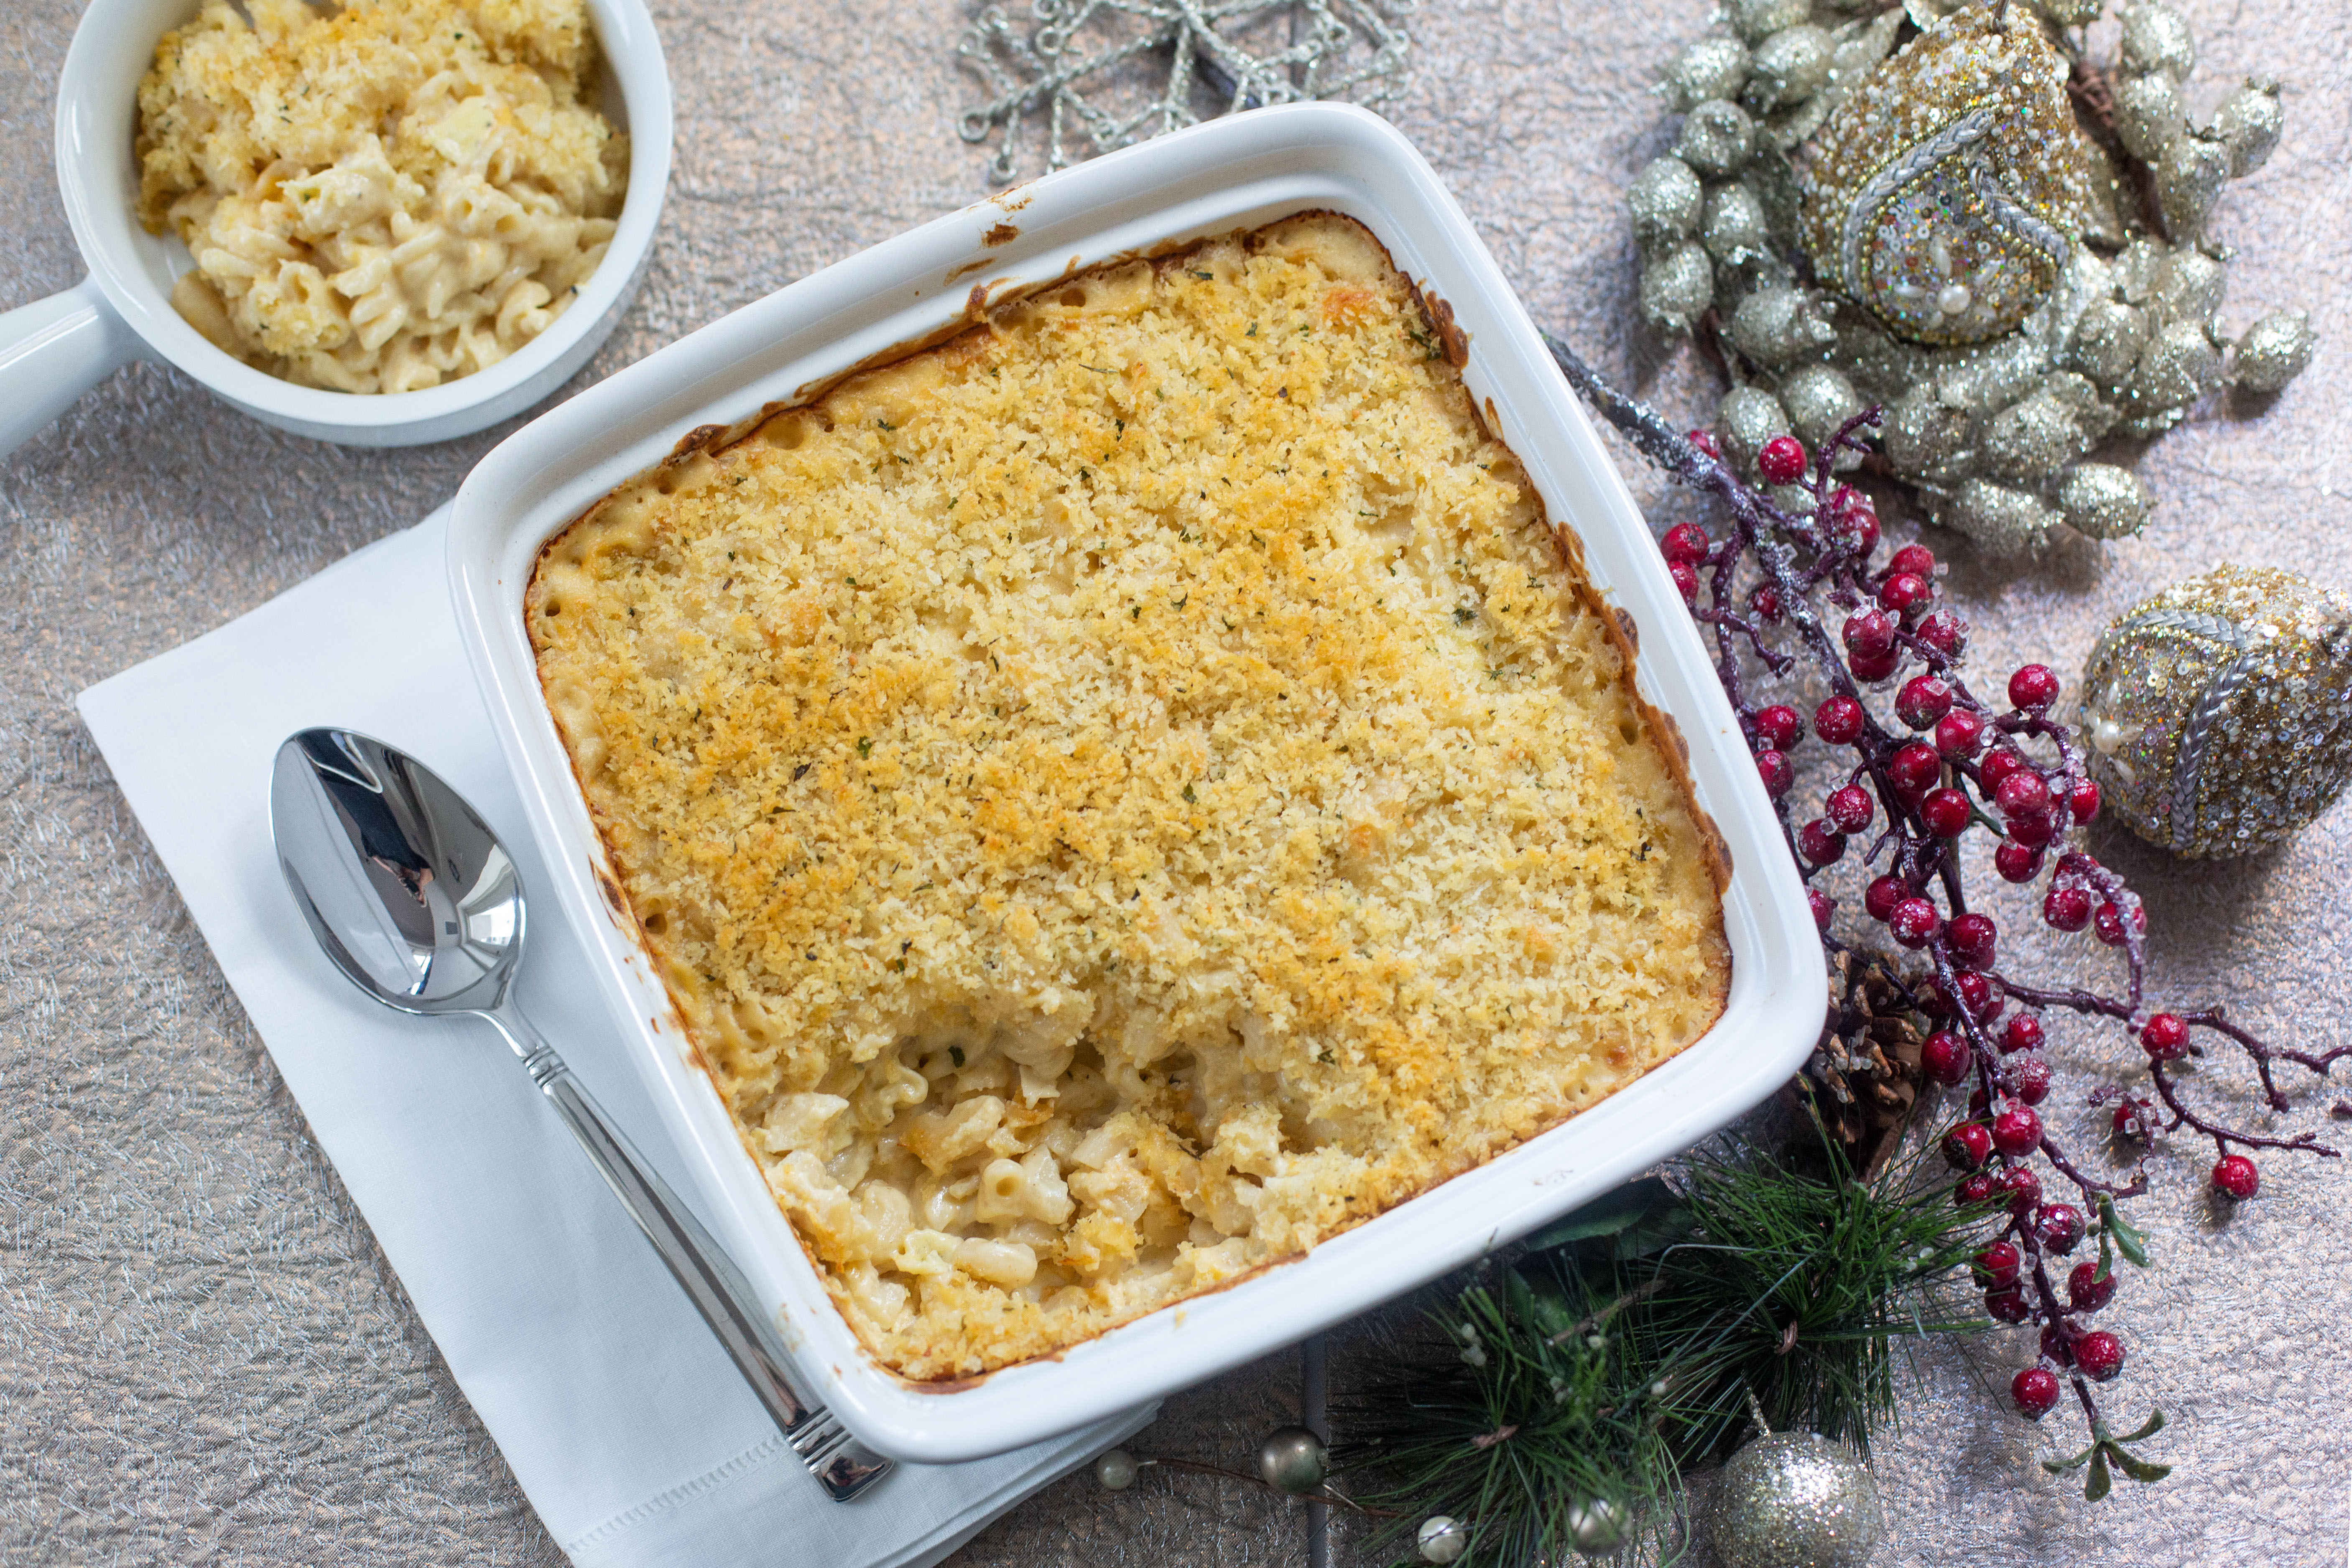
I was invited to participate in to compete in the 2nd Annual Tresomega “Organics For Life” Blogger Recipe Challenge again this year, and I decided to make a Luscious Truffle Macaroni and Cheese recipe using their gluten-free Quinoa pasta using a combination of the Elbows and Fusilli.

This recipe is super delicious, easy to make and is super creamy made with five cheeses (Truffle Brie, Mascarpone, Cheddar, Monterey Jack and Parmesan), half and half, truffle butter, a dash of truffle oil and truffle salt, onion and garlic, italian seasoning all topped with crunchy, buttery Panko bread crumbs.

I baked it in a large casserole dish for 30 minutes at 375 until golden brown, and let it cool for a few minutes before DEVOURING it’s luscious, cheesy, truffle-y self.

TresOmega gluten-free quinoa pasta is totally organic, non GMO, wheat and corn free, and tastes delicious just like regular pasta. And the elbows and fusilli shapes are perfect for holding all that cheesy delicious sauce!

It’s the perfect cozy, heartwarming dish made for the #holidays…or any time you just need a dash of comfort on a cold, dreary Winter day.

Enjoy and Happy Holidays!
This recipe is super delicious, easy to make and is super creamy made with five cheeses (Truffle Brie, Mascarpone, Cheddar, Monterey Jack and Parmesan), half and half, truffle butter, a dash of truffle oil and truffle salt, onion and garlic, italian seasoning all topped with crunchy, buttery Panko bread crumbs. Perfect comfort food dish for the holidays!
Ingredients
Instructions
Notes
You can also substitute other cheeses that are great for melting: Gruyere, Fontina, Emmental
You can find out more about TresOmega Gluten-Free Pastas on their website, or on their social media pages:
Feel free to comment and share this post with your followers and be sure to tag #tresomega, #organicsforlife in your post with a link back to this original post on my blog, with a credit to me, @artfulgourmet.


I can’t believe this year is almost over – and what a year it has been – lots of new opportunities, new friends and new places – I’m so thankful for all of them, as well as my family and all my longtime best friends!

I love the #holidays and they always remind me of what is most important, and to love each other like you love yourself, not just at #Christmas but throughout the year.

And what better way to celebrate the #holidays with those you love than with a lovely #Christmas #cocktail? This is my White Peppermint Cocktail made with #Smirnoff Peppermint Vodka, Creme de Cacao, vanilla, half and half and a dash of stevia liquid sweetener. It’s creamy and sweet and minty all wrapped up in a delicious concoction perfect for the holidays!

Wishing you and yours a very Merry Christmas and Happy New Year 2019!
This is a festive cocktail perfect for the holidays! Made with Smirnoff Peppermint Vodka, Creme de Cacao, 1/2 and 1/2, vanilla and stevia sweetener or simple syrup, garnished with candy canes. Sweet and lovely and delicious! Merry Christmas 🙂
Ingredients
Instructions

Christmas Eve fun playing in Downtown St Pete

Love the fire pits on the rooftop at The Canopy at The Birchwood Hotel

The holiday lights are so festive and magical!

And here are a few more holiday cocktail recipes below made with Smirnoff Peppermint Vodka and their special limited edition Smirnoff No 21 Holiday Ornament Vodka.
Check out more of their fun holiday cocktail recipes online!

Peppermint Cranberry Moscow Mule
(Makes 1 Cocktail)
Ingredients:
Directions:
In a cocktail shaker, combine Smirnoff Peppermint Twist and cranberry juice with ice. Shake. Fill a copper mug with ice, pour the vodka & juice over the ice. Top with ginger beer. Garnish with sugar coated cranberries and mint.
Courtesy of Kendra Darling, Simply Darrling

Orange & Peppermint Hot Chocolate
(Makes 1 Cocktail)
Ingredients:
Directions:
Combine hot chocolate, triple sec, and Smirnoff Peppermint Twist in a mug. Stir, and serve with a candy cane. Garnish with a candied orange peel.
Courtesy of Kendra Darling, Simply Darrling

Smirnoff Holiday Punch
(Makes 12 Servings)
Ingredients:
Directions:
Combine all the juices in a punch bowl. Stir in the Sparkling wine and the Smirnoff No. 21 Holiday Ornament Vodka. Garnish with slices of limes, oranges, and frozen cranberries. Place a ball of raspberry sherbet into a glass. Ladle punch into the glass.
Courtesy of Kendra Darling, Simply Darrling

Ornament Cocktail
(Makes 1 Cocktail)
Ingredients:
Directions:
Mix together the Smirnoff No. 21 Holiday Ornament Vodka, simple syrup, and juices. Use a funnel to pour into a clear ornament. Place Pomegranate seeds and mint leaves into a martini glass. To enjoy, pour the cocktail into the martini glass.
Courtesy of Kendra Darling, Simply Darrling

Holiday Cosmo
(Makes 1 Cocktail)
Ingredients:
Directions:
Rim a martini glass with water and dip into edible glitter. In a cocktail shaker, add ice, Smirnoff No. 21 Vodka, orange liqueur and cranberry pomegranate juice. Shake until chilled. Pour into martini glass and garnish with cranberries.
Courtesy of Megan Marlowe, Strawberry Blondie Kitchen

Autumn Harvest Punch
(Makes 16 servings)
Ingredients:
Directions:
Into a punch bowl, add sliced apples, pears and lemon. Pour in apple cider, Smirnoff No. 21 Vodka and lemon juice. Garnish with cinnamon sticks, clove and fresh rosemary springs. Stir to combine and chill until ready to serve. Right before serving, add in 1 liter ginger ale.
Courtesy of Megan Marlowe, Strawberry Blondie Kitchen

Fun in Straub Park in St Pete Florida!

Love all the gorgeous holiday lights!

Cheers!

sparkle sparkle sparkle!


Enjoy the holidays and here’s to a new fabulous year filled with good food, good drinks, good friends and good times 🙂


Ahhhhh, it’s the holidays…my favorite time of year! I absolutely love cooking for the #holidays, especially with all the parties and fun gatherings with friends and family.

I was invited to participate in the Paisley Farm Blogger Challenge this year and was lucky enough to receive some delish samples of all their farm fresh pickled veggies: Five Bean Salad, Asian Bean Salad, Southwest Bean Salad, Dilled Brussels Sprouts, Hot Brussels Sprouts, Sweet Pickled Beets and Sweet Cauliflower.

I decided to make a lovely Winter Holiday Salad with some of their amazing Sweet Pickled Beets and Hot Brussels Sprouts, along with some Tuscan Kale, toasted walnuts, blue cheese and dried cranberries, tossed in a Blood Orange Vinaigrette dressing.

The Sweet Pickled Beets have a great balance of sweet and spicy flavors with a hint of cinnamon, which I love! And the Hot Brussels Sprouts are mildly spiced but have a little kick to them, adding some heat and vinegary flavors to the salad.

Start out with some Tuscan kale, chopped into bite sized pieces, then layer the salad with the beets, brussels sprouts, toasted walnuts, blue cheese and dried cranberries. Drizzle the salad with the Blood Orange Vinaigrette made with blood orange juice, extra-virgin olive oil, Chardonnay white balsamic vinegar, a dash of Dijon mustard, minced onions, sea salt and freshly cracked black pepper.

Absolutely delicious and refreshing, and a healthy beginning or side dish to your holiday meal. Wishing you all a very Merry #Christmas and Happy New Year!

This is a lovely Winter Holiday Salad made with Paisley Farm Sweet Pickled Beets and Hot Brussels Sprouts, along with some Tuscan Kale, toasted walnuts, blue cheese and dried cranberries, tossed in a Blood Orange Vinaigrette dressing. Perfect for the holidays as an appetizer or side dish to the main event.
Ingredients
Instructions

I’d love to hear your comments below on this recipe and if you make any of your own recipes with Paisley Farm Foods, please let me know! And be sure to tag #paisleyfarm #paisleyfarmfresh #kroger in any posts that you post or share and be sure to include a link to the original post on my blog and tag me at #artfulgourmet!
J.W. Paisley, founder of Paisley Farm back in 1942, based his original company concept on an ethic that they carry forth today: making products out of the freshest ingredients, delivered with the most exciting and flavorful taste combinations imaginable. All of their bean salads and sweet pickled veggies are non-GMO, gluten-free and are available at stores like: Ralphs, Costco, Sam’s Club, BJ’s, Kroger, Walmart, Smith’s and Fry’s.
To find out more about Paisley Farm Foods, check out their website and social media pages: