Hey guys! Oh my gosh, it’s almost the end of the year! Can you believe it? Where does time fly? I’m so ready for a New Year though – #2019 can’t come soon enough! 🙂
I was invited to participate in the #Steviva #Holiday #Keto #Blogger #Recipe Challenge this year and made a Sweet and Spicy Meyer Lemon Shrimp Stir Fry. With all the #holidays going on and the rich, delectable #food I’ve been enjoying this month, I wanted to make a recipe a little bit lighter and healthier, and on the lower carb side…(before it all happens again this weekend for New Years!)
I love Steviva products because they are lower in carbs, low glycemic, low calorie and they use all natural ingredients in their products. Their line of good-for-you all natural alternative sweeteners are terrific options for cooking and baking without sugar. Whether you need a granulated sweetener to replace table sugar, a powdered sweetener to replace confectionery sugar or a liquid sweetener to replace corn syrup, they have carefully developed safe, low glycemic, low caloric sweeteners that taste and act just like sugar.
This dish is super easy and quick to make and has great flavors using fresh Meyer Lemon juice, soy sauce, sesame, Nectevia Agave Stevia Blend, Steviva Erythritol Blend, a dash of ginger and #Sriracha for some spiciness to make a delicious sticky marinade to go with the shrimp and fresh veggies. And it’s low carb and low cal! BONUS*** 🙂
Simply make your marinade for the shrimp with all the ingredients and put it in the fridge in a ziplock baggie for 1/2 an hour. Then stir fry the shrimp for a few minutes until they are no longer pink and remove the shrimp from the pan.
Add the veggies and stir fry those for about 5-7 minutes until tender crisp and the sauce starts to thicken. Add the cooked shrimp back in and toss together for another minute or so.
Serve immediately over brown or cauliflower rice, zucchini noodles or soba noodles and spoon the rest of the spicy and sweet sauce on top and garnish with a few more sesame seeds and even some green onions if you wish.
A super easy and delicious stir fry made with shrimp and fresh veggies, marinated in a spicy and sweet sauce made with Meyer lemon juice, soy sauce, Sriracha, Steviva Blend and Nectevia. Great for a weeknight dinner or special occasion. Best served over brown rice, cauliflower rice, zucchini noodles or soba noodles.
Whisk together Steviva Blend, Nectevia agave nectar, soy sauce, garlic, lemon juice, sesame oil, sesame seeds, Sriracha, red pepper flakes and ginger in a small mixing bowl.
Add half of the sauce to the shrimp and let marinade in the refrigerator for 30 minutes or more.
Heat butter in a medium sized skillet over medium high heat. Add the shrimp, discard marinade from the bag (save the other unused half for making the sauce). Saute for about 3-5 minutes until shrimp is no longer pink.
Remove shrimp from the pan and add the fresh vegetables. Saute for about 5 minutes or so until soft.
Add the reserved marinade and pour over the vegetables. Cook for another few minutes until sauce thickens.
Add the cooked shrimp back into the pan and toss together with the vegetables and the sauce. Season with pepper, to taste.
Serve immediately, garnish with additional sesame seeds and green onions if desired over brown rice, cauliflower rice, soba noodles or zucchini noodles.
Notes
You can also use this marinade for scallops or chicken or beef, just increasing the cook time appropriate for the protein (about 10-12 mins for chicken or beef until cooked through).
Vegetables can be swapped out as well whatever you prefer!
I’d love to hear your comments on this recipe below if you decide to make it! Please make sure to tag @stevivabrands and @artfulgourmet with a link back to this original post on my blog if you do share any recipes or photos on social media!
For more information on #Steviva Brands products and more recipes, please visit their website and social media pages:
Note: I received products from Steviva Brands to experiment with recipes for the Blogger Challenge Recipe Contest. All opinions, recipes, photos and text are my own.
Ahhhhh, it’s the holidays…my favorite time of year! I absolutely love cooking for the #holidays, especially with all the parties and fun gatherings with friends and family.
I was invited to participate in the Paisley Farm Blogger Challenge this year and was lucky enough to receive some delish samples of all their farm fresh pickled veggies: Five Bean Salad, Asian Bean Salad, Southwest Bean Salad, Dilled Brussels Sprouts, Hot Brussels Sprouts, Sweet Pickled Beets and Sweet Cauliflower.
I decided to make a lovely Winter Holiday Salad with some of their amazing Sweet Pickled Beets and Hot Brussels Sprouts, along with some Tuscan Kale, toasted walnuts, blue cheese and dried cranberries, tossed in a Blood Orange Vinaigrette dressing.
The Sweet Pickled Beets have a great balance of sweet and spicy flavors with a hint of cinnamon, which I love! And the Hot Brussels Sprouts are mildly spiced but have a little kick to them, adding some heat and vinegary flavors to the salad.
Start out with some Tuscan kale, chopped into bite sized pieces, then layer the salad with the beets, brussels sprouts, toasted walnuts, blue cheese and dried cranberries. Drizzle the salad with the Blood Orange Vinaigrette made with blood orange juice, extra-virgin olive oil, Chardonnay white balsamic vinegar, a dash of Dijon mustard, minced onions, sea salt and freshly cracked black pepper.
Absolutely delicious and refreshing, and a healthy beginning or side dish to your holiday meal. Wishing you all a very Merry #Christmas and Happy New Year!
This is a lovely Winter Holiday Salad made with Paisley Farm Sweet Pickled Beets and Hot Brussels Sprouts, along with some Tuscan Kale, toasted walnuts, blue cheese and dried cranberries, tossed in a Blood Orange Vinaigrette dressing. Perfect for the holidays as an appetizer or side dish to the main event.
Ingredients
1/2 cup extra virgin olive oil
3 tablespoons Chardonnay balsamic vinegar
3 tablespoons blood orange juice
1 tablespoon minced onions
1 teaspoon Dijon mustard
Sea salt and freshly ground black pepper
2 cups Tuscan Kale, chopped
1 cup Paisley Farm Sweet Pickled Beets
1 cup Paisley Farm Spicy Brussels Sprouts
1/2 cup blue cheese, torn into pieces (Cambozola)
1/2 cup toasted walnuts
1/2 cup dried cranberries
Instructions
Whisk together white balsamic vinegar, blood orange juice, onion and dijon mustard. Slowly whisk in olive oil until vinaigrette emulsifies. Season with sea salt and freshly ground pepper to taste and whisk a little more, set aside.
In a medium-large salad or serving bowl, add the kale, top with Sweet Pickled Beets, Spicy Brussels Sprouts, blue cheese, toasted walnuts and dried cranberries.
Drizzle the vinaigrette on top of the salad and toss together, or serve on the side in a small bowl.
I’d love to hear your comments below on this recipe and if you make any of your own recipes with Paisley Farm Foods, please let me know! And be sure to tag #paisleyfarm #paisleyfarmfresh #kroger in any posts that you post or share and be sure to include a link to the original post on my blog and tag me at #artfulgourmet!
J.W. Paisley, founder of Paisley Farm back in 1942, based his original company concept on an ethic that they carry forth today: making products out of the freshest ingredients, delivered with the most exciting and flavorful taste combinations imaginable. All of their bean salads and sweet pickled veggies are non-GMO, gluten-free and are available at stores like: Ralphs, Costco, Sam’s Club, BJ’s, Kroger, Walmart, Smith’s and Fry’s.
To find out more about Paisley Farm Foods, check out their website and social media pages:
The holidays are approaching so quickly (yay!) and during this time of year I love staying indoors and making some serious comfort food. Especially anything #Italian, made with #pasta. And #cheese. And #veggies.
But that always comes with consequences, (note: stretchy pants, lol) and I’m trying to restrain myself a little bit by eating lighter and healthier until all the holiday parties start flooding in…(this weekend!)
I topped the pasta with some sautéed mushrooms, garlic, mire poix, zucchini, Italian sausage, roasted pecans and a sprinkle of Parmesan cheese. The sauce is super light too – made with chicken broth, a splash of brandy and a few tablespoons of half and half and some dried Italian herbs for a light, gorgeous flavor.
Tresomega Quinoa Penna Pasta is made with a unique blend of organic Royal Bolivian Quinoa – a nutrient packed superfood, organic amaranth, an ancient grain rich in vitamins and minerals and #organic white rice. And, it’s gluten-free, corn-free and certified organic.
They only use the highest quality ingredients, sustainably sourced and environmentally-sensitive to help promote a #healthy lifestyle. They are also dedicated to supporting a viable economic livelihood for farmers and promoting a #sustainable agricultural environment for future generations.
Sausage, Zucchini + Mushroom Pasta {Gluten-Free, Organic}
Prep Time: 10 minutes
Cook Time: 20 minutes
Total Time: 30 minutes
Yield: Serves 4
Serving Size: 1 1/4 cups pasta
A super delicious Italian pasta dish made with Tresomega Gluten-Free Quinoa Penne Pasta and their Organic Coconut Oil, topped with some sautéed mushrooms, garlic, mire poix, zucchini, italian sausage and toasted pecans and a sprinkling of Parmesan cheese. The sauce is super light too, made with chicken broth, a splash of brandy and a few tablespoons of half and half, sprinkled with some italian herbs for a light, gorgeous flavor.
Ingredients
2 tablespoons Tresomega Coconut Oil
6 ounces ground pork Italian sausage
1 (8 ounce) package sliced baby bella mushrooms
1 cup chopped mire poix (celery, carrots, onion)
1 zucchini, sliced into demi lunes
2 tablespoons fresh garlic, minced
1 (8 ounce) package Tresomega Penne Pasta
1/3 cup brandy or dry white wine
1 cup organic chicken broth
3 tablespoons half and half
Sea salt and freshly ground black pepper
1 teaspoon red pepper flakes
1/2 tablespoon dried Italian herb seasoning
1/2 cup dry roasted pecans
2 tablespoons grated Parmesan cheese
Instructions
Heat the coconut oil in a large skillet over medium-high heat. Add Italian sausage, mushrooms, mire poix, zucchini, and garlic and saute together stirring often, until sausage is crumbly and cooked through, about 8-10 minutes.
Meanwhile, cook the pasta according to package directions, drain and set aside. Toss with a tablespoon of coconut oil to prevent pasta from sticking together while cooking the rest of the ingredients.
Add the brandy (or wine) and let alcohol cook down until flavors are absorbed for about 2 minutes.
Add the chicken broth to the mixture and bring to a boil. Reduce heat to medium and cook for another minute or so.
Stir in half and half, season with salt and pepper, and red pepper flakes and italian seasoning.Cook for another few minutes on low heat.
Serve the Sausage, Mushroom Zucchini sauce over the pasta and top with fresh grated Parmesan cheese.
Notes
You can also use any of the other Tresomega Quinoa pastas (fusilli, spaghetti, or elbows)
Thanks to Tresomega Nutrition for sponsoring this post! Please share the love and enjoy more of Tresomega Nutrition’s products by visiting their website and connecting via social media:
I’d love to hear your comments below on the recipe and be sure to tag your shared posts with #tresomega #organicsforlife and #artfulgourmet @artfulgourmet!
This is a sponsored post from Tresomega Nutrition written by me. All opinions, recipes and photos are my own, and I only support products I love and use myself. Also, if you share this post or any of my other posts, recipes or photos, please be nice and tag my content with @artfulgourmet and include a link to the original post on The Artful Gourmet.
I love soup in the winter time because it’s a great way to warm up in the freezing weather, and a delicious, healthy thing to eat after all the heavy food from the holidays. And I especially love noodle soup with lots of veggies, meat and seasonings.
I recently was invited to join the blogger recipe challenge for JSL Foods to create a unique soup recipe using their Fortune Udon Noodles.
I created a soup recipe using their Mushroom Udon noodles – they are so good and easy to make! They are fresh and pre-cooked, perfect for a soup or stir fry and fortified with Omega-3 and have no MSG.
You simply add the noodles to some water and add the flavor packet provided, then cook for a few minutes after the water comes to a boil. Alternatively you can microwave the noodles in just 3 minutes and then add it to your soup base.
After the noodles were done, I set them aside and made the Spicy Pork mixture to go in the soup. First I added all the seasonings and spices, sriracha, fish sauce, soy sauce and togarashi seasoning (a Japanese spicy pepper seasoning you can find online) to the ground pork and sautéed over medium-high heat until cooked through.
Then I returned the pot of cooked noodles to the burner, added some chicken broth, fresh chopped kale, yellow sweet corn and a little more garlic salt and pepper and let that cook until the kale wilted and the corn was heated through. I added the cooked spicy pork mixture back into the pot with the noodles, kale and corn and let it simmer for another 5-10 minutes on low heat to let all the flavors meld together.
And voila! A super delicious and healthy soup for the winter with a great combination of flavors from the mushroom Udon noodles, the spicy pork, the fresh kale and corn, all topped with more sliced green onions, togarashi seasoning and a pat of butter to give it another layer of silky flavor and dash of sweetness to cool the heat from the spicy broth.
This is spicy and delicious mushroom Udon noodle soup - topped with a spicy pork mixture, kale, corn, garlic and green onions to make a savory soup perfect for winter.
Ingredients
1 package Fortune Udon noodles, mushroom flavor
1 tablespoon vegetable or peanut oil
1 tablespoon sesame oil
1 pound ground pork
1 1/2 tablespoons garlic, minced
1 tablespoon ginger paste
1 teaspoon lemongrass, minced
1 teaspoon fish sauce
2 tablespoons soy sauce
2 tablespoons Sriracha
1 tablespoon Togarashi seasoning
Black pepper, to taste
4 cups chicken broth
1 teaspoon garlic salt
1 (11 ounce) can sweet yellow corn
3-4 large handfuls kale, chopped
2 green onions, sliced
Butter, for garnish (optional)
Instructions
Cook the Fortune Udon noodles in a large pot according to package directions (add 1 1/4 cups of boiling water and seasoning packet to the noodles and simmer for 3 minutes). Set aside.
Heat the oil in a medium saute pan over medium high heat, add the ground pork, garlic, ginger, lemongrass, fish sauce, soy sauce, Sriracha, Togarashi seasoning and black pepper and cook for about 5 minutes or so until the pork is cooked all the way through.
Return the pot of cooked Udon noodles back to the burner, add the chicken broth, garlic salt, kale, corn and green onions, and let simmer over medium heat until kale is wilted and the corn is cooked through.
Add the cooked spicy pork mixture and stir together, simmering for a few more minutes until the flavors are blended through the soup.
Serve the Udon noodle soup immediately and garnish with additional sliced green onions and a pat of butter until melted, for garnish.
You can also try their other flavors in chicken and original flavor – check out their website and social media pages for more info on their products. You can purchase JSL Foods products at the following stores: Hannaford’s, Price Rite, and Shop Rite.
Disclosure: This is a sponsored post and I received products from the client to develop and test a recipe and create photos and copy for the post. All recipes, images, copy and opinions are my own. Do feel free to share this post, but please make sure to link back to this page and give credit to me as “Kristen Hess/The Artful Gourmet” for any photos, recipes and copy shared online.
I just discovered an amazing new cafe and store in NYC called Dr Smood – have you seen it? If not, you need to go. Based out of Miami, Dr Smood is a health company that makes “Smart Food for a Good Mood” – and oh how you’re gonna love this place!
They make all their own juices, smoothies, organic products and delicious healthy food based on 6 moods – Power, Beauty, Immunity, Detox, Energy and Health, which you can choose based on your mood and feeling and what you want to gain from the experience.
I had the opportunity to visit the Flatiron location in NYC and had a delicious Organic Detox Juice #9, made with ginger, lemon, lime, raw honey, echinacea, and cayenne. Then for lunch I tried their Butternut Squash Soup, Turkey and Avocado sandwich on their homemade Performance Bread before browsing the beautiful cafe and store of amazing products including organic tea, coffee, chocolate, health and beauty supplements and organic dried foods.
Dr Smood’s Organic Superfood Powders
Dr Smood’s Organic Superfood Powders would make a wonderful gift for the health and wellness-obsessed foodies on your list. They’re full of health-boosting goodness and are easy to use (they can be easily mixed into smoothies or juices, on yogurt or cereal or added to energy balls and no-bake treats).
There are a total of 13 beautifully packaged superfood powders, including Raw Cacao Powder, Spirulina Powder and Red Maca Powder. Each powder comes with an information packet, including a recipe and serving suggestions, and can be purchased at one of the five Dr Smood cafés in NYC.
Dr Smood Red Maca Powder is an adaptogenic herb that helps the body to adjust to stress. Maca is an excellent source of phytochemicals and protein and helps to regulate the endocrine system and hormones, boost libido and increases energy, stamina and endurance. Enjoy maca in homemade granola or add it to tea, juice, smoothies, oatmeal or cereal. (SRP: $21.95)
Dr Smood Spirulina Powder contains over 60% complete protein—almost 3x as much as beef—and is one of the few good sources of plant-based B12. This algae can also boost your immunity and promote a healthy digestive tract. Use it to make a semi-raw soup with sweet potatoes and carrots, spirulina cacao clusters or add it to your favorite juice or smoothie. (SRP: $14.95)
Dr Smood Raw Cacao Powder contains approximately 40x more antioxidants than blueberries, which help the body to resist and repair damage from free radicals; plus it’s a natural mood booster and can promote beautiful skin, nails and hair. Use it to make hot cacao with coconut cream and almond milk this season and you will never want the standard version of hot chocolate again! You can also add it to coffee, yogurt, fresh fruits or smoothies. (SRP: $10.95)
I picked up a jar of the Red Maca powder at the store and created a new recipe for Maca Pumpkin Couscous w/ Shallots and Bacon and Crispy Sage that turned out absolutely delicious! Maca powder is a great supplement to add to sweet recipes like juices and smoothies and organic raw desserts, or savory recipes like soups, sauces, gravies, or to sprinkle on roasted veggies.
Maca Pumpkin Couscous w/ Shallots and Bacon and Crispy Sage
Prep Time: 15 minutes
Cook Time: 1 hour, 15 minutes
Total Time: 1 hour, 30 minutes
Yield: Serves 4.
Serving Size: 1 cup
A delicious and healthy way to incorporate Red Maca powder into a lovely fall savory dish. Roasted pumpkin, sautéed garlic and shallots and bacon tossed into a basil and herb couscous topped with crispy sage and pumpkin seeds.
Ingredients
1 small sugar pumpkins, halved, seeds removed, skin on
3 tablespoons olive or coconut oil, divided
Sea salt and freshly cracked black pepper
1 tablespoon Dr Smood Red Maca Superfood Powder
Dash of cayenne pepper
2 tablespoons maple syrup
2 shallots, sliced
1 garlic clove, chopped
6 slices of bacon, cooked, drained and crumbled
1 package of Near East Basil and Herb couscous
6-8 sage leaves
Roasted pepitas or pumpkin seeds, for garnish
Parmesan cheese, grated, for garnish
Instructions
Preheat oven to 400 degrees F.
Drizzle each pumpkin half with 1 tablespoon of oil. Season with salt and pepper, Red Maca powder and cayenne. Place the pumpkin halves cut side down onto a lightly greased baking sheet. Roast in oven for 1 hour, until fork tender and golden brown. Remove from oven and let cool for 5 minutes.
Remove skin from pumpkin, cut into 1-inch cubes and toss with maple syrup; set aside.
Meanwhile, bring a large saucepan of salted water to a boil. Cook the couscous according to package directions and set aside.
Cook bacon in oven on a large foil lined baking sheet for about 20 minutes until crispy and brown, drain and crumble; set aside.
Heat another tablespoon of oil in a sauté pan over medium heat; cook shallots and garlic for approximately 5 minutes until soft and golden (be careful not to burn!). Add sage leaves and sauté until crispy and browned.
Add the cooked pumpkin, bacon, garlic, shallots to the couscous and toss together.
Transfer to individual serving bowls, garnish with crispy sage, roasted pumpkin seeds and grated parmesan cheese.
Notes
You can also substitute roasted butternut squash or any other hearty veggies like eggplant, zucchini, mushrooms and bell peppers.
Omit the bacon and cheese to make it vegetarian and dairy free.
Here’s another fun easy recipe you can make when you have a sweet tooth:
Maca, Coconut and Cashew Granola (gluten-free, vegan)
1 1/2 cups gluten-free rolled oats
1 cup raw, unsalted cashews, coarsely chopped 1 cup coconut flakes
4 tablespoons pure maple syrup
2 tablespoons coconut oil
1 tablespoon Dr Smood Red Maca Superfood Powder
pinch Himalayan fine grain sea salt
Preheat your oven to 300° F. Line a medium-sized baking sheet with parchment. Mix all ingredients in a bowl. Spread all ingredients in an even layer on a pan. Bake for 15 – 20 minutes. Allow to fully cool on the pan. Granola will firm and turn crunchy once cooled. Store in a sealed container in the fridge.
Check out the gallery below to see more photos of their amazing store and food and products I discovered!
To find a Dr Smood cafe and retail store near you, please visit their website at http://drsmood.com
It’s a cold, rainy Fall day in NYC, and what better than to make a big pot of cozy comfort food for the soul?
I was invited to join the TresOmega Blogger Recipe Challenge and I thought my One Pot Chili Mac Soup recipe would be the perfect thing to make with their gluten free pasta incorporated. This recipe is a cross between chili, tacos, mac and cheese and soup – all mixed together into a delicious pot of goodness..trust me, you’re gonna love this!!!
TresOmega Gluten Free Quinoa Elbows Pasta is made with a unique blend of Organic Royal Bolivian Quinoa – a nutrient packed superfood, organic amaranth, an ancient grain rich is vitamins and minerals, and organic white rice. The pasta is gluten-free, corn-free and certified organic and GMO-free, and has 3 grams of fiber and 6 grams of protein in each serving.
Next I browned the ground beef, garlic and onions in a little more coconut oil and added some taco seasoning to the mixture in a large dutch oven.
Then I added all the delicious veggies to the pot – corn, three types of beans, tomatoes, and chiles, and mixed it all together with the ranch seasoning. Just cover the pot and let simmer on low for about an hour, adding the cooked pasta in the last 5 minutes of cooking. Guys, this is so easy..and soooo good!
You can top this soup with whatever your heart desires – sour cream, jalapeños, shredded Mexican cheese, green onions, corn chips, maybe even a little parsley or cilantro for some extra green…go nuts!
This one-pot recipe is so simple to make and so delicious and best of all gluten free! So you can have a big pot of comfort food without all the guilt and feeling weighted down. Although on a cold rainy day like today, it might just warrant taking a nice nap afterwards. Enjoy 😉
Heat one tablespoon of Tresomega Coconut Oil over medium high heat in a large skillet. Add the ground beef, onions and garlic and brown for about 5-7 minutes; drain the excess fat. Transfer the mixture to a large stockpot or Dutch oven, stir in taco seasoning.
Add the beans, corn, tomatoes, green chiles and ranch dressing mix, and simmer over low heat for about 1 hour in the pot on the stove.
Meanwhile, cook Tresomega Elbows according to package directions, drain, toss with a tablespoon of Tresomega Coconut Oil and set aside.
Add cooked pasta to the pot in the last 5 minutes of cooking.
To serve, ladle soup into bowls. Top with corn chips, sour cream, shredded Mexican cheese, green onions and jalapenos.
Notes
Note - you can also cook the soup in a slow cooker over low heat for 6-8 hours.
Disclaimer: This is a sponsored post by TresOmega Nutrition as part of their Blogger Recipe Challenge. I did not receive compensation for this post but did receive products to develop this recipe and all opinions, recipes, photos and text are my own. Please do not use any images without my granted permission. Do feel free to share this post on social media with a link back to the original post and credit to Kristen Hess/The Artful Gourmet.
This is another favorite recipe I developed for my client Seven Barrels using their Meyer Lemon Olive Oil and Raspberry Balsamic Vinegar to make a lovely sweet and tart dressing, perfect for salads around the holidays. I wanted to make a recipe that incorporates Thanksgiving leftovers and create something light and easy after such a big, rich, and heavy meal.
This Wild Rice + Turkey Bowl with Citrus Vinaigrette uses all that gorgeous leftover cooked turkey, some wild rice, crisp romaine, fresh oranges and orange zest, crunchy celery, red onion, dried cranberries and toasted walnuts, drizzled in a gorgeous lemon and raspberry vinaigrette dressing with a touch of cinnamon, cumin and tarragon.
Feel free to experiment too with the bowl ingredients – you can substitute any other healthy whole grain like quinoa or farro or brown rice, and you could also try using cooked chicken in place of the turkey and try dried tart cherries and pistachios in place of the cranberries and walnuts. Any way you make it..I promise it will be delicious!!!
Wild Rice + Turkey Bowl with Cranberries and Oranges
Prep Time: 20 minutes
Cook Time: 20 minutes
Total Time: 40 minutes
Yield: Serves 4
This is a great recipe for using leftover Thanksgiving turkey - a healthy delicious bowl salad with wild rice, romaine, orange, celery, red onion and dried cranberries and toasted walnuts, drizzled in a gorgeous lemon and raspberry vinaigrette dressing with spices and tarragon.
Ingredients
Turkey
2 cups roasted turkey (light and/or dark meat – large slices or shredded)
Prep the cooked turkey breast by shredding the meat into bite sized pieces or slicing it into large pieces for the salad.
For the vinaigrette, whisk together orange juice, Seven Barrels Raspberry Balsamic Vinegar, Seven Barrels Meyer Lemon Olive Oil, tarragon, grated garlic, 1 teaspoon orange zest, cumin, pepper, salt, and cinnamon.
For the bowl, combine cooked wild rice with 1 teaspoon orange zest. Toast chopped walnuts in a small sauté pan over medium-low heat for about 5 minutes until lightly golden brown, set aside.
Divide cooked turkey, rice, romaine, orange segments, celery, red onion and dried cranberries among four serving bowls; drizzle with vinaigrette and garnish with toasted walnuts.
Notes
You can also substitute dried tart cherries, and cooked chicken breast for the cranberries and turkey.
Try experimenting with other grains too - quinoa, farro, or brown rice in place of wild rice.
I recently was approached by Steviva to compete in the Sweetin It-Up Blogger Recipe Challenge and decided to make a sugar free, gluten free Kung Pao Beef with Cauliflower Rice. I love Asian food, but oftentimes it has many hidden sugars in the sauce, so I thought it would be cool to make this savory dish for the challenge.
Steviva has a wide range of stevia-based products and I chose to use Necteviaand Erysweet for my recipe to replace the normal sugar in the sauce. Erysweet is a pure, non-GMO erythritol that is naturally derived and can be substituted cup-for-cup for sugar in recipes. Nectevia is an organic blue agave nectar infused with premium 100% pure stevia extract – and has only 1/4 the calories, carbs and sugars of regular agave, or table sugar with a warm honey flavor.
Kung Pao is made with chicken or beef marinated in soy sauce, sesame oil, and rice wine, which is then sautéed in a wok on high heat with crunchy bell peppers, water chestnuts, garlic, ginger, green onions and hot chilies.
I made a sweet and spicy sauce made with more soy sauce, rice wine, Chinese black vinegar, chicken broth, Erysweet and Nectevia in the pan with the cooked meat and veggies and tossed in some spicy peanuts, which was thickened into a luscious sweet/spicy/savory pot of yum. To serve, I topped the dish with fresh cilantro and more crunchy peanuts along with some yellow cauliflower rice sautéed with soy sauce and sesame oil and some fresh cilantro tossed in to keep it gluten free. Absolutely delicious without all the sugar and carbs!
Kung Pao Beef w/ Cauliflower Rice (Sugar + Gluten Free)
Prep Time: 20 minutes
Cook Time: 20 minutes
Total Time: 40 minutes
Yield: 4-6
Serving Size: 1 cup
Ingredients
MARINADE:
1 3/4 pounds boneless beef sirloin
1 tablespoon soy sauce
2 tablespoons sesame oil
1 tablespoon rice wine
1 egg white, lightly beaten
1/2 teaspoon kosher salt
1/2 teaspoon freshly ground black pepper
KUNG PAO:
2 tablespoons peanut oil
4-6 dried red chilies
1 tablespoon garlic, minced
1/2 tablespoon ginger, grated (or ginger paste)
1 teaspoon red chile flakes
3 scallions, sliced on the bias, 1/2-inch pieces
1/2 red bell pepper, sliced into strips
1 can water chestnuts, sliced in half
2 tablespoons soy sauce
3 tablespoons rice wine
1 tablespoon Chinese black vinegar (or balsamic)
2 tablespoons Nectevia Original
2 teaspoons Erysweet
1 cup chicken broth
1 tablespoon cornstarch mixed with 2 tablespoons water
3/4 cup roasted spicy peanuts
1/4 cup cilantro, chopped
Cauliflower rice sautéed with soy sauce, sesame oil and cilantro
Instructions
MARINADE:
Trim the fat from the steak all over and cut into 1-inch cubes. Combine the marinade ingredients in a large bowl and mix in the beef. Stir together to coat well, and place covered in the fridge for at least an hour to overnight.
KUNG PAO:
Heat the peanut oil in a wok or large sauce pan over medium heat, add chilies and cook for a minute until they begin to brown. Add garlic, ginger and cook for another minute. Turn heat up to high and add scallions, peppers, water chestnuts and chile flakes; saute for about 5 minutes until they begin to get soft and lightly browned. Add steak (remove from marinade and discard excess) and cook for about 3 minutes or so until beef begins to brown. Add soy sauce, rice wine, Chinese vinegar, Erysweet, Nectevia and chicken broth. Mix in the cornstarch, stirring well, to thicken the sauce. Toss in the roasted peanuts and serve over cauliflower rice with chopped cilantro, additional peanuts if desired.
Hope you enjoy making this recipe – please let me know what you think if you made it in the comments below! And feel free to share this post on social media tagging #theartfulgourmet and #steviva with a link back to the original post on this blog.
For more info on Steviva products, check them out online and social media:
Disclaimer: This was a sponsored post by Steviva Brands and I received products to create recipes and photos for this post. All opinions, images, and text are my own.
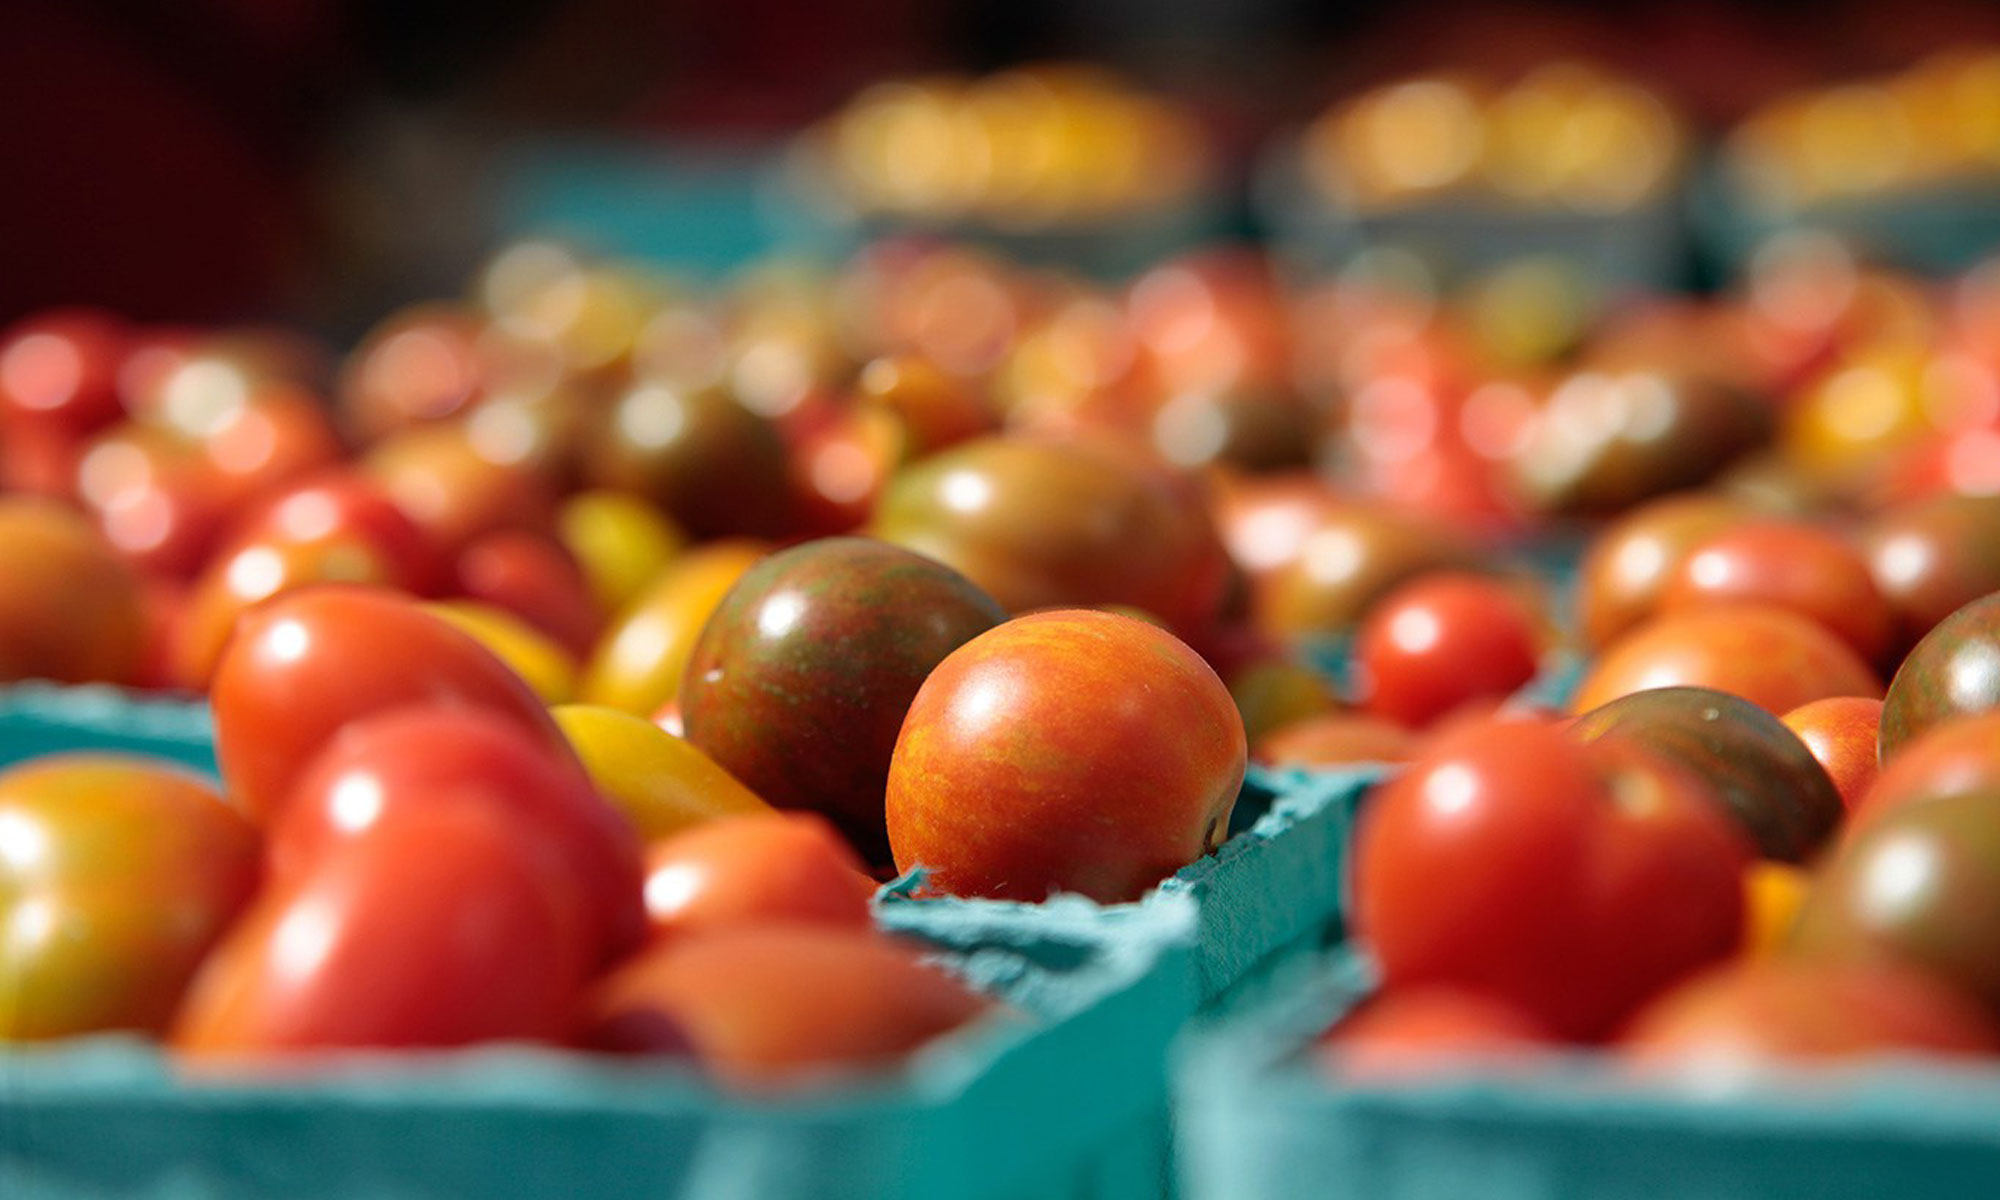
Summer is in full swing, and we all know what that means…TOMATO SEASON! I’m sure you all have a bountiful crop of tomatoes lying around from your garden..and if not, a plentiful supply of them from the farmers market or grocery store. So what better recipe to make with them than a gorgeous, easy Summer pasta dish?
Now I know this may sound weird, but I am not a fan of raw tomatoes. Never have, never will. Yeah, I am THAT person. But, when they’re cooked with a plethora of fresh ingredients to sweeten them up and break them down into a gorgeous sauce or salsa? I’m a huge tomato fan once they are transformed into some sweet and savory deliciousness…so here we go. Balsamic Tomato Basil Pasta with Fresh Ricotta.
This is truly Summer in a Bowl, my friends. This pasta dish is so simple and fresh you’re gonna love it. I made a lovely chunky sauce with a batch of chopped fresh tomatoes, simmered in 7 Barrels Balsamic Vinegar and their Sweet Basil Olive Oil (omg #LOVE!), with sautéed sweet onions and garlic, red pepper flakes and chicken stock. Then I tossed the pasta with a little bit of the pasta water, added the cooked balsamic tomato sauce, and topped it with fresh basil, some big dollops of fresh ricotta, and lots of Parmesan cheese. Juicy, sweet, tangy, savory perfection.
This is truly Summer in a Bowl, my friends. Made with fresh tomatoes simmered in 7 Barrels Balsamic Vinegar and Sweet Basil Olive oil, with sautéed sweet onions and garlic making a lovely chunky tomato sauce..topped with fresh basil and ricotta cheese and more Parmesan cheese! And it's so easy to make that you won't be slaving over the stove in this hot weather either. Juicy, sweet, tangy, savory perfection.
Ingredients
1 pound of pasta, reserving some of the pasta cooking water
1 tablespoon Seven Barrels Sweet Basil extra virgin olive oil
4-6 large tomatoes, diced
1 small onion, diced (about 1/2 cup)
3 cloves garlic, minced
1/2 teaspoon dried red pepper flakes
1/2 cup Seven Barrels Traditional Balsamic vinegar
1/4 cup chicken stock
2 tablespoons cornstarch
1/4 cup grated Parmesan cheese
1/4 cup fresh ricotta cheese, for garnish
1/4 cup fresh basil, torn into pieces, for garnish
Sea salt
Freshly ground black pepper
Instructions
Cook pasta according to package directions, drain and set aside.
In a large skillet, heat the olive oil over medium-high heat. Once the oil is hot, add tomatoes, onions, garlic and red pepper flakes.
Reduce the heat to medium and cook 3 to 5 minutes over medium heat, until onions begin to get soft and lightly browned and tomatoes release some of their liquid.
Place balsamic vinegar, chicken stock, and cornstarch in a small bowl and whisk well. Carefully add it to the skillet and continue to cook for a few minutes more until the sauce slightly thickens; remove from the heat.
Add the cooked pasta to the skillet with the tomatoes, and toss together over low heat for an additional few minutes until the sauce coats the pasta. Add a small amount of the pasta cooking water if the mixture is too dry, to your desired sauce consistency.
Place the pasta in large bowl and top with fresh grated Parmesan, ricotta cheese, and basil. Season with salt and pepper to taste.
Serve hot, immediately with some crusty garlic bread.
I was recently invited as a guest for the FoodyDirect.com Expert Interview Series to talk about great tasting and looking food, and I’m honored to share the interview with you! I discuss my background and how I got into Food Styling and Photography as a full-time freelance profession, along with some of my favorite things to cook, food trends, hot spots in NYC and some simple rules for great food photography on social media.
I also included one of my favorite go-to recipes in the article, my Rochester-Style Chicken French with Broccolini which I know you’re gonna love!
Check out the interview below or on FoodyDirect.com(the best online mail order source for gourmet food and gifts!
——-
Kristen Hess is a New York City food stylist, photographer, recipe developer, and author of the food blog, The Artful Gourmet. We recently chatted with Kristen about her favorite cuisines, cooking trends, and NYC eateries, and also asked her to share her food stylist expertise with us to help foodies take better photos of their gastronomical creations.
Tell us a bit about yourself. Why did you decide to dive headfirst into learning about cooking and food photography?
I’ve always loved food and cooking but never considered it as a full-time career until I moved to NYC and started taking a series of cooking classes at The Institute of Culinary Education. I was working in advertising at the time and thought it was a fun hobby, but then that hobby became more serious as I discovered food media as a blossoming career path and started taking more classes in food styling, photography, and food writing and then started my blog. Out of all of the different styles of cuisine and cooking in your repertoire, which one was the most fun to learn about?
My all-time favorite is Italian food because I love the simplicity of the gorgeous ingredients, rustic flavors, and cooking techniques. Whether it’s homemade pasta and sauce, homemade pizza, a gorgeous salad, an antipasti dish, or a roasted chicken with vegetables, I love it all!
Name a cooking trend, tool, or category that you’re currently excited about.
Alternative flours and coconut everything! I try to live a healthy lifestyle, but sometimes it’s hard when you work in the food industry (esp. in NYC!) surrounded by delicious temptations every day. Alternative flours made out of chickpeas, coconut, almond, bananas, brown rice, farro, buckwheat, chia, and arrowroot are great for low-carb and paleo/gluten-free cooking – and they’re healthier, too. You can make pizza crust, bread, pasta, pancakes, tortillas, pastry, crepes, socca, and all kinds of dishes with it. And I love coconut oil, cream, and milk as an alternative to full-fat regular dairy sometimes because it has a nice subtle coconut flavor and is great to cook with at high heat. I’ve made curries, smoothies, baked goods, and more with it. Great stuff.
Many people have a basic idea of what a food stylist does – but could you tell us about some types of food photography that you’ve done that people may not associate with the craft?
I do some interesting gigs with agencies for their food clients who are doing on-site media tours promoting food products and recipes to food editors for all the major food magazines. For example, The Jackfruit Company launched their new products and I toured around with the owner and PR agency making tacos, salads, burgers, and sandwiches on-site in the editors’ board rooms while they pitched the product to the editors and writers (to gain press and brand affection, of course!).
Another new type of job that is getting popular is styling food for Facebook Live segments for cookbook authors and chefs, health experts, and bloggers. I did quite a few of these for Keri Glassman and Andy Boy Broccoli Rabe, making recipes for them which were demoed live on Facebook at PureWow Magazine and Cosmo.com. I also did this for Halloween making super fun recipes by blogger Elise Strachan at People Food and Food and Wine.
When you see people posting pictures of food on their social media pages, what are some of the “mistakes” you see that make the dish look really unappetizing?
I always say lighting is a huge factor for any good food photo. If it’s too yellow or too blue, you need to fix the hue or it looks unappetizing. Also, never use flash or take photos with overhead lights as they give harsh shadows and blow out the food. Try to shoot food with natural light as much as possible. Bad angles are a no-no too. Don’t shoot burgers or sandwiches overhead. You can’t see what’s inside. Pizza is great for overhead shots because you want to see what’s on it. Don’t be afraid to crop into the shot too for some detail. Finally, consider your composition; what’s the hero in the shot? Focus on that dish. Not the glass behind it. Let the hero shine!
Finish this sentence: “If you’re a true foodie, the next time you visit New York City, you definitely need to stop by…”
For pizza, you need to check out DiFara on Ave J in Brooklyn. The wait is kinda long, but it’s soooo good and super worth the trip and the wait. I also love RubiRosa pizza in Soho.
Pearl Oyster Bar in the West Village is amazing for fresh oysters, seafood, wine, etc.
My favorite taco joint is La Esquina in Nolita. They make authentic Mexican style tacos on small corn tortillas with fresh cilantro, pork, steak, chicken, and homemade salsa. Plus, the grilled street corn is to die for!
You can’t go to NYC without getting a delicious burger, fries, and milkshake from the Shake Shack in Madison Square Park. Again, the line is long, but so worth the wait!!!
And lastly, go to Katz’s Deli in the Lower East Side for a pastrami on rye New York City style. Delish.
What types of desserts do you enjoy making for friends and family?
I’m definitely more of a savory cook than a pastry cook, but I absolutely love making pies and tarts. I always make lovely fruit-based pies or tarts in the summer around the 4th of July using berries, peaches, and mascarpone on a puff pastry sheet. Thanksgiving is always fun; I love experimenting with new pie recipes (something different than pumpkin or apple pie) like Christina Tosi’s Crack Pie or my Bourbon Buttermilk Pecan Pie.
Finally, could you share with us one recipe that’s always a hit when you prepare it?
I have so many recipes that I love but one of my absolute favorites is my “Rochester-Style Chicken French with Broccolini.” It’s actually not a French recipe; it’s an Italian recipe similar to a piccata dish, but with a light coating of egg batter, butter, white wine, lemon, and parsley on thinly-pounded chicken, sautéed in a pan and then coated in the luscious buttery lemon sauce. It’s easy to make, tastes amazing, and everyone loves it. I serve it with sautéed broccolini, but you could also serve it with green beans or sautéed spinach, over pasta or rice, or alongside some crusty french bread to mop up the sauce. Goes great with a tangy white wine like Pinot Grigio and a simple green salad with shaved Parmesan cheese and a tangy wine vinaigrette.
This delicious Italian dish originated in Rochester, NY and is a great meal for a special occasion or any night of the week. Thin chicken cutlets are coated in a light egg and parmesan batter then sautéed until crispy and brown. They are coated in a luscious lemon butter and wine sauce and served with a side of fresh broccolini. Goes great with a crisp white wine such as Pinot Grigio and a green salad with shaved Parmesan and a tangy vinaigrette.
Ingredients
CHICKEN FRENCH:
1/4 cup olive oil/canola oil blend for sauteing (I used Colavita Garlic Oil Blend)
1 1/2 pounds boneless, skinless chicken breast cutlets
2-3 eggs
1/4 cup shredded Parmigiano-Reggiano cheese
Kosher salt and fresh ground black pepper
Dash of cayenne pepper
1 tablespoon fresh chopped parsley
1/2 cup of superfine flour (Pan Searing flour or Wondra)
LEMON BUTTER SAUCE:
1-2 garlic cloves, minced
1/2 cup white wine or sherry
1 cup chicken broth
Juice from 1 1/2 lemons (about 1/4 cup)
1 teaspoon red pepper flakes (optional)
2 tablespoons cold butter, cut into pieces
Lemon wedges, for garnish
1-2 tablespoons fresh chopped parsley, for garnish
BROCCOLINI:
1 bunch broccolini, trimmed
Lemon Butter sauce (see above)
lemon, S&P for garnish
Instructions
CHICKEN FRENCH:
Heat oil in a large non-stick saute pan over medium heat.
Meanwhile, whisk together eggs, cheese, salt and pepper, cayenne, and fresh parsley in a large mixing bowl.
Place flour in another flat bowl and season with salt and pepper to taste.
Rinse and pat dry chicken breasts, then dredge each one in flour first (left hand), then egg mixture (right hand).
Place chicken into the heated saute pan and cook for 6 minutes on one side. Flip chicken over and saute for another 6 minutes until golden brown.
Remove from pan and set aside, covered with a foil tent.
LEMON BUTTER SAUCE:
In the same skillet, saute the minced garlic for 1-2 minutes, being careful not to burn.
Add the wine and bring liquid to a boil over high heat, scraping up the brown bits in the pan.
Pour in the chicken broth, lemon juice, and red pepper flakes (if using) and let reduce by half, another 5-7 minutes.
Stir in the butter and whisk until it melts.
Add chicken back into the pan with the sauce and let simmer another 5-10 minutes.
Place chicken on serving plate with the steamed broccolini and spoon lemon butter sauce over the top of both.
Garnish with lemon wedges and additional chopped parsley if desired.
BROCCOLINI:
Steam broccolini for about 5 minutes, covered. Remove lid and steam for another 5 minutes until fork tender but still bright green.
Top broccolini with Lemon Butter sauce, additional lemon, salt, and pepper to taste.
Notes
You can also substitute veal for the chicken or artichokes for a vegetarian option.