5 Holiday Appetizer Recipes and Colavita Olive Oil Holiday Giveaway!

Holiday Appetizer Recipes & Colavita Holiday Giveaway

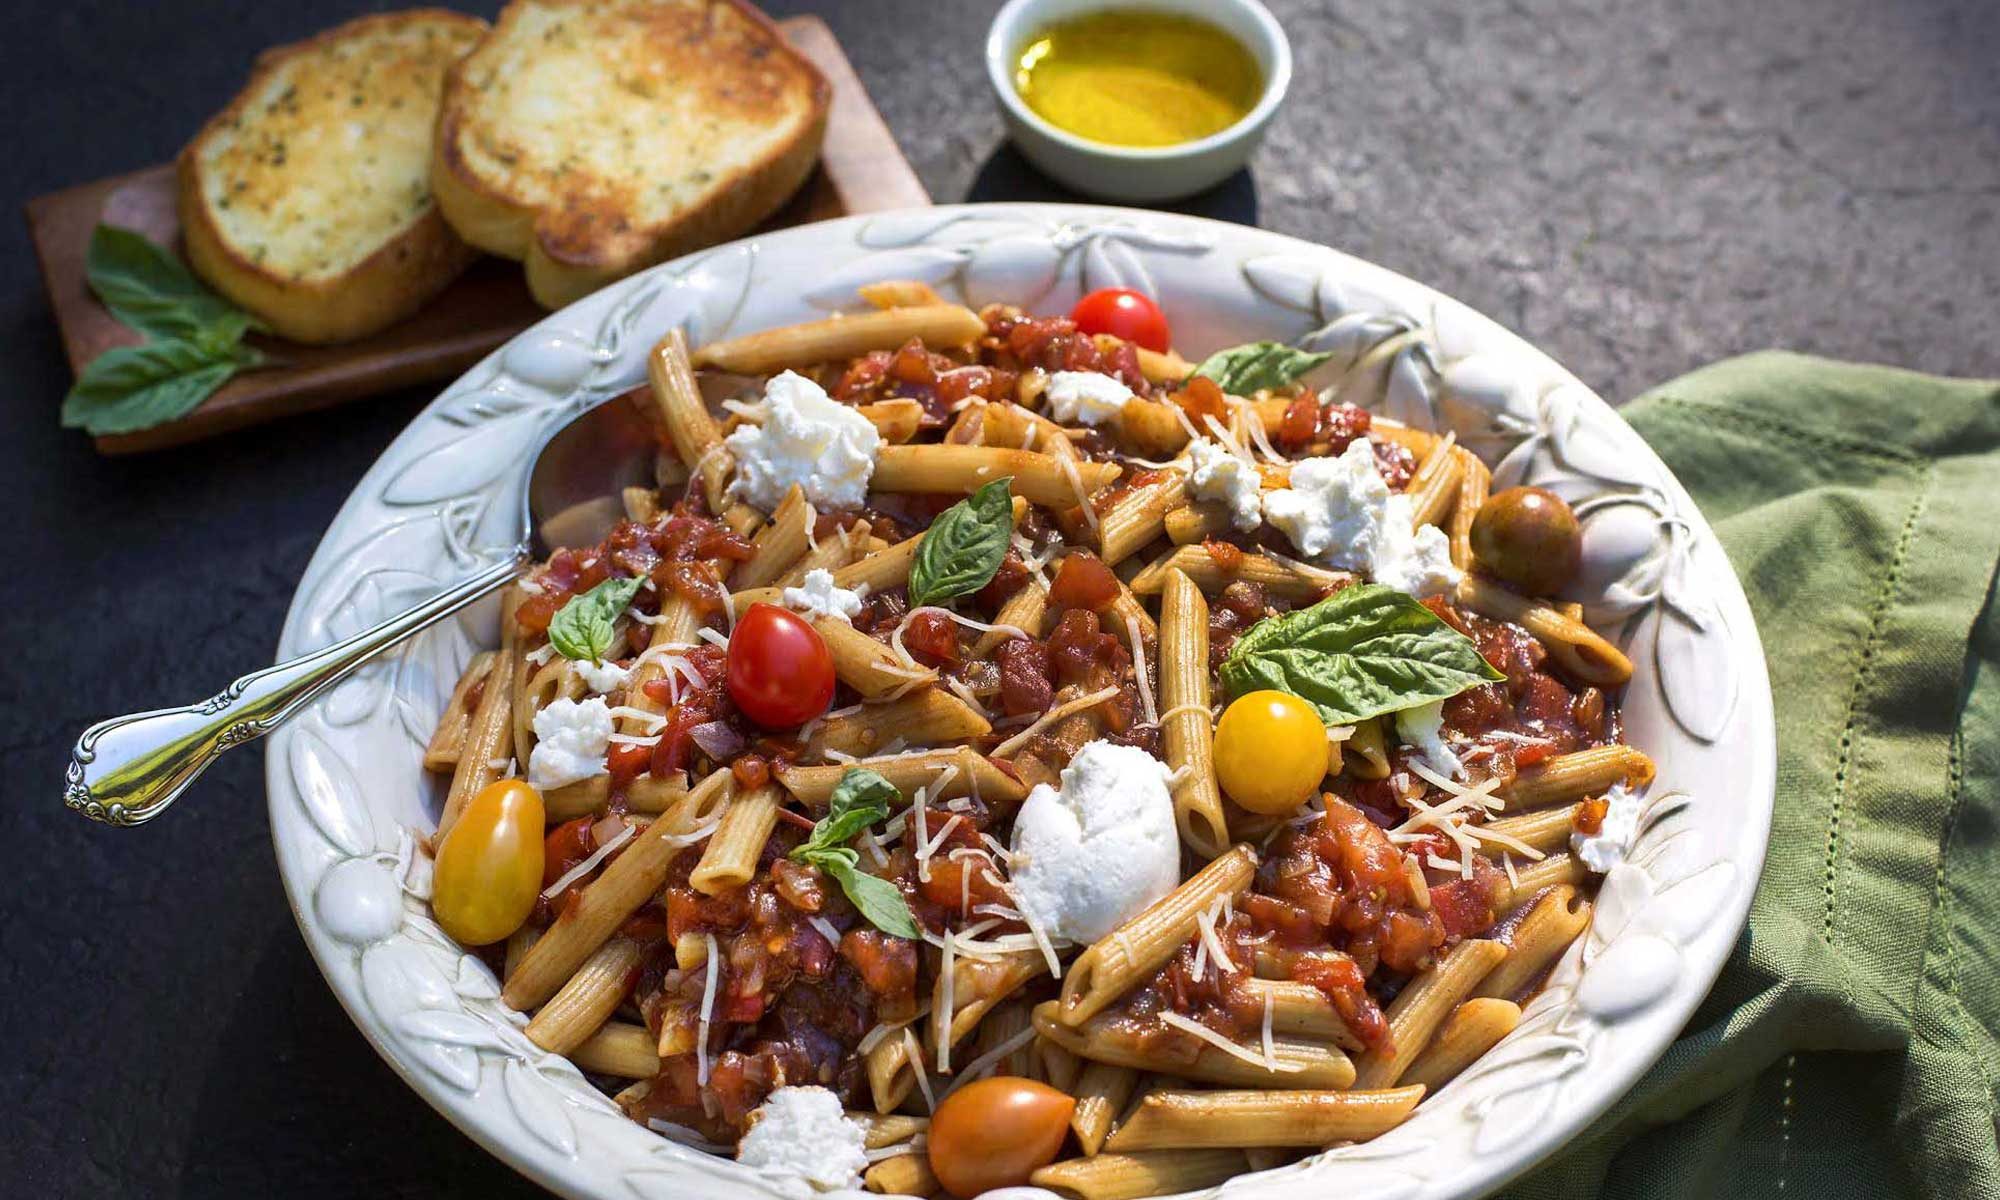
The holidays are here, and what better way to celebrate by throwing a holiday cocktail party with friends and family? I’ve teamed up with Colavita this season to celebrate with all of you, by creating  some delicious Holiday Appetizer recipes using their World Selection and Private Selection Extra Virgin Olive Oils and Flavored Cooking Oil blends. 

Colavita Olive Oil Collection

Colavita Olive Oil Giveaway!

*THIS GIVEAWAY HAS ENDED – Congratulations to Manda Kay, the winner of our Colavita holiday giveaway! Hope you cook up lots of goodies with your EVOO & Balsamic Glace! Happy Holidays 🙂

I’ve teamed up with Colavita this holiday season and giving away some of their delicious olive oils and balsamic vinegars so you can celebrate the season by cooking up some holiday goodies of your own! The winner will receive: one (1) 3/4 liter of Colavita Private Selection Fruttato EVOO, one (1) 32 oz Roasted Garlic EVOO plus one (1) 29.5 oz bottle of their Balsamic Glace. 

All you have to do to enter the giveaway is leave me a comment at the end of this post telling me what your favorite Holiday Appetizer to make with olive oil is.

*For extra entries, just follow me on twitter, facebook, pinterest, google+, tumblr or sign up for my newsletter (at the top right hand side of this page) and tell me you did so in the comments section. **As an added bonus, Colavita is also offering a 25% discount to all of my readers on any purchase in their online store. Simply enter the code ‘AG25’ to receive the discount upon checkout!

**This giveaway begins on Sunday, Dec 9th and ends Sunday Dec 23rd at midnight EST, where one person will be selected by random from the comments section below.**

Colavita World Selection Olive Oils are a new collection of extra virgin olive oils exploring the tradition in countries outside of italy from estates and farms in Australia, Argentina, California, Greece, Spain and Portugal as well as other prime olive oil growing nations. Read more about a few of my favorites that I used in my recipes below!

Colavita California EVOO


Colavita 100% Californian EVOO

The warm climate in the “Golden State” of California fosters both grape and olive cultivation perfect for wines and olive oils. The Colavita 100% Californian EVOO is pressed from olives grown in the Sacramento and San Joaquin valleys of California. The mild flavor makes this oil perfect for all culinary applications. Enrich your favorite meal with a drizzle of EVOO and a glass of wine.

Read more and get it online


Colavita Roasted Garlic EVOO


Colavita Roasted Garlic EVOO

Colavita Roasted Garlic EVOO is a product originally created exclusively for BJ’s Wholesale Stores. To many it has become the “gateway product” that exposes customers to the entire Colavita family of products. It is raved about on their online store so we wanted to share it with all of you! It’s the perfect finishing oil and wonderful for enhancing garlic already present in your dish. Try it on Garlic Bread or my Homemade Pita Chips (recipe below).

Read more and get it online


Colavita Argentina EVOO

Colavita 100% Argentina EVOO

The Argentina EVOO was a hands-down favorite at this year’s New York Wine and Food Festival. Arbequino, Coratina and Manzanilla olive cultivars grown in the Catamarca and Mendoza regions of Argentina give this EVOO and intense, fruity aroma and taste. Pair this EVOO with soups, roasted fish, grilled vegetables and red meat for an unbeatable duo.

Read more and get it online


Colavita Private Selection EVOO

Colavita Private Selection Fruttato EVOO

Colavita’s Fruttato Oil has recently been inducted into the Colavita “Private Selection” line. This line was created to highlight the products which have received the honor of being marked a Colavita family favorite. It is made by cold pressing new harvest olives just before their peak ripeness. The result is a full bodied EVOO which is slightly pungent with peppery flavor notes.

Read more and get it online


Colavita Roasted Garlic Oil Blend


Colavita Roasted Garlic Oil Blend

This Colavita Premium Blend is an all-purpose cooking, frying, and salad dressing oil which combines the delicate hint of roasted garlic in a light Canola Oil and Virgin Olive Oil Blend. It is a versatile oil that is naturally low in saturated fats and has no trans fats.

Read more and get it online


 Holiday Appetizer Recipes

Sweet and Spicy Chicken Bites

Sweet and Spicy Chicken Bites

Prep Time: 15 minutes

Cook Time: 30 minutes

Total Time: 45 minutes

Yield: 8-10

These yummy sweet and spicy Asian Chicken bites combine honey, soy sauce, orange and Sriracha to make a fun bite-sized appetizer with a delicious glaze.

Ingredients

  • 1/2 cup honey
  • 2 tablespoons brown sugar
  • 1 tablespoon Sriracha hot sauce
  • 2 tablespoons white vinegar
  • 2 tablespoons fresh orange juice, plus 1 tsp zest
  • 2 tablespoons soy sauce
  • 2 teaspoons Colavita Roasted Garlic EVOO
  • 1 teaspoon Worcestershire sauce
  • 1 tablespoon minced garlic
  • 1 pound skinless boneless chicken thighs, cut into bite sized pieces
  • 1 tablespoon Colavita Roasted Garlic EVOO
  • Fresh ground white pepper
  • Dash of red pepper flakes
  • 2 teaspoons cornstarch
  • 2 teaspoons water
  • 1 tablespoon black and white sesame seeds, toasted (for garnish)
  • 1 green onion, sliced thin (for garnish)

Instructions

  1. Combine all ingredients from honey through minced garlic and place inside a large plastic freezer bag.
  2. Cut up chicken into bite-sized pieces and trim visible fat, place in bag and marinate in refrigerator for at least an hour to overnight.
  3. Preheat oven to 425 degrees.
  4. Remove chicken from freezer bag, reserving marinade, and place on a greased baking sheet.
  5. Bake for 20 minutes, turning one time until chicken is browned nicely.
  6. Strain marinade and discard solids, and pour into a saucepan bringing to a boil. Reduce heat and cook for about 3 minutes.
  7. Combine water and cornstarch and slowly pour into glace in saucepan. Add fresh cracked white pepper and red pepper flakes, stirring well.
  8. Turn oven up to 500 degrees.
  9. Toss chicken bites with the glaze and broil for about 5 minutes.
  10. Meanwhile, toast sesame seeds for a few minutes in a pan over medium heat and chop green onion.
  11. Serve chicken bites garnished with sesame seeds and green onions with cocktail toothpicks on a small platter or small plates.

Notes

Recipe adapted from Cooking Light March 2003

https://www.theartfulgourmet.com/2012/12/5-holiday-appetizer-recipes-and-colavita-olive-oil-holiday-giveaway/


Caramelized Onion, Ricotta & Pancetta Tart

Caramelized Onion, Ricotta & Pancetta Tart

Prep Time: 15 minutes

Cook Time: 1 hour, 30 minutes

Total Time: 1 hour, 45 minutes

Yield: 8

This is a lovely tart recipe that combines sweet and savory flavors. The caramelized onions give it a sweet flavor with a hint of fig balsamic vinegar, balanced out by creamy ricotta, nutty Gruyere cheese, fresh herbs and crispy pancetta.

Ingredients

  • 1 package pancetta (8 thin slices)
  • 3 tablespoons Colavita Fruttato EVOO
  • 2 sweet Vidalia onions, halved lengthwise and sliced thin
  • 1 tablespoon brown sugar
  • Kosher salt
  • Fresh ground black pepper
  • 1-1 1/2 tablespoons Fig balsamic vinegar (Tavern Direct brand)
  • 1 cup fresh ricotta
  • 1 egg yolk
  • 1 tablespoons dried Fines Herbes (or 2 tablespoons fresh herbs)
  • 1/2 cup shredded Gruyere cheese
  • 1 frozen pie shell, defrosted, or homemade tart dough

Instructions

  1. Preheat oven to 350 degrees.
  2. Heat a saute pan over medium heat and cook pancetta until browned but not fully cooked, about 5 minutes. Drain fat from pan and place pancetta on paper towels to drain to the side. Once cooled, chop pancetta into small pieces.
  3. Peel onions, remove top and bottom stems and cut in half lengthwise.
  4. Slice onions thin (about 1/8" thick or desired thickness).
  5. In the same saute pan, add 3 tablespoons olive oil and heat over medium high heat.
  6. Add onions and cook over medium high for about 10 minutes.
  7. Sprinkle brown sugar, salt and pepper over onions and stir well, cook another 10-20 minutes, reducing heat to medium low if onions start to brown too quickly.
  8. Continue cooking and stirring onions over medium low for another 15 minutes, add a few teaspoons of water if desired.
  9. Add the fig balsamic vinegar to the onions, turn heat down to low and let cook until they are caramelized, soft and sweet, up to an hour total.
  10. Combine the ricotta, egg yolk and Fines Herbes together in small mixing bowl.
  11. Spread the ricotta mixture over the pie shell in a 9" tart pan with removeable bottom.
  12. Sprinkle Gruyere cheese over ricotta.
  13. Top with caramelized onions and pancetta.
  14. Bake the tart in the oven for approximately 30-45 minutes until pastry and filling are golden brown, and pancetta is crispy.
  15. Let tart cool on a cooling rack for 10-15 minutes before serving.
  16. Serve tart cut into wedges.

Notes

If you prefer to make your own tart dough rather than using a frozen pie crust, Martha Stewart has a great recipe for Flaky Tart Dough on her website at http://www.marthastewart.com/319448/flaky-tart-dough

https://www.theartfulgourmet.com/2012/12/5-holiday-appetizer-recipes-and-colavita-olive-oil-holiday-giveaway/

Parmesan Garlic Artichoke Dip w/ Homemade Pita Chips

Parmesan Garlic Artichoke Dip

Prep Time: 15 minutes

Cook Time: 30 minutes

Total Time: 45 minutes

Serving Size: 8

Hot Artichoke dip is one of my all time favorite holiday dip recipes, and this one is extra special, using Colavita's California EVOO, lemon zest and minced garlic with lots of gooey cheese. Instead of using mayonnaise, I substitute a light sour cream to cut some of the fat and calories. Serve with my homemade baked pita chips or crackers.

Ingredients

  • 2 tablespoons Colavita California extra virgin olive oil
  • 1 package frozen artichokes, defrosted
  • 1 tablespoon minced garlic
  • zest and juice from 1/2 lemon
  • Garlic salt with parsley (to taste)
  • Fresh cracked black pepper (to taste)
  • 1/2 cup shredded parmesan cheese
  • 1 cup shredded light monterey jack cheese, plus 1/2 cup for topping
  • 1/2 cup light sour cream
  • dash of cayenne (optional)
  • dash of paprika (for garnish)
  • 1 green onion, sliced thin (for garnish)

Instructions

  1. Heat oil in a saute pan over medium high heat. Add artichokes and minced garlic, saute about 5-7 minutes until heated through.
  2. Add lemon juice, zest, garlic salt and pepper, mix well and cook another few minutes, set aside.
  3. Meanwhile, add shredded cheeses and sour cream together in a mixing bowl.
  4. Add sauteed artichokes, garlic and lemon to cheese and sour cream.
  5. Sprinkle with a dash of cayenne (if desired), mix well and transfer to a casserole dish.
  6. Sprinkle additional monterey jack cheese over the top and bake in the oven for about 20-30 minutes until bubbly and cheese is melted on top.
  7. Let cool a few minutes, sprinkle with paprika and green onions. Serve with homemade baked pita chips (recipe follows), crackers or crudites.
https://www.theartfulgourmet.com/2012/12/5-holiday-appetizer-recipes-and-colavita-olive-oil-holiday-giveaway/

Baked Garlic Pita Chips

Prep Time: 15 minutes

Cook Time: 15 minutes

Total Time: 30 minutes

Yield: Makes 36 pita chips

Making homemade pita chips is super easy and way better than buying the storebought kind for your holiday party. Mine are made with whole wheat pita bread, drizzled with EVOO, and sprinkled with garlic salt and cumin for some extra flavor. So delicious and crispy straight out of the oven and so addicting you'll never buy them again! Serve with Hot Parmesan Garlic Artichoke Dip or any of your other favorite party dips.

Ingredients

  • 6 whole wheat pita rounds
  • 2 tablespoons Colavita California EVOO
  • 1 tablespoon garlic salt
  • 1/2 tablespoon cumin

Instructions

  1. Preheat oven to 400 degrees.
  2. Cut pita rounds into triangles (6 wedges per pita).
  3. Lay out pita wedges on a baking sheet and brush each wedge with olive oil.
  4. Sprinkle garlic salt and cumin on top.
  5. Flip over pita wedges, repeat coating with oil, salt and cumin.
  6. Place baking sheet(s) in oven and cook pita wedges for about 15 minutes (checking to make sure they don't burn!)
  7. Let cool, and serve with Hot Parmesan Garlic Artichoke Dip.
https://www.theartfulgourmet.com/2012/12/5-holiday-appetizer-recipes-and-colavita-olive-oil-holiday-giveaway/

Sage, Lemon & Garlic Cocktail Meatballs

Sage, Lemon & Garlic Cocktail Meatballs

Prep Time: 15 minutes

Cook Time: 30 minutes

Total Time: 45 minutes

Yield: 18 medium or 36 small meatballs

Serving Size: 2-4 per person

Everyone loves cocktail meatballs at holiday parties! These lovelies have a hint of lemon and sage and are light and fluffy, made with ground pork or chicken. They are first browned on the stovetop and then finished in the oven until golden brown. They're delicious alone, or dipped in a hot pepper jelly (Williams-Sonoma brand is great), balsamic pear jam (there's one by Academia Barilla that is to die for) or simply dipped in balsamic vinegar glace.

Ingredients

  • 3 slices of bread, crusts removed
  • 1/4 cup milk
  • 1 pound ground pork or chicken
  • 1/4 cup fresh sage, chopped fine
  • 1 tablespoon garlic, minced
  • 1/2 cup onion, minced
  • zest and juice from half a lemon
  • 1 cup mozzarella cheese, shredded
  • 1 teaspoon red pepper flakes
  • 1 egg, beaten
  • 1 teaspoon garlic salt
  • Fresh ground black pepper, to taste
  • 1 tablespoon Colavita Argentina EVOO
  • 1 tablespoon Colavita Roasted Garlic Cooking Oil Blend
  • Red Pepper jelly, for dipping (Williams Sonoma brand)
  • Balsamic Pear jam, for dipping (Academia Barilla brand)
  • Colavita Balsamic Glace, for dipping

Instructions

  1. Preheat oven to 350 degrees F.
  2. Remove crusts from bread and tear into small pieces in a large mixing bowl, add milk and let soak for 10-15 minutes.
  3. Mix in ground pork or chicken, sage, garlic, onion, lemon juice and zest, cheese, pepper flakes, egg, salt and pepper with soaked bread crumbs with your hands in a claw-like motion to keep meatballs light and fluffy.
  4. Roll meat mixture into small to medium size meatballs (small makes approximately 36, medium makes approximately 18).
  5. Heat olive oils in a large saute pan over medium heat (if not using cooking oil blend, mix EVOO with a tablespoon of butter to avoid temperature from getting too high and splattering).
  6. Cook meatballs in batches in the oil for about 5 minutes each batch until meatballs are browned on all sides, drain on paper towels.
  7. Once all meatballs are browned, place them on a large rimmed baking sheet coated with cooking spray to avoid sticking.
  8. Bake in the oven for approximately another 15 minutes until cooked through and to keep warm.
  9. Top with additional garlic salt (if desired), fresh chopped sage, and serve with red pepper jelly and balsamic pear jam, and Colavita Balsamic Glace for dipping.
https://www.theartfulgourmet.com/2012/12/5-holiday-appetizer-recipes-and-colavita-olive-oil-holiday-giveaway/

Crunchy Zucchini Sticks w/ Yogurt Dill Sauce

Crunchy Zucchini Sticks w/ Yogurt Dill Sauce

Prep Time: 20 minutes

Cook Time: 20 minutes

Total Time: 40 minutes

Yield: 8-10

These zucchini sticks are a great appetizer for any holiday party. They have a light crunchy coating of Japanese Panko seasoned bread crumbs and are finished with a splash of lemon and sprinkling of sea salt. They go perfect with the cool and creamy yogurt dill sauce or even a ranch dressing for dipping.

Ingredients

  • CRUNCHY ZUCCHINI STICKS
  • Colavita Roasted Garlic Cooking Oil Blend
  • 4 medium zucchini, cut into half, into long strips
  • 1 cup all-purpose flour
  • 1 cups Panko Japanese-style seasoned breadcrumbs
  • Sea salt and fresh ground pepper
  • 2 large eggs
  • Sea salt, for sprinkling, to taste
  • Lemon wedges, for garnish
  • Fresh minced dill, for garnish
  • YOGURT DILL SAUCE
  • 1 cup of Greek yogurt
  • 2-3 tablespoon minced dill
  • Sea salt and pepper, to taste

Instructions

  1. CRUNCHY ZUCCHINI STICKS
  2. Heat olive oil over medium high heat in a large deep saute pan, about 2 inches high.
  3. Trim ends off zucchini, cut in half and then in half again lengthwise.
  4. Cut zucchini into large strips about 1/2 an inch thick.
  5. Pour the flour and Panko breadcrumbs into one large bowl and season with salt and pepper.
  6. Beat eggs in a separate bowl.
  7. Dip zucchini sticks in egg, shaking off excess, then dip in bowl to coat with flour and breadcrumbs.
  8. Place coated zucchini on a baking sheet.
  9. Fry in batches until golden brown, draining excess oil on another baking sheet lined with paper towels.
  10. Squeeze some fresh lemon juice on top of zucchini and sprinkle with fresh dill and additional sea salt to taste.
  11. YOGURT DILL SAUCE
  12. In a medium bowl, mix together greek yogurt, dill, salt and pepper to taste.
https://www.theartfulgourmet.com/2012/12/5-holiday-appetizer-recipes-and-colavita-olive-oil-holiday-giveaway/

*This is a sponsored post by Colavita, but as usual, all opinions expressed are my own. I received 5 bottles of Colavita olive oil samples to create the recipes for this article and holiday promotion. Winners of the giveaway will receive the prizes directly from Colavita by mail and should expect 2-3 weeks delivery time due to the holidays. 

**All photographs, recipes and copy are copyrighted by Kristen Hess/The Artful Gourmet 2012 and cannot be republished without my permission or credit on the reposted original material from this article or website.

My Favorite Roasted Squash Recipes

I don’t know about you, but one of my favorite Fall veggies to make is Squash. I absolutely love the buttery, savory smell of it roasting in the oven and it’s so easy to make.

There are plenty of different varieties of Squash, but one of the most popular ones to make for the holidays is Butternut Squash, which has a sweet, creamy, buttery flesh. Other popular Squash varieties include Kabocha, Acorn, Spaghetti, Long Neck and Cheddar Cheese squash. There are different ways to prepare squash but the easiest and most flavorful way is by roasting it in the oven on a sheet pan for about 30 minutes to an hour. Simply cut the squash in half (or peel and cut into medium chunks or slices), scoop out the seeds and fibrous flesh and drizzle with olive oil or butter, some fresh cracked pepper and sea salt, and sprinkle on some brown sugar or drizzle with honey or maple syrup for a luscious, buttery, sweet and savory dish.

You can also sprinkle on some fresh herbs (parsley, sage, thyme, chives, tarragon) and garlic or add a dash of cayenne or cinnamon, nutmeg and cloves for some spicy layers of flavor. Some ideas for the squash leftovers are to add the roasted squash to Macaroni and Cheese, Wild Rice or Orzo, or make a healthy salad by adding it to some spinach, chard or kale, apples, some toasted walnuts or pecans, cranberries or pomegranate seeds, tossed in a light herb vinaigrette dressing. However you make it, it’s simply delicious; and perfect as a Thanksgiving side or Fall vegetarian side dish.

Check out the different types of squash on Saveur.com website and enjoy my favorite squash recipes below!

Roasted Butternut Squash with Brown Sugar Butter and Herbs

Roasted Butternut Squash with Brown Sugar Butter and Herbs

Prep Time: 15 minutes

Cook Time: 30 minutes

Total Time: 45 minutes

Yield: 4

Ingredients

  • 1 butternut squash (about 3 pounds)
  • 1 tablespoon olive oil
  • 2 tablespoons unsalted butter, cut into small cubes
  • 1 teaspoon nutmeg
  • 1 tablespoon sea salt (Pink Himalayan or Fleur de Sel)
  • Freshly ground black pepper
  • 2 tablespoons brown sugar
  • 1 tablespoon Fines Herbes (parsley, chervil, tarragon, chives)

Instructions

  1. Preheat the oven to 425 degrees.
  2. Cut the squash in half cross-wise and remove top and bottom stems. Scrape out all the seeds and fibers inside; discard. Peel the squash and cut into 1-inch chunks.
  3. Place squash on a large baking sheet, and drizzle with olive oil. Dot with small chunks of butter and sprinkle nutmeg, salt and pepper, brown sugar and herbs over squash. Mix together and place sheet in preheated oven.
  4. Bake for about 15 minutes, stir the squash around the pan. Bake for another 15 minutes and remove from oven.
https://www.theartfulgourmet.com/2012/11/my-favorite-roasted-squash-recipes/

Roasted Acorn Squash with Cayenne Maple Syrup

Roasted Acorn Squash with Cayenne Maple Syrup

Prep Time: 15 minutes

Cook Time: 1 hour

Total Time: 1 hour, 15 minutes

Yield: 4

Ingredients

  • 2 acorn squash
  • 1 1/2 tablespoons olive oil
  • 2 tablespoons unsalted butter, cut into small cubes
  • Sea salt and freshly ground black pepper (to taste)
  • 1 teaspoon cayenne pepper
  • 1 tablespoon brown sugar
  • 2 tablespoons maple syrup

Instructions

  1. Heat oven to 400F. Cut the squash in half with a large knife and scoop out the seeds and insides with a large spoon; discard.
  2. Place squash halves on a rimmed baking sheet. Drizzle with olive oil and rub on both sides of squash. Dot squash with butter and season with salt and pepper, cayenne pepper, and brown sugar. Drizzle maple syrup over the squash. Add some water to the bottom of the baking sheet (about an inch) and place in oven.
  3. Roast squash for 45 minutes to an hour, until flesh is soft and caramelized. (You may want to check on the squash half way through and brush some of the butter and syrup over the tops of the squash as it's baking to keep it from drying out.)
https://www.theartfulgourmet.com/2012/11/my-favorite-roasted-squash-recipes/

Roasted Spaghetti Squash with Toasted Pinenuts, Sage and Parmesan

Roasted Spaghetti Squash with Pine Nuts, Sage and Parmesan

Prep Time: 15 minutes

Cook Time: 1 hour, 15 minutes

Total Time: 1 hour, 30 minutes

Yield: 4

Ingredients

  • 1 small spaghetti squash (about 2-3 pounds)
  • 1 tablespoon extra-virgin olive oil
  • 2 tablespoons unsalted butter
  • 2 cloves garlic, finely minced
  • 6-8 sage leaves
  • 1/2 cup pine nuts
  • 1/2 teaspoon sea salt (or to taste)
  • Fresh ground black pepper (to taste)
  • 1/4 cup shredded parmesan cheese

Instructions

  1. Preheat oven to 375F.
  2. Pierce squash all over with a knife and roast spaghetti squash for 1 hour. When squash pierces easily with a knife, remove from oven; let cool for 10-15 minutes.
  3. Cut squash in half lengthwise, remove and discard seeds. Use a large fork to scrape the squash into long 'spaghetti-like' strands.
  4. Toast the pine nuts in a sauté pan over medium heat until golden for about 5 minutes. After the nuts are toasted, remove them from the pan and add the olive oil, a tablespoon of butter, and sage leaves. Sauté mixture until the sage leaves are crispy. Add the minced garlic and saute for another minute.
  5. Crush the sage leaves in the garlic oil mixture, and then pour it over the warmed squash. Add the additional tablespoon of butter, salt and pepper and top with toasted pine nuts and shredded parmesan cheese.
https://www.theartfulgourmet.com/2012/11/my-favorite-roasted-squash-recipes/

—–

Other Squash Recipes you may enjoy:

The Kitchn’s 10 ways to eat an Acorn Squash

Cooking Light Butternut Squash Recipes

Taste of Home Spaghetti Squash Recipes

Food 52 Butternut Squash Recipe Contest

Brown Eyed Baker’s Butternut Squash and Bacon Mac & Cheese


Roasted Cream of Tomato Soup

Roasted Cream of Tomato Soup

Last year in January, it was cold, dark, rainy, and downright miserable and depressing. Not to sound negative, but we all know that’s what winter in NYC can feel like at times. ENDLESS. I pretty much hibernated away in my apartment, and decided I needed to entertain myself somehow – what better way than to cheer myself up with some homemade creamy tomato soup?

When I was a kid, I used to love staying home sick from school – why? My Mom would wrap me up under blankets on the couch and make me a grilled cheese sandwich smothered in Campbell’s tomato soup in front of the tube, which made the misery of being sick almost OK (and kinda fun!) – and to this day, I still crave this combo for a cozy day on the couch at home.

This recipe is sure to warm you up with its creamy roasted tomato flavor. Serve it with some grilled or toasted bread with olive oil and herbs or mini grilled cheese bites for dipping in the soup (or smothering!) and maybe even a glass of red wine to warm you up even more.

Maybe Spring can wait a few more months after all.

Roasted Cream of Tomato Soup

Prep Time: 1 hour

Cook Time: 45 minutes

Total Time: 1 hour, 45 minutes

Yield: 4

Ingredients

  • 4 lbs fresh heirloom or vine-ripened tomatoes, quartered
  • 4 large garlic cloves
  • 1-2 tbsp extra-virgin olive oil, for drizzling
  • 1 tbsp butter
  • 2-3 medium shallots, finely chopped
  • 1 tsp fines herbes (parsley, chervil, tarragon, chives)
  • Kosher salt and fresh ground black pepper
  • 2 cups chicken broth (or vegetable, if you prefer)
  • 1 tbsp tomato paste
  • 1/2 c heavy cream or half and half

Instructions

  1. Preheat the oven to 350 degrees.
  2. Spread the tomatoes and garlic on a baking sheet, drizzling with olive oil and bake for 45 minutes to an hour until tomatoes are soft and skins are dark brown. Remove from the oven and let cool. Once cooled, remove skins from tomatoes and garlic and discard.
  3. Heat a large saucepan or Dutch oven over low heat. Add butter, shallots, fines herbes and salt and pepper, saute until the onions are soft. Add the roasted tomatoes and garlic, chicken or vegetable broth and tomato paste and bring mixture to a boil. Reduce heat and cover, simmer for 20-30 minutes.
  4. After 20-30 minutes, puree the soup with an immersion blender in the pan, or remove from pan and puree in a blender and pour back into the pan.
  5. Stir in heavy cream or half and half, blending thoroughly. Add additional salt and pepper to taste and garnish with a sprinkle of fines herbs (or julienned basil leaves).
  6. Serve in soup bowls with crusty garlic herb bread (or over a grilled cheese sandwich on a plate!) and a glass of red wine.
https://www.theartfulgourmet.com/2012/10/roasted-cream-of-tomato-soup/

Tomato-Soup-1

Other Tomato Soup recipes you may enjoy:

Kalyn’s Kitchen Tomato and Cilantro Soup

Michael Chiarello’s Homemade Tomato Soup 

Pioneer Woman’s Sherried Tomato Soup

Michael Symon’s Blue Cheese and Tomato Soup via The Amateur Gourmet

Average Betty’s Creamy Tomato Soup and Grilled Cheese

Italian White Bean, Vegetable & Pasta Soup

Italian White Bean, Vegetable & Pasta Soup

I always look forward to the season change to Autumn – there’s something calming to the beautiful colors of the leaves, the cooler temperatures, and sunny skies. It’s a time of harvesting and celebration of autumnal fruits of the earth mixed with a sadness for the upcoming cold Winter months.

I love the heartier, warming foods Autumn brings, and there’s nothing better than a delicious bowl of homemade soup. It reminds me of when I was a kid – my Mom would always have a big pot of soup simmering away on the stove to warm us up after a day outside romping in the leaves in the brisk, cool weather. Mom’s soup was always something to look forward to and a safe haven to come home to.

This recipe for Italian White Bean, Vegetable & Pasta Soup is a simple and nutritious soup chock full of fresh vegetables and herbspasta and Italian Great Northern white beans. It’s great topped with some freshly grated cheese, served with crusty bread and a leafy green salad.

The good news with vegetable soup is you can substitute just about any veggies you want – throw in some kale or spinach, zucchini, green beans, peas, corn; whatever your heart desires. It’s healthy and filling and warming to the soul.

And it’s definitely worth taking a romp in the leaves if you know there’s a pot of goodness on the stove waiting for you.

Italian White Bean, Vegetable & Pasta Soup

Rating: 41

Prep Time: 20 minutes

Cook Time: 50 minutes

Total Time: 1 hour, 10 minutes

Yield: 4-6

Ingredients

  • 1 tablespoon extra virgin olive oil
  • ½ cup chopped red onion
  • 3 cups chopped fresh tomato
  • 2 carrots, peeled and sliced thinly
  • 1-2 stalks diced celery
  • ½ cup chopped yellow bell pepper
  • ½ zucchini squash, cut into thin slices, halved
  • 2 cloves minced garlic
  • ½ cups dried pasta (bow-tie, penne or shells)
  • 1 can Italian white beans
  • 1 teaspoon kosher salt (or to taste)
  • ½ teaspoon freshly ground black pepper (or to taste)
  • ¼ teaspoon paprika
  • ¼ teaspoon dried ground fennel seed
  • 1 tablespoon chopped fresh parsley (or ¼ tbsp. dried)
  • 1 tablespoon minced fresh basil (or ¼ tbsp. dried)
  • 3 cups water
  • 3 cups vegetable stock (low sodium)
  • A few fresh thyme sprigs or leaves (for garnish)
  • Freshly grated Parmesan or Romano cheese (for garnish)

Instructions

  1. In a large stock pot or Dutch oven, heat olive oil and sauté onions, tomatoes, carrots, celery, bell pepper and zucchini over medium-high heat for 5 minutes. Add the minced garlic and sauté another 1-2 minutes.
  2. Add the pasta, white beans, salt and pepper to taste, paprika, fennel seed, chopped fresh herbs, water and vegetable stock; cover and simmer over medium-low for 30 to 40 minutes until cooked through and vegetables are tender. Add additional salt and pepper to taste, and extra stock or water to adjust desired consistency and thickness.
  3. Garnish with fresh thyme leaves and freshly grated cheese; serve with crusty Italian bread and a leafy green salad.

Notes

Feel free to substitute or add any veggies you like to the soup: Zucchini, Green Beans, Squash, Corn, Peas, etc.

Adjust thinness or thickness of soup by adding more or less broth and/or water to the soup while it cooks down.

https://www.theartfulgourmet.com/2012/10/italian-white-bean-pasta-soup/


Spinach, Cheese & Green Onion Pie with Dill and Fines Herbes

Spinach, Cheese & Green Onion Pie with Dill and Fines Herbes

There’s nothing better than a fresh baked pie on a dreary, Fall day. I decided to make a savory pie (quiche) with some fresh spinach, green onions, garlic, dill, Fines Herbes, eggs, milk, Parmesan and Sharp White Cheddar cheese I had on hand. So easy, and the perfect comfort food to warm you up on a gray day like today.

I used store-bought frozen pie crusts to save time and make my life easier, but if you’re in the mood to make your own pie crust, here’s a great basic recipe by Martha Stewart. If you’re into gluten-free, check out this pie crust recipe by Bea Peltre of La Tartine Gourmande. You can also make or cut the dough into smaller mini pies or use this recipe filling for a 9-inch tart if you prefer. This is a vegetarian recipe, but would also be fantastic with a little bit of crispy bacon or prosciutto and asparagus or broccoli if you’re not a spinach fan. You can also substitute Gruyere or Fontina cheese in place of the shredded White Cheddar if you like. Serve with leafy greens tossed in a balsamic vinaigrette and a latte or glass of white wine, and you’ve got a fantastic brunch! Enjoy.

Spinach, Cheese & Green Onion Pie with Dill and Fines Herbes

Rating: 41

Prep Time: 15 minutes

Cook Time: 45 minutes

Total Time: 1 hour

Yield: 6-8

Ingredients

  • 1 9-inch unbaked pie shell (or handmade pie dough)
  • 1 tablespoon olive oil
  • 1 tablespoon unsalted butter
  • 2 cloves garlic, minced
  • 2 green onions, sliced thin
  • 1- 5 ounce package fresh baby spinach leaves
  • 3 large eggs
  • 1 1/2 cups milk
  • 1 teaspoon dried dill or 1 tablespoon fresh dill
  • 1 teaspoon dried Fines Herbes
  • 1 tablespoon minced onion
  • 1/2 tablespoon garlic salt
  • Pinch of ground nutmeg (a few sprinkles)
  • Freshly ground black pepper
  • 1 1/4 cups shredded White Sharp Cheddar cheese
  • 1/2 cup grated Parmesan cheese

Instructions

  1. Preheat the oven to 375 degrees.
  2. Let frozen pie shell defrost and place in a 9 inch pie pan.
  3. Heat oil and butter in a saute pan over medium-high heat. Saute spinach for a few minutes until wilted. Add minced garlic and green onions and saute for another minute or so. Remove from heat and set aside to cool.
  4. In a medium mixing bowl, beat eggs with milk, herbs and seasonings. Add Parmesan cheese to egg mixture and stir well.
  5. Place the spinach, garlic and onion mixture over the bottom of the unbaked pie shell. Sprinkle grated Cheddar cheese over the top. Pour egg, milk and herbs mixture over the cheese, spreading evenly inside the pie crust.
  6. Bake pie in oven for 45 minutes until eggs are firmly set and crust is browned. If crust edges start browning too quickly, cover them with some foil half way through.
  7. Remove the pie from the oven and let it cool and firm up for 10-15 minutes.
  8. Slice into wedges and serve with a green salad.

Notes

*Alternative Recipe Suggestions: Add some crispy bacon or prosciutto to the quiche, substitute Gruyere or Fontina for Cheddar, or use asparagus or broccoli instead of spinach.

https://www.theartfulgourmet.com/2012/10/spinach-cheese-green-onion-pie-with-dill-and-fines-herbes/

Spinach Pie
Betcha can’t eat just one slice!

Other Spinach Pie Recipes you might enjoy:

Paula Deen’s Crustless Spinach and Cheese Quiche

Williams Sonoma Spinach and Feta Quiche

Martha Stewart Spinach and Gruyere Quiche


Potato Latkes with Sauteed Caramelized Apples with Honey and Cinnamon Sour Cream

Potato Latkes with Caramelized Honey Apples & Cinnamon Sour Cream

In the spirit of the Jewish New Year holiday Rosh Hashana, I created a delicious dish for my client miditto, to pair with some of their late Summer and early Fall wine selections for our September photo shoot. Apples and honey are often eaten together to celebrate the New Year, and are typical symbols of hope for sweet and healthy new beginnings.  What better way to serve them than with classic Potato Latkes? I used a traditional latke recipe with shredded onions and potatoes mixed with flour and egg and seasonings, then fried in oil into crispy potato cakes. Rather than serving them with traditional applesauce, I thought it would be a tasty variation to caramelize the apples in butter and brown sugar and top the latkes with the apples and a drizzle of honey and cinnamon sour cream. Delicious, heartwarming, and definitely something to celebrate! Shanah Tova. Happy New Year! 

Potato Latkes with Cinnamon Sour Cream

3 1/2 cups shredded peeled baking potato (about 1 ½ pounds)
1 1/4 cups grated onion
6 tablespoons all-purpose flour
1 teaspoon chopped fresh parsley
1/2 teaspoon onion sea salt
1/4 teaspoon freshly ground black pepper
1 large egg
1/4 cup olive oil, divided
Sour cream (for serving)
1 teaspoon cinnamon

Combine potato and onion in a colander. Drain 30 minutes, pressing with the back of a spoon until barely moist. Combine potato mixture, flour, and next 4 ingredients (through egg) in a large bowl; toss well.

Heat a large skillet over medium-high heat. Add 2 tablespoons olive oil to pan, and swirl to coat. Spoon 1/4 cup potato mixture loosely into a dry measuring cup. Pour mixture into pan, and flatten slightly. Repeat to form 6 latkes. Cook in batches by sautéing them 3-4 minutes on each side or until golden brown. Remove latkes from pan, and keep warm in an oven on low heat.

Repeat procedure with the remaining 2 tablespoons olive oil and potato mixture to yield 12 latkes total. Combine sour cream and cinnamon in a bowl. Serve with Sauteed Caramelized Apples over the latkes. (recipe follows)

Makes 6 servings.

Recipe adapted from myrecipes.com

—–

Sauteed Caramelized Apples with Honey

4 tablespoons unsalted butter
4 large red or green apples
3/4 cup brown sugar
1 teaspoon cinnamon
1 tablespoon fresh thyme leaves or fresh chopped parsley
2 tablespoons honey

Preparation

Peel and core apples and cut into thin wedges.

Melt butter over medium-high heat in a large nonstick skillet.

Add apples, brown sugar and cinnamon to pan and sauté apples about 10 minutes until lightly caramelized.

Sprinkle with chopped fresh thyme or parsley leaves and let cool. Serve over latkes with a drizzle of honey and a side of sour cream mixed with cinnamon and additional parsley or chives.

Serves 4-6.

Pair the Latkes and Caramelized Apples with a full-bodied Pinot Noir or smooth Cabernet Sauvignon. See Miditto.com for more great organic and vegan wine recommendations and selections!


Food Gone Wild! Eating Aliens & Preserving Wild Foods Press Event @ Haven’s Kitchen NYC

Preserving Wild Foods & Eating Aliens

I recently had the opportunity to attend a special press dinner in support of the upcoming launch of Jackson Landers’s book, ‘Eating Aliens’ and of Matthew Weingarten and Raquel Pelzel’s book, ‘Preserving Wild Foods.’  The dinner was a preview of some of the recipes from their upcoming book launches this Fall with Storey Publishing, held at the lovely cooking school and event space at Haven’s Kitchen in NYC. I met the Chefs and Authors, publishers and other journalists from the food media world. We learned about invasive species and foraging wild foods as well as the philosophy behind sustainable eating, hunting and cooking and sampled wild and amazingly delicious dishes from their books.

Haven's Kitchen NYC
Haven’s Kitchen NYC

So what kind of wild food did we actually eat? Delicious food it was, but stuff you wouldn’t normally think of or hear about or see on a restaurant menu for a Saturday night dinner out on the town. We ate Dandelion Jelly ToastsPan-fried Snakehead (a large, black, meaty invasive fish that is absolutely delicious and tastes like swordfish!), Lionfish with Furikake Seaweed Salt  (my favorite dish of the night, see recipe below), Chinese Mystery Snails, Fiddlehead Ferns, Wild Ramp Pesto, Pickled Garlic Scapes, Pickled Wild Chanterelle Mushrooms with Crostini (another one of my favorites! see recipe below), Homemade Sausage, and Duck Prosciutto, Mulberry Shortcakes and more delicious wild, foraged foods.

This event was a great learning, tasting and meet and greet experience with other foodies and talented chefs, hunters and cookbook authors. They made this wild food taste so good it made me want to start foraging my own wild mushrooms, ramps and berries and start canning and pickling my own gourmet creations, while supporting sustainably and reducing the amount of invasive species around the world all at the same time. I can’t say I’ll be hunting my own game or diving to catch fish with my bare hands anytime soon – I’ll leave that to the masters that I met that evening…

Jackson Landers
Jackson Landers

Jackson Landers, Author/Invasive Species Hunter/Adventurer. Check out all of Jackson’s adventures hunting, cooking and traveling and some great photos on his website The Locavore HunterPreorder the ‘Eating Aliens’ book online.

Matt Weingarten
Matt Weingarten

Matthew Weingarten is a New York City-based chef who has garnered great acclaim for his heritage comfort food. His food reflects a strong sense of place and season, and he is a committed proponent of sustainability and authenticity. He is a director on the board of Chefs Collaborative and lives in Brooklyn, New York. Read more/pre-order ‘Preserving Wild Foods’ Cookbook online.

Raquel Pelzel
Raquel Pelzel

Award-winning writer Raquel Pelzel has collaborated with professional chefs on thirteen cookbooks, including the James Beard-nominatedDamGoodSweet and Masala Farm. She is a former editor at Cook’s Illustrated and lives in Brooklyn, New York. Check out Raquel’s website for more info on her background, cookbooks and recipes.

Below are some great photos I captured from the event – CLICK HERE TO VIEW FULLSCREEN SLIDESHOW

[flickr-gallery mode=”photoset” photoset=”72157630805695356″]

Mulberry Shortcakes
Mulberry Shortcakes
Dandelion Jelly Toasts
Wild Chanterelle Mushrooms
Snakehead Fish 2
Snakehead Fish
Snakehead Fish w/ Pickled Sea Vegetables
Dried Seaweeds & Sea Vegetables
Chinese Mystery Sea Snails
Prosciutto & Rhubarb Crostini
Pickled Garlic Scapes
Pickled Beans
Pickled Beans
Lionfish2
Lionfish
Pan-Seared Lionfish w/ Furikake Seaweed Salt
Homemade Sausage & Duck Prosciutto
Dried Cured Meats2
Dried Cured Meats
Pickled Canned Veggies & Pesto
Fiddlehead Ferns
Fiddlehead Ferns

Snakeheads on a plate – Jackson Landers discussing the invasive species, Snakehead Fish, at the press dinner event, by Helenah Swedberg on Vimeo.

Another great video “Close to the Bone” – An intimate and suspenseful portrait about hunting, sustainability and love by videographer Helenah Swedburg.

Here’s a couple of my favorite recipes from the Preserving Wild Foods Cookbook that we sampled at the press event. Enjoy!

—–

Pickled Chanterelle Mushrooms 

In a large bowl, put

2 pounds chanterelle mushrooms, brushed free of dirt and debris
8 shallots, finely diced
2 tablespoons fresh thyme leaves
1tablespoon roughly chopped marjoram leaves
2 bay leaves
2 sprigs fresh rosemary

Put in a skillet

12 black peppercorns
6 allspice berries
1 whole clove
1 tablespoon fennel seeds

Toast the spices over medium-high heat until fragrant and the fennel seeds take on a bit of color, about 2 minutes. Add 1/4 cup kosher salt. Stir in the salt and continue to cook until the salt is warmed through, another 1 minute.

Pour the salt and spices over the mushrooms and herbs and set aside while you make the pickling liquid. In a medium saucepan, boil

2 cups water
1 cup fruity olive oil
1/2 cup aged sherry vinegar
1/4 cup dried currants
8 garlic cloves, thinly sliced
2 tablespoons sugar

Pour over the mushrooms, tightly cover the bowl with plastic wrap, and set aside until the bottom of the bowl is cool to the touch and the liquid is at room temperature, 1 to 2 hours.

Sterlize the jars and divide the mushrooms among the still-warm jars, leaving 1/2 inch headspace. Clean the rim of the jars with a clean kitchen towel before covering with the lids. Fasten the lid and band. Set up a hot water bath and submerge the jars placing gently on a canning rack, covering with 1 inch of water. Bring the water to a boil and process the jars for 15 minutes in a boiling water bath.

When processing is complete, use the canning tongs to transfer the hot jars to a kitchen towel-lined surface. Listen for the pops of the seals as the jars cool.

The next day, test the seal by pressing on the center of the lid (it shouldn’t bounce back). Simply put the jar in the fridge and use right away.

Store in a cool, dark, dry place preferably between 50 and 70 degrees F, for up to a year.

Eat alone or serve on an antipasti platter with smoked, cured meats, cheeses and vegetables with crusty bread or crostini and crackers.

Makes 2 pints (four 8 oz jars).

—–

Furikake Seaweed Salt (Fish and Meat Seasoning)

Furikake gives a blast of umami to the most ordinary of meals. Sprinkle it on plain sticky rice and any type of noodle, simply prepared steamed veggies and lightly grilled or pan-seared meats and fish. The sesame seeds reduce the amount of salt in the seasoning and the mineral-rich seaweeds ensure that you’re body gets what its craving when you hanker for a salty snack.

In a small bowl,

2 tablespoons fine sea salt
1 tablespoon sugar
1/4 cup warm water

and set aside. Heat a medium skillet over medium-low and pour in

1 cup sesame seeds

Toast the sesame seeds, stirring often, until they are golden, 5 to 7 minutes. Pour the salt-sugar water over the sesame seeds. The liquid will bubble violently; once it calms down, stir the sesame seeds so they don’t clump. Reduce the heat to low and continue to toast the sesame seeds for 30 seconds. The pan will be almost dry at this point. Watch the seeds, as you don’t want the sugar to burn. Remove the pan from the heat and crumble in

2 sheets nori
1 (6-inch) sheet dulse (or  1/4 cup dry dulse flakes)

Set the pan back over low heat and stir the dulse and seeds. The seaweed will soften up a bit, and then become fragrant and dry. Once the seaweed is crisp again and dry to the touch, after about 30 seconds, remove the pan from the burner and turn out the seasoning onto a large platter to cool. Put the furikake into a glass jar or shaker and use to season anything that needs a wake-up call. (This is the seasoning we sampled on the Pan-Seared Lionfish – it was absolutely AH-MAZING!!!!)

Makes about 1 1/2 cups.

—–

All photos credited to Kristen Hess, The Artful Gourmet. Copyright 2012. Please do not share or distribute any of the photos or videos on this website commercially or for personal use without permission from the respected owners.


A Perfect Summer Salad: Grapefruit, Avocado & Fennel w/ Asian Citrus Dressing

Grapefruit, Avocado and Fennel Salad

I found a delicious recipe for a Grapefruit, Avocado and Fennel Salad that I had to make – it’s a fresh combination of healthy grapefruit, avocados and fennel with a light, tangy Asian Citrus dressing made with fruit juice, honey, olive and sesame oil and a little bit of onion and mustard. The original recipe called for a pound of fennel, but I switched it up by adding sliced celery and fresh salad mix (any lettuce will do but I used an Italian Romaine, green leaf and cabbage mix). I also added some some fresh grapefruit juice into the dressing and topped the salad with some sliced toasted almonds for some nutty flavor and crunch. You could also throw in some sesame seeds or sunflower seeds which would be great too. The original recipe called for twice the amount of dressing which I cut in half, and I recommend tossing the dressing on at the end instead of all together with the salad, to avoid any mushiness and to keep the veggies fresh and crunchy. If you want to double the dressing recipe below, use half of it as a marinade for some grilled chicken or shrimp and toss either of those into the salad for a full meal. Light, tangy, refreshing and delicious! Perfect summer salad – enjoy.

Grapefruit, Avocado & Fennel Salad

Prep Time: 45 minutes

Total Time: 45 minutes

Yield: 8

Ingredients

  • Dressing:
  • 1/3 cup fresh orange juice
  • 1/8 cup fresh lemon juice
  • 1 tablespoon fresh squeezed grapefruit juice
  • 1 1/2 tablespoons olive oil
  • 1 tablespoon honey
  • 1/2 tablespoon Vidalia onion, minced
  • 1/2 teaspoon grated lemon peel
  • 1/2 teaspoon grated orange peel
  • 1/2 teaspoon minced peeled fresh ginger
  • 1/2 tablespoon Dijon mustard
  • 1/2 teaspoon sesame oil
  • Kosher salt and fresh ground black pepper, to taste
  • Salad:
  • 2 large pink grapefruits, sectioned
  • 1 fennel bulb, trimmed, cut into paper-thin slices
  • 2 celery stalks, cut into thin slices
  • 1 large avocado, halved, pitted, peeled, cut into thin slices
  • 1 bag of fresh salad mix
  • 1/2 cup sliced toasted almonds
  • Kosher salt and fresh ground pepper, to taste

Instructions

  1. To make the dressing: whisk together all the ingredients in a small mixing bowl and set aside.
  2. To make the salad: cut the grapefruits in half, and cut around the edge and in between the pith, peel and cut out the wedges, removing all pith and peel. Trim the top and bottom off of the fennel bulb, remove the core and cut into paper thin slices. Cut celery into thin slices. Halve the avocado and remove the pit. Cut thin slices and remove the outer skin.
  3. Toss salad mix into a large salad bowl, and add grapefruit wedges, fennel and celery slices and add dressing, tossing to coat. Top the salad with avocado slices and sliced toasted almonds and salt and pepper to taste.
https://www.theartfulgourmet.com/2012/06/grapefruit-avocado-fennel-salad/

Recipe inspired by and adapted from Epicurious

Fresh, Local Greenmarket Menu at Gotham Bar & Grill NYC

Gotham Bar and Grill, NYC

I had the opportunity to attend a fantastic event for a menu tasting at Gotham Bar and Grill in NYC with several other influential food bloggers this week. The special lunch event was in celebration of the launch of Greenmarket to Gotham 2012 highlighting the farms they love best and in support of GrowNYC.

For 12 weeks, Gotham will be featuring their “Greenmarket to Gotham” Menu – a Vegetarian, $25 Prix Fixe two-­course Lunch menu crafted by Chefs Alfred Portale and Livio Velardo. The dishes will change weekly, featuring one of Gotham’s favorite regional farms from Union Square Greenmarket. In their commitment to supporting NY farmers and purveyors and the city of New York, $1 of each menu will go to GrowNYC’s program Grow to Learn: The Citywide School Gardens Initiative.

Vino
Vino

Our all-vegetarian lunch featured fresh ingredients from the Union Square Greenmarket purveyor Cherry Lane Farms, and we sampled some great wines from French and NY State wineries to accompany the meal.

Green Garlic Soup
Green Garlic Soup

Green Garlic Soup made with sunchokes, leeks, spring onion and new potato parmesan emulsion

Cherry Lane Farm's Summer Squash

Cherry Lane Farm’s Summer Squash made with goat cheese stuffed zucchini blossom and smoked eggplant panisse and sauce vert

Strawberry Shortcake

and a lovely Strawberry Shortcake for dessert made with fresh market strawberries, white chocolate ganache and Thai basil ice cream

Desserts
Desserts

Visit Gotham’s Facebook Page to see the weekly Farmer’s Markets and Menus.

Check out Cherry Lane Farms seasonal products online.

—–

Gotham Bar and Grill
12 E. 12th St (btw University Plc & 5th Ave)
New York, NY 10003
212.620.4020
http://www.gothambarandgrill.com/ 

Herbivoracious: Vibrant Vegetarian Recipes & A Cookbook Giveaway!

Herbivoracious-Michael Natkin

I recently had an opportunity to meet an amazing author/chef/blogger/photographer at a recent book launch party at Candle 79, Michael Natkin. If you haven’t checked out Michael’s award-winning vegetarian blog, Herbivoracious, then you absolutely must. His creative vegetarian dishes are colorful, fresh and vibrant, and he recently published his first cookbook named after his blog. I had the opportunity to meet Michael at the party and get a signed copy of his cookbook which I absolutely adore (even though I am not a vegetarian) and loved the recipes so much that I wanted to share a few with you and offer a chance for you to enter to win a copy of the amazing cookbook yourself, giveaway courtesy of Harvard Common Press.

The cookbook is full of 150 recipes and global dishes that he has created based on inspiration from his travels around the world: Mediterranean, Middle East and Asia are some of the main areas of influence on his cooking, which has led to his unique dishes full of taste, texture, aroma and gorgeous presentation. Appetizers and Small Plates, Soups and Salads, Sandwiches and Tacos, Pasta and Noodle DIshes, Side Veggie Dishes and Desserts are all colorfully presented in this beautiful cookbook.

Whether you are an omnivore, herbivore, vegan, vegetarian or pescatarian (or just love fresh veggies, salads and healthy recipes) – I know you’ll love this cookbook as much as I do! Michael has also graciously given me two recipes from his cookbook to share with you: Over The Top Eggplant Parmesan and a cool and refreshing Watermelon, Radish and Watercress Salad (see recipes following). Enjoy!

***THIS GIVEAWAY HAS ENDED! CONGRATULATIONS TO OUR WINNER, SHEA ROSS OF ATLANTA GA! STAY TUNED FOR FUTURE COOKBOOK GIVEAWAYS 🙂 

Here’s how to enter to win a copy of the cookbook (open to US/Canadian residents only):

*** VERY IMPORTANT! *** Leave a separate comment for EACH of your entries or only one entry will be counted. For example, leave your first comment about your favorite vegetable or vegetarian dish and why you want to win the cookbook, then add another comment to say “I follow you on Twitter”, another to say “I follow you on Pinterest”, etc. If you already follow me on Twitter, Pinterest and/or Facebook let me know as well, since this counts as an entry.

*NOTE: Please make sure to provide your current email address (which won’t be visible) so I can reach you if you win.

I will randomly draw one lucky winner on Sunday, June 10 at 11 pm EST. Good Luck and enjoy the recipes from Michael’s book below!

—–

Over-the-Top Eggplant Parmigiana

Eggplant Parmesan
Eggplant Parmesan

SERVES 6
1 HOUR (40 MINUTES ACTIVE)

For this no-holds-barred eggplant parmigiana, the eggplant is breaded with panko and pan-fried, layered with fresh mozzarella and homemade tomato sauce, finished in the oven, and then topped with a dice of fresh heirloom tomatoes. It makes a satisfying entrée, and you need only add a green salad to make a celebratory dinner.

I don’t salt and drain eggplant for most uses, but it is worthwhile in this recipe. Extracting some of the liquid makes the eggplant fry up firm yet fork-tender. You don’t want any mush factor in your parmigiana.

Here’s a great tip for breading. Use one hand to put the eggplant in the flour, egg, and bread crumbs. Use the other hand to toss the eggplant in the bread crumbs and into the skillet. By keeping one hand for the wet stuff and the other for the dry, you avoid getting your hands breaded along with the eggplant!

The finest canned tomatoes for Italian dishes come from the area of San Marzano; look for that name on the can.

Ingredients

  • 3 large or 5 smaller globe eggplants (about 4 pounds total)
  • Kosher salt
  • 1 tablespoon extra-virgin olive oil
  • 2 garlic cloves, minced
  • 2 cups canned crushed tomatoes (preferably San Marzano)
  • 1 cup all-purpose flour
  • 3 cups panko bread crumbs
  • 4 large eggs, beaten
  • Vegetable oil, for pan-frying
  • 12 ounces mozzarella, thinly sliced
  • 1 cup freshly grated Parmigiano-Reggiano
  • 2 handfuls fresh basil leaves, coarsely chopped

To Serve

  • 1 1⁄2 cups diced vine-ripened tomatoes (only truly good, ripe tomatoes will do here; don’t use those supermarket ones ripened with ethylene gas)
  • 1 handful fresh basil leaves, coarsely chopped
  • Kosher salt
  • Freshly ground black pepper

Directions

  1. Peel the eggplants and slice lengthwise into planks a scant 1⁄2 inch thick. Layer in a colander with a heavy sprinkling of kosher salt between each layer, top with a plate, and weight with some cans. Set aside on a plate to drain for at least 30 minutes. Wipe off excess salt with a paper towel.
  2. Heat the olive oil in a medium-size saucepan over medium-high heat. Add the garlic and sauté until fragrant, about 30 seconds. Add the crushed tomatoes and bring to a simmer. Reduce the heat and simmer for 15 minutes, while you make the rest of the recipe. Don’t add salt, because the eggplant will still have residual salt from the draining process.
  3. Set up a rack or baking sheet covered with paper towels for draining the fried eggplant. Butter a 9 x 13-inch baking dish and preheat the oven to 400°F.
  4. Set up for dredging, with plates for the flour and bread crumbs and a shallow bowl for the eggs. Heat a good 1⁄4 inch of vegetable oil in your biggest skillet over high heat. Working with two slices of eggplant at a time, pat them in the flour until they have a dry coating, then drag through the egg, and finally press both sides in the bread crumbs, covering thoroughly. Place them in the skillet, where they should start sizzling immediately. Don’t pack them in too tightly in the skillet; leave yourself some room to work. Flip when brown, about 2 minutes, then brown on the other side. They should be fork-tender at this point (the oven time is just to melt the cheese, not cook the eggplant). Transfer the eggplant to the rack to drain. Repeat with the remaining eggplant, adding more vegetable oil as necessary.
  5. To assemble, set down your first layer of eggplant in the prepared baking dish, and top each slice with a couple tablespoons of tomato sauce, a piece of mozzarella, a bit of Parmigiano, and a bit of basil. Build up three layers, finishing with cheese.
  6. Bake until the cheese is thoroughly melted, about 20 minutes.
  7. To serve: Toss the diced tomatoes with the basil and a pinch of salt. Put an eggplant stack on each plate, and top with 1⁄4 cup of the tomato salad and a grind of fresh black pepper.

—–

Watermelon Radish and Watercress Salad

Watermelon, Radish and Watercress Salad

GLUTEN-FREE
SERVES 4
10 MINUTES

This delicious salad is driven purely by its beautiful ingredients; all you have to do is take a little care to arrange them nicely.

Watermelon radishes are green on the outside, but when sliced you see that they are intensely red in the middle, looking much like tiny watermelons. If you have a mandoline, use it here: It is excellent for slicing them thinly and evenly.

If you have difficulty finding watercress, check the refrigerated produce section of upscale markets. They often carry hydroponic watercress, making this peppery green, once strictly seasonal, available year-round. Look for bright, fresh leaves with no signs of wilting. The tart cress makes a great foil for the sweet figs and pomegranate seeds (or more technically, arils).

Ingredients

  • 1 large watermelon radish, very thinly sliced
  • Extra-virgin olive oil
  • 4 handfuls watercress, rinsed and dried
  • 1 lemon
  • 4 ripe fresh figs, halved
  • 1⁄4 cup pomegranate seeds
  • 16 shavings Parmigiano-Reggiano or other hard aged cheese
  • 12 toasted walnut halves
  • Flaky sea salt (such as Maldon)

Directions

  1. Arrange a circle of watermelon radish slices on each of four chilled plates. Drizzle with a little olive oil.
  2. Toss the watercress with a bit of the olive oil and a squeeze of lemon juice. Place a fluffy handful on each plate. This is the critical step to making the salad look nice—aim to make a tall, high mound in the center, and don’t let it spread out.
  3. Add 2 fig halves, 1 tablespoon pomegranate seeds, 4 cheese shavings, and 3 toasted walnut halves to each plate. Sprinkle with flaky sea salt and serve immediately.

—–

Get more great recipes from Herbivoracious

Herbivoracious is also available in an enhanced e-book edition, with 25 videos featuring Natkin touring ethnic markets, introducing ingredients and showing how to choose them, and preparing recipes from the book. The e-book will also offer social media functionality for sharing recipes, photos, and video on Facebook, Twitter, and blogs.

Click here to download a press release.