As the weather cools down in the late fall season, there’s nothing I love more than cooking a big one-pot comforting dish on a Sunday afternoon. One-pot dishes are so easy to make, and the enticing smells from the oven are enough to wipe out any winter blues that might be coming on. Welcome my Wine-Braised Chicken with Bacon, Veggies and Herbs.
I love making hearty braised dishes with meat and vegetables because they’re easy and so good, especially in my KitchenAid® 6.0Qt Cast Iron Cookware.It’s big enough to make a meal for a crowd, and it’s enameled with cast iron inside which makes it the perfect vessel to cook slow braised dishes, roasts, stews, soups, chilis and any one-pot meals. It even has a grill pan inside the lid! How cool is that?
My Wine-Braised Chicken has tons of goodness inside: chicken thighs, shallots, bacon, cipollini onions, garlic, fresh rosemary and thyme, bacon and carrots. It’s slow-cooked into a big pot of deliciousness with white wine, chicken broth, and then a reduced au jus cream sauce served over the top.
This is such a delicious and easy recipe to make and it’s pure comfort food perfect for a chilly Winter day. The best part is you only have to cook and clean in one pot, which is awesome. (More time to snuggle under the blankets and watch movies by the fireplace!)
I’d love to hear what you would make in your KitchenAid® Cast Iron Cookware by experimenting with my recipe. Would you use a different meat, like beef or pork? What vegetables would you substitute or add? Would you try a different sauce for the recipe?
Share your take on this Wine-Braised Chicken recipe on the KitchenAid Instagram page using #MadeWithKitchenAid for a chance to be featured!
Now that summer is coming to an end, I thought it would be appropriate to make one last dish to celebrate the season. And what would be better than something with fresh seafood and something that requires minimum cooking effort in this scorching weather?
I decided to make a delicious Seafood Corn Chowder, chock full of seafood – lobster, scallops, crabmeat, shrimp, fresh corn,
and all kinds of fresh veggies – multi-colored bell peppers, onions, potatoes, garlic and spices, all cooked in a chicken stock finished with cream and garnished with fresh chives and parsley.
I made this chowder in my gorgeous KitchenAid®Professional Seven-Ply 8-Quart Stockpot, which is perfect for making soups, stews, chili, and one-pot dishes for a crowd.
It’s extra large and made out of multi-layered stainless steel so it’s sturdy and heats up quickly and evenly. It also has optional pasta and steamer inserts, which I love, that fit right inside the large pot and lid. This is definitely one of my favorite go-to pots that I use for everything and it all fits conveniently together with a stainless steel lid to seal in moisture and heat.
There’s nothing better than a big pot of soup in the Winter – and this has been the longest one..ever. I’ve always loved my Gram’s Minestrone soup – chock full of veggies, ground beef and pasta and thought I would make a spin on it by making it a combination of her Minestrone and Italian Wedding Soup just for fun. I made a batch of chicken meatballs with lots of parmesan cheese, garlic, onion and fresh parsley..browned them up a bit before adding some kale, carrots, chickpeas, chopped tomatoes and orzo and let it all simmer up into a big batch of healthy, heartwarming goodness. I topped it off with some extra grated parmesan, sea salt and fresh cracked pepper and mopped it up with some fresh baked Italian Rosemary bread from Todaro Bros. down the street.
Who says you can’t have some fun during a blizzard? I’m happy as a clam right now. Or as a meatball, bathing in that gorgeous broth with veggies.
1 teaspoon Tony Chacere's Creole Seasoning (or sub seasoned salt or poultry seasoning)
pinch of cayenne
pinch of nutmeg
dash of red pepper flakes
1 teaspoon Deliciously Dill Blend (The Spice Hunter)
Sea salt
Fresh ground black pepper
Soup:
2 tablespoons olive or canola oil
1 medium onion, chopped
1 tablespoon minced garlic
20 baby carrots, sliced 1/4 inch thick
4 cups chicken broth
2 cups water (use 3 or 4 if you like a thinner soup)
1 (28 ounce) can chopped Italian tomatoes
1 bunch kale, torn (ribs and stems removed)
1 can chickpeas
1 cup orzo or other small pasta (ditalini, pastina, risi or stars)
Instructions
Make the meatballs:
Preheat a dutch oven over medium heat and spray with some cooking oil.
Add all ingredients into a large mixing bowl and stir. Mix together well with your hands and roll into small meatballs (about 1 1/2 inch size), place on a baking sheet or plate.
Brown meatballs in batches for about 6-8 minutes until lightly golden brown (but not cooked all the way through).
Remove meatballs, cover and set aside while prepping soup ingredients.
Make the soup:
Add additional 2 tablespoons of oil to the Dutch oven and saute onions, garlic and carrots for about 6 minutes until soft and translucent.
Stir in broth, water, and tomatoes; cook over medium-high for about 5-7 minutes until liquid comes to a boil.
Add kale, chickpeas, orzo to the pot, let soup come to a steady rolling boil for about 5 mins or so.
Add browned meatballs, cover and let simmer for about 20-30 minutes over medium-low heat, stirring occasionally until orzo and meatballs are cooked through. Add additional salt and pepper to taste.
Serve in large soup bowls topped with additional grated parmesan cheese and fresh chopped parsley for garnish and a side of crusty Italian bread or Rosemary Foccacia bread for mopping up the soup.
Don't forget the wine, fireplace, and your Valentine to make it a complete meal.
Winter is always a little bit depressing without any sunshine and constant grey skies and snow storms every other day in New York City. But there’s something cozy about it too, when I’m pent up in my apartment with not much to do other than cook, watch a good movie and snuggle under a blanket with my heater on. For my birthday last November my Mom got me a gorgeous Wolfgang Puck cast iron ceramic enamel braising pan which I’ve been dying to make a big pot of delicious comforting something or other in. I’ve had a craving for a warm and homey stew and had some Williams-Sonoma Beef Stew Braising Sauce on hand, so it was the perfect excuse to get cooking and cure the winter chills outside.
I rounded up some beef chuck, carrots, potatoes, chopped tomatoes, onions and baby peas and threw it all in the big pot. I added a dark Irish stout beer (Guinness is the best!) and beef broth to give it a hearty savory flavor along with the stew starter which has a nice balance of spices in it like cumin, curry and paprika, dark beer, fire-roasted red peppers, chiles and tomatoes for a little extra kick. After a few hours in the oven it’s just a big pot of yum. Kinda like a big hug. Now that’s worth staying in for.
Cut the beef into 1-inch cubes, dredge with seasoned pan-searing flour and brown in 2 tablespoons of canola oil over medium high heat for about 5 minutes, turning to brown on all sides. Remove beef from pan with a slotted spoon and set aside.
Add onions to the pan along with another 2 tablespoons of canola oil and saute for about 5 minutes until tender. Add the 2 tablespoons of minced garlic and saute another minute.
Add Worchestershire sauce and beer and cook with onions for a few minutes, stirring and scraping pan to loosen the brown bits. Add the beef broth and cook for another few minutes.
Return the seared beef to the pot, add the chopped tomatoes, carrots, potatoes and Beef Stew starter and salt and pepper to taste, and bring to a boil.
Cover and throw the pot into a preheated 350 degree oven and let the goods simmer for about an hour. Remove from oven, stir and reduce heat to 300 degrees. At this point, if the stew is not thick enough for your liking, add a slurry of starch or roux thickener mixed with some water (about 1/4 cup) into the stew and stir well throughout. You can also smash a few of the potatoes to thicken it up a little bit. Place pot back in the oven braise for another 30 minutes to an hour. Defrost the baby peas and add into the pot the last 5 minutes or so.
Let the stew cool on top of the stove uncovered for about 15-20 minutes to let it thicken. Serve with rye bread or Irish Brown Bread and a glass of Guinness or dark beer of your choice.
1 cup seasoned pan-searing flour (Wegmans or Wondra)
4 tablespoons canola oil, divided
2 pounds boneless chuck beef, cut into 1-inch cubes
1 ½ large onions, sliced
2 tablespoons minced garlic (3 or 4 cloves)
1 tablespoon Worchestershire sauce
1 bottle Irish stout beer (like Guinness)
1 8.5 ounce jar Williams-Sonoma Beef Stew Braising Sauce
1 14-ounce can low-sodium beef broth
4 Roma tomatoes, chopped fine in a food processor
2 cups baby carrots or large carrot chunks
6 Yukon Gold potatoes, quartered into chunks
1 package frozen baby peas
¼ cup starch or roux thickener and water slurry (optional)
Salt and pepper, to taste
Fresh parsley, chopped, for garnish
Rye or Brown Bread for serving
Instructions
Preheat the oven to 350 degrees F and heat 2 tablespoons of canola oil over medium-high heat in a large cast iron enamel braising pan or Dutch oven.
Cut the beef into 1-inch cubes, dredge with seasoned pan-searing flour and brown in 2 tablespoons of canola oil over medium high heat for about 5 minutes, turning to brown on all sides. Remove beef from pan with a slotted spoon and set aside.
Add sliced onions to the pan along with another 2 tablespoons of canola oil and saute for about 5 minutes until tender. Add the 2 tablespoons of minced garlic and saute another minute.
Add Worchestershire sauce and beer and cook with onions for a few minutes, stirring and scraping pan to loosen the brown bits. Add the beef broth and cook for another few minutes.
Return the seared beef to the pot, add the chopped tomatoes, baby carrots, potatoes and Beef Stew Braising Sauce, salt and pepper to taste, and bring to a boil.
Cover and place the pot into the oven and let the goods simmer for about an hour. Remove from oven, stir and reduce heat to 300 degrees. At this point, if the stew is not thick enough for your liking, add a slurry of cornstarch, flour or roux thickener mixed with some water (about 1/4 cup) into the stew and stir well throughout until desired thickness (keep in mind it will also thicken as the stew sits awhile and cools). You can also smash a few of the potatoes to thicken it up a little bit.
Place pot back in the oven braise for another 30 minutes to an hour. Defrost the baby peas and add into the pot the last 5 minutes or so.
Let the stew cool on top of the stove uncovered for about 15-20 minutes to let it thicken. Serve with rye bread or Irish Brown Bread and Irish grassfed butter (Kerrygold is my fav!!) a glass of Guinness or dark beer of your choice.
Chili is one of my go-to recipes when the Autumn leaves start turning colors and the weather starts getting cooler – especially on a crisp weekend night cuddled under some fuzzy blankets with me and my kitty cat watching some movies. Or with a group of friends watching everyone go crazy on college football game day. There’s nothing better than that. And, it’s an easy thing to make and dishes out a big dose of comfort. The best part is once I make a big pot, I can eat it for a few days and then throw the rest in the freezer for later (unless all my crazy friends dig in and there’s nothing left to show for it which actually makes me the happiest!)
I decided I wanted to make a spicier version of the chili I normally make and added a kick to it with some Cajun/Creole seasoning Tony Chacere’s (or you can try Emeril’s Southwest Essence) which adds an extra layer of spicy, savory flavor with green and red bell pepper and celery flavors. I added some red pepper flakes, diced green chilies and a few tablespoons of hot sauce to the mix and used half ground chicken (you can also use ground turkey) / half ground beef and threw in some garlic, onions and black beans to make it a little healthier too. If you want to make it even more authentically Cajun, you could throw in some Andouille sausage or corn or green and red peppers for even more flavor and texture.
It’s perfect on its own, but you can cool the heat a little bit with some sour cream and shredded cheddar cheese on top. If you want it even spicier, just throw in a little extra hot sauce – I love Evil Ooze by Hotline Pepper Products (my friend Kerry Stressel makes it in Texas) and classic Tabasco hot sauce, or you can do a little milder sauce like Frank’s RedHot or Cholula) and top with extra diced chilies or sliced jalapenos. I usually serve my chili with plain crackers or corn chips, but you could also make some yummy cheesy garlic bread to serve with it instead. Cozy up and enjoy! 🙂
1 tablespoon Cajun or Creole seasoning (Tony Chacere's)
2 tablespoons chili powder
2 tablespoons cumin
2 tablespoon paprika
1 tablespoon cayenne pepper
1/2 tablespoon red pepper flakes
2 cups low-sodium chicken or vegetable stock
1 cup water
1 -28 ounce can crushed tomatoes
1 -15 ounce can tomato sauce or 1/2 cup chopped fresh tomatoes
2-3 tablespoons hot pepper sauce
1 can black beans, drained and rinsed
1 can diced green chilies, drained (or 1 fresh jalapeno, seeded and diced)
1 cup of corn kernels (optional)
Salt and freshly ground black pepper, to taste
Shredded cheddar cheese and sour cream, for garnish
Extra hot sauce, diced chilies or jalapeno (if desired)
Crackers, garlic toast or corn chips, for serving (if desired)
Instructions
Heat the olive oil in a large pot and saute the chopped onion until soft and translucent, for about 5-6 minutes. Add the minced garlic and saute for another 30 seconds to 1 minute.
Add the ground chicken or turkey and beef to the pot and mix with the garlic and onion, stirring with a wooden spoon to brown the meat. Continue to cook until all the meat is brown and no longer pink, for about 8-10 minutes. Drain the fat off the meat into a colander and place meat and onion-garlic mixture back into the pan.
Add the Cajun-Creole seasoning and all the dry chili spices and red pepper flakes, stir and cook for another minute or so.
Pour in the stock, water, crushed tomatoes, tomato sauce (or chopped fresh tomatoes) and hot sauce; turn up the heat until chili starts to bubble, and lower heat to a simmer.
Stir in black beans and and diced green chilies, cover and simmer for at least 45 minutes, up to 2 hours, stirring occasionally.
Add salt and freshly ground black pepper to taste. (Note: You can play with the thickness of the chili by adding additional water or stock as it simmers, but be sure to taste and adjust the seasonings to your liking if you do this.)
Serve with shredded cheddar cheese and sour cream for garnish. Top with some extra diced chilies or jalapenos for extra zing if desired.
Notes
You can play with the desired thickness of the chili by adding additional water or stock but be sure to taste and season it to your liking if you do this.)
You can also add some fresh or canned corn to the chili while cooking.
Serve with shredded cheddar cheese and sour cream for garnish. You can also top with some extra diced chilies or jalapenos for extra zing if desired.
Fresh cilantro or lime adds great flavors as garnish for a little bit more green.
Enjoy with a big hearty glass of red wine or a beer and some crackers, corn chips or cheesy garlic bread.
On a recent trip up to Rochester, I had the pleasure of discovering a lovely little Italian place called the Mona Lisa Café. My mother and I stopped in there on a whim one afternoon for a cappuccino, but after entering the café and seeing all the delicious pastries and gelato and enticing smells of amazing food, we decided to stay for lunch instead.
We sat at a table by a large window and enjoyed a glass of wine while perusing the menu. At first we thought we would just split an appetizer, but there were just too many tasty choices on the menu to settle for just one item. We opted for a delicious Italian Panini and their amazing Greens and Beans appetizer made with escarole and cannelloni beans sautéed with heaps of garlic, savory Italian sausage, white wine, olive oil and bread crumbs topped with Parmesan cheese. WOW. Best thing I’ve ever tasted! I loved this dish so much I was inspired to recreate it at home, and my own version of Garlicky Greens and Beans with Sausage I now present to you. Delicioso!
2 cups Fingerling potatoes, peeled and cut into quarters or chunks
1 1/4 pound sweet Italian sausage (may use chicken or turkey sausage if you prefer)
4 tablespoons extra-virgin olive oil, divided
6 garlic cloves, sliced or chopped fine
1 teaspoon dried red pepper flakes
1 large bunch of greens (I used collards, but you can use spinach, kale, escarole, or mustard/turnip greens)
1 can white cannellini beans, drained and rinsed
2 1/2 cups chicken broth
1/2 cup water
1 tablespoon dried minced onion
2 tablespoons white wine vinegar
Sea salt and freshly ground pepper, to taste
1/2 cup shredded Parmigiano-Reggiano cheese, plus extra for garnish
Crusty bread or garlic bread, for dipping
Instructions
Rinse and drain potatoes, cut into quarters or chunks, depending on the size.
Bring a large pot of water to a boil and cook potatoes for about 10-12 minutes until tender. Drain and set aside.
At the same time, add 1/2 inch of water to a large saute pan over medium heat. Add sausages to and cover with a lid, simmering for 10 minutes (without turning). Remove the lid, turn sausages over, and cook for another 5 minutes until almost cooked through.
Meanwhile, measure out your liquids and dry seasonings and set aside.
Chop the garlic.
Wash the greens well and drain. Remove and discard the veins and stems, cutting leafy green parts off on either side into 1-inch strips.
Remove sausages from pan and cut into coin-sized chunks. Drain fat from pan and wipe down.
Add 1 tablespoon of oil into the same pan and return to medium heat. Add garlic and red pepper flakes, and saute while stirring often, for about 1 minute being careful not to burn garlic.
Add additional 3 tablespoons of oil and start sauteing greens by the handful until they are just starting to wilt.
Add cannellini beans, sausage, potatoes, broth, water and minced onion; bring ingredients to a boil. Reduce heat, cover and let simmer on low for 10-15 minutes to let the flavors meld.
Remove lid, add 2 tablespoons of white wine vinegar, and let simmer for another 5 minutes or so until the liquid reduces a little (you can simmer it down longer if you like a thicker stew or add more broth/water if you like a thinner stew).
Season with salt and pepper to taste.
Serve the Greens and Beans in large bowls topped with shredded Parmigiano-Reggiano cheese and crusty bread for dipping in the broth.
Delicioso!
Notes
Substitute sweet Italian sausage with chicken or turkey sausage or omit all together and adjust water/broth down to 2 cups if you prefer a vegetarian dish.
Mona Lisa Cafe uses breadcrumbs and white wine in their dish which I omitted in my version because of the starch from the potatoes and adding a splash of white wine vinegar which gives it a nice tangy flavor to the broth. Feel free to experiment by topping it with toasted breadcrumbs and using some wine in place of the water in my recipe, but you'll need to adjust the amount of liquids down if you omit the potatoes from the dish so it's not too watery/brothy. The consistency should be of a nice light stew with a balance between the meat and vegetables and the broth.
Serve with a dry white Italian wine such as Pinot Grigio and crusty bread for dipping up the broth.
I always look forward to the season change to Autumn – there’s something calming to the beautiful colors of the leaves, the cooler temperatures, and sunny skies. It’s a time of harvesting and celebration of autumnal fruits of the earth mixed with a sadness for the upcoming cold Winter months.
I love the heartier, warming foods Autumn brings, and there’s nothing better than a delicious bowl of homemade soup. It reminds me of when I was a kid – my Mom would always have a big pot of soup simmering away on the stove to warm us up after a day outside romping in the leaves in the brisk, cool weather. Mom’s soup was always something to look forward to and a safe haven to come home to.
This recipe for Italian White Bean, Vegetable & Pasta Soup is a simple and nutritious soup chock full of fresh vegetables and herbs, pasta and Italian Great Northern white beans. It’s great topped with some freshly grated cheese, served with crusty bread and a leafy green salad.
The good news with vegetable soup is you can substitute just about any veggies you want – throw in some kale or spinach, zucchini, green beans, peas, corn; whatever your heart desires. It’s healthy and filling and warming to the soul.
And it’s definitely worth taking a romp in the leaves if you know there’s a pot of goodness on the stove waiting for you.
Freshly grated Parmesan or Romano cheese (for garnish)
Instructions
In a large stock pot or Dutch oven, heat olive oil and sauté onions, tomatoes, carrots, celery, bell pepper and zucchini over medium-high heat for 5 minutes. Add the minced garlic and sauté another 1-2 minutes.
Add the pasta, white beans, salt and pepper to taste, paprika, fennel seed, chopped fresh herbs, water and vegetable stock; cover and simmer over medium-low for 30 to 40 minutes until cooked through and vegetables are tender. Add additional salt and pepper to taste, and extra stock or water to adjust desired consistency and thickness.
Garnish with fresh thyme leaves and freshly grated cheese; serve with crusty Italian bread and a leafy green salad.
Notes
Feel free to substitute or add any veggies you like to the soup: Zucchini, Green Beans, Squash, Corn, Peas, etc.
Adjust thinness or thickness of soup by adding more or less broth and/or water to the soup while it cooks down.
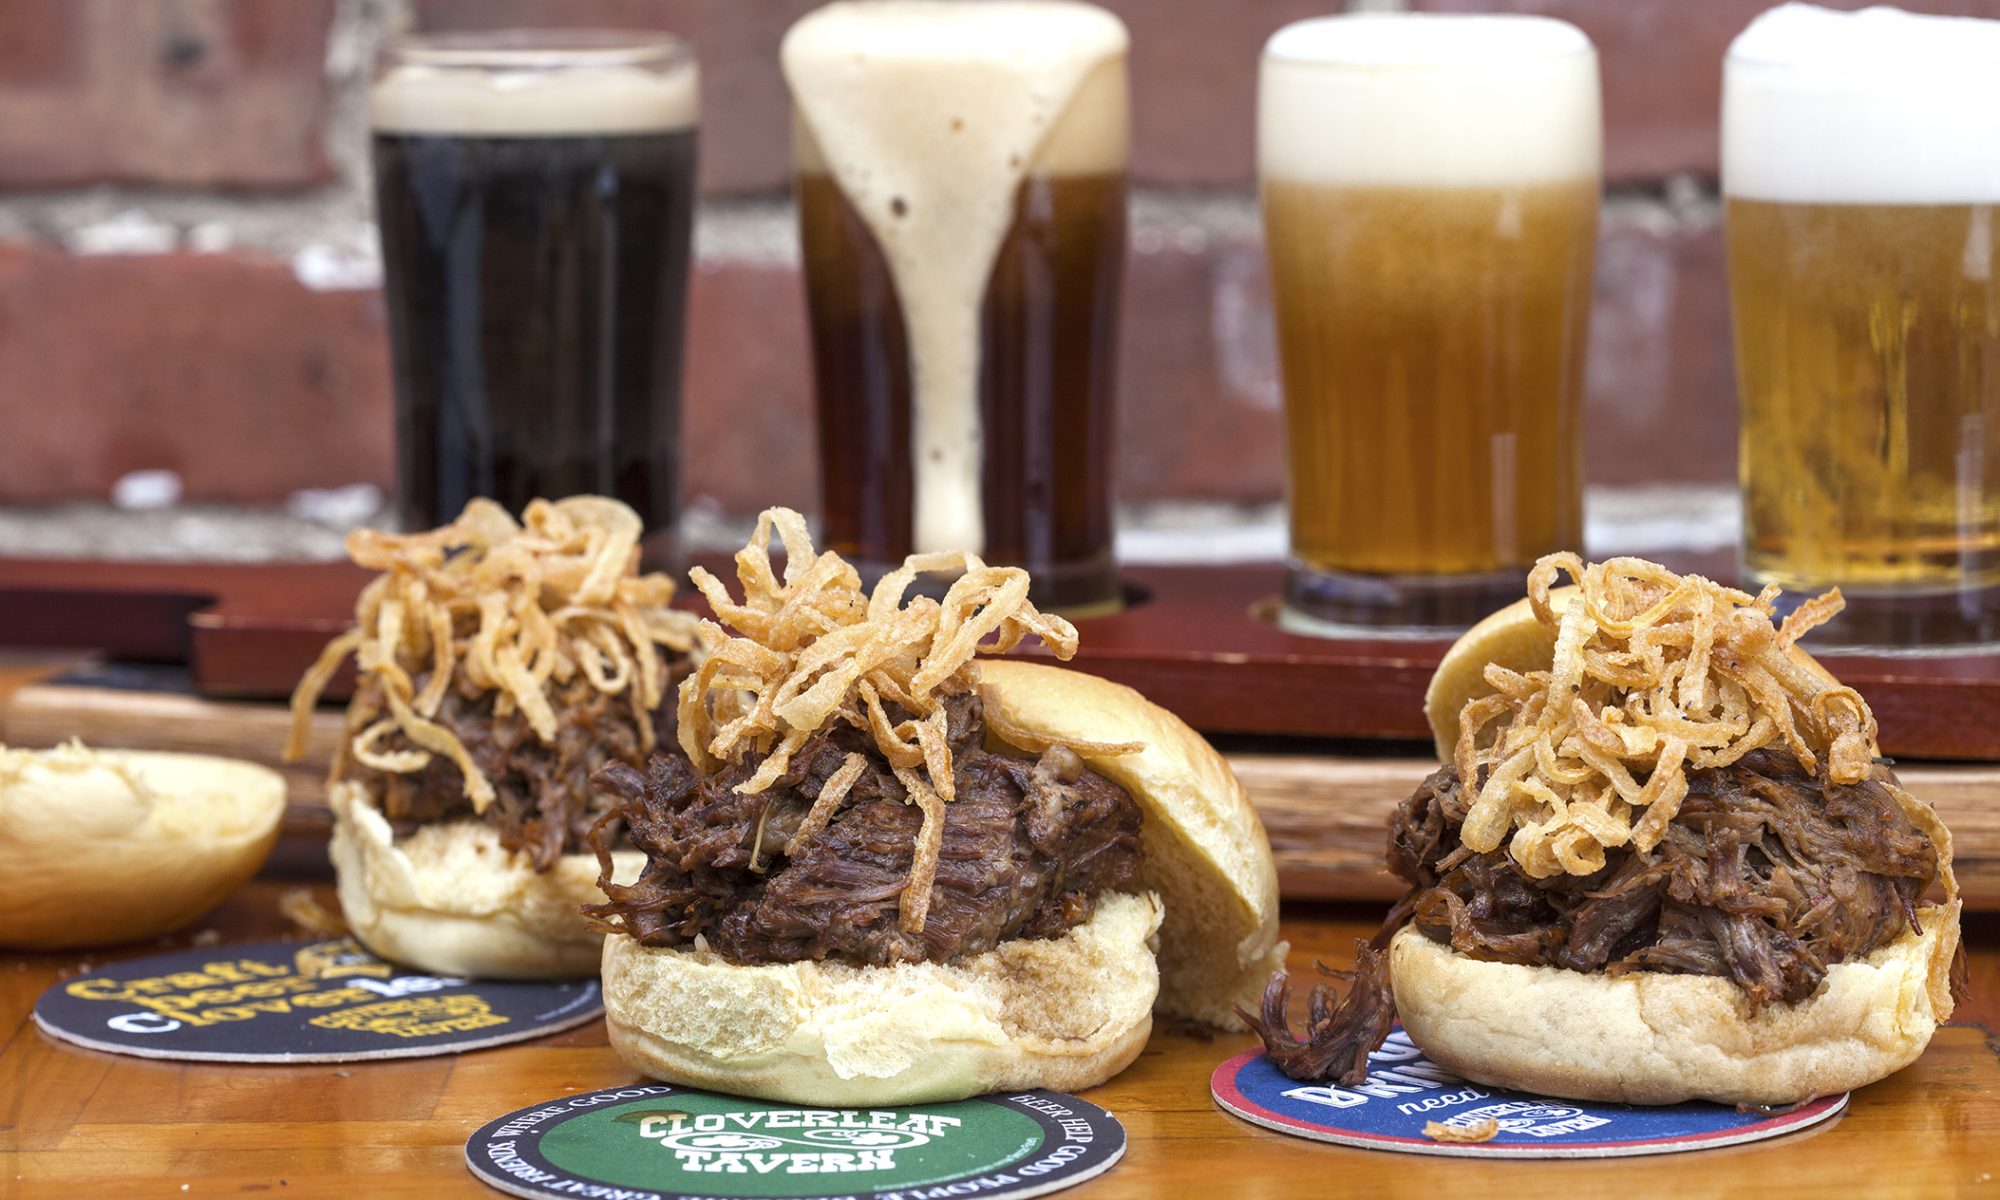
It’s that time of year again as Summer is ending and the weather is changing, perfect time of year for game day parties, Labor Day parties and heartier fare for a crowd. When I think about the perfect food to celebrate early Fall with friends and family, Savory Slow-Cooked Pulled Pork comes to mind.
Chef preparing Pulled Pork
Last week I was invited to a special Pork-a-Palooza! event in Chelsea sponsored by The National Pork Board– I had the opportunity to hear Sara Kate Gillingham-Ryan – food writer, recipe developer and author of the popular website The Kitchn, speak about her love for Pork and all the simple delicious ways you can make it just by throwing a gorgeous Pork Shoulder (or any cut you choose) braised in the oven, grilled or in a Crock Pot with your veggies, seasonings and marinades and letting it cook slow and low until you get juicy, flavorful, melt-in-your-mouth goodness.
Herb Rub Oven-Braised Pulled Pork
We sampled three different varieties of Pulled Pork (Chili Rub Slow Cooker Pulled Pork, Savory Rub Grilled Pulled Pork, and Herb Rub Oven-Braised Pulled Pork) and got creative by whipping up some tasty Pork dishes for ourselves such as Pulled Pork Soft Tacos, Fried Rice, Caesar Wraps, Quesadillas, Egg Scrambles, Pizzas, Baked Potatoes, Tostadas, Salads, Sliders, and Grilled Cheese. Talk about an inspiring delicious event!
1 3-pound boneless pork shoulder or sirloin meat
2 tablespoons chili powder
1 1/2 teaspoons salt
1/2 teaspoon cayenne powder
1 tablespoon canola oil or other neutral-flavored oil
1/2 cup chicken broth
Line a 9×13-inch baking pan with foil and place the pork in the pan. In a small bowl, combine the chili powder, salt and cayenne. Rub the mixture all over the sides of the meat, pressing to adhere (if the meat is tied together with twine or netting, just rub the seasoning right over it). Set aside.
In a large skillet over medium-high heat, warm the oil. Add the pork and brown on all sides, 6 to 8 minutes. Transfer the meat to a slow cooker.
Add the broth to the skillet, scraping up any browned bits. Add the broth to the slow cooker, cover and cook until the pork is very tender, 6 to 8 hours on low or 4 to 5 hours on high.
Transfer the meat to a cutting board and let rest 10 to 15 minutes. Use two forks to shred meat into bite-sized pieces. Moisten/season with cooking juices to taste.
Serving suggestions: This recipe is only mildly spiced, so if you like things with a kick, try adding more cayenne to the rub or add some of your favorite hot sauce to the finished, shredded meat. Use the pork to make a traditional pulled pork sandwich, with barbeque sauce and slaw, or enjoy it in your favorite chili reicpe or on top of a Tex Mex Caesar salad.
Prep time: 10 minutes
Cook time: 5 1/4 to 8 1/4 hrs
Serving size: 8 to 10 servings
—–
Cookbook Giveaway!
*THE GIVEAWAY HAS ENDED AND OUR WINNER IS YOLANDA BARAJAS SMITH! CONGRATULATIONS!
I am giving away one (1) copy of Sara Kate Gillingham-Ryan’s cookbook,Good Food to Share, to one lucky person, drawn by random. If you haven’t seen this cookbook, you absolutely need to! It’s hardcover, and full of gorgeous food photography and recipes for entertaining with family and friends. Sara has amazing menus for planning a simple supper or an impromptu dinner party with fresh and flavorful ingredients and gives great tips for cocktail, beer and wine pairings for whatever occasion you are planning to have with friends.
All you need to do to receive one (1) entry, is to leave a comment on this post what is your favorite way to prepare and eat Pulled Pork.
For additional entries, tweet this post, pin it, share it on Facebook (you’ll get separate entries for each!), and let me know in separate comments on this post that you’ve done so. For even more entries, follow Artful Gourmet on Twitter and Facebook and also let me know you’ve done so!
The giveaway begins on Friday August 31st and will end on Sunday, Sept 9th at 11 pm EST.Please leave your email with your comments (this will not be made public) so that I can contact the winner of the giveaway and send the cookbook. Good luck! I hope you enjoy the recipes and make some fun, creative Pulled Pork recipes yourself!
Chef Pia Vallone / Mascarpone Mousse with Almond & Cookie Crumb
I love Italian food. I mean reallyloooove Italian food.. And who doesn’t? But especially authentic, homemade Italian – cooked with fresh ingredients and simple, healthy recipes that are downright divine. I recently took a cooking class at the Institute of Culinary Education in New York City with Chef and Culinary Instructor Pia Vallone, who teaches the Techniques of Italian Cooking course. It was a 5-week intensive class 6 hours long. Lots to learn in a short amount of time. Chef Pia, a native of Italy and graduate of ICE, taught us a a variety of recipes from different regions of Italy spanning the basic recipes and techniques.
Wild Boar Ragu w/ Matriciani
We made fresh pasta and risottos, hearty ragus and fresh and creamy sauces, roasted and braised meats, seafood dishes, soups and stews,
Baked Tomatoes with Oregano / Baked Shrimp with Garlic, Parsley & Crumbs
roasted and braised vegetables (my favorites were the Roasted Tomatoes and Stuffed Wine-braised Artichokes), desserts such as Classic Tiramisu, Mascarpone Mousse and Rustic Italian Apple Crostata,
Radish, Spinach, Romaine and String Bean Salad
and healthy, fresh Italian salads and small plates.
Making Fresh Ricotta Gnocchi
We always had red and white Italian wine and fresh Italian bread to accompany, and learned the customs of eating the way the Italians do – start with an “antipasti” (appetizer), next order a “primo” (first course usually consisting of pasta, risotto, minestrone or other soups), then pick your main “secondi” (second course usually a meat or fish dish), have a small bit of “formaggi” (cheese) after your main, then on to “dolci” (sweets/desserts such as cheese, fruit, sweet wine, and coffee/cappucino).
Sage Brown Butter
We made some of the most amazing Italian food during this class and learned classic authentic cooking techniques that I was able to bring home with me to prepare my own delicious Italian food. In fact, I was so impressed with Pia’s class that I had to interview her to share her culinary background and story along with a recipe with all of you! Enjoy.
Can you tell me a little bit about your culinary training and professional background? What was your first job as a Chef and what was that like?
My first and only hands-on restaurant experience was in an Italian restaurant in London (cannot remember the name of the restaurant), near Victoria Station, in the summer of 1978. A friend of mine who worked as an executive chef there, offered me a job as a sous chef. After a month of hard work, I had to leave the restaurant, because my visa was about to expire and soon after, I returned to Italy. The second experience related to food, was working for several years as a bookkeeper for a restaurant and corporate catering. There I learned so much about food and was exposed to new ingredients and flavor profiles, although I worked in the establishment’s office. As for training, I graduated from The Institute of Culinary Education in NYC and hold a Culinary Arts diploma and a Pastry and Baking Arts diploma. I currently work at ICE as a Manager of Kitchen Assistants and as a Recreational Chef Instructor, though I have worked in different areas in the company, within the past 10 years.
When did you realize you wanted to be a Chef? Who inspired you most as a young cook and what did you learn from them?
I always loved cooking and eating, but I began to spend time experimenting with recipes from various kinds of cuisines in my home kitchen, cooking for friends when I arrived to New York in 1980. Wanting to get involved with food and becoming a chef was a second career change for me, which began in 2001.
My greatest inspiration was my father, who was a gourmand and a terrific cook. I spent many hours in the kitchen with him during my childhood, helping out, observing him and absorbing all the knowledge I could. From my father, I learned passion, love and appreciation of good food and the importance of using fresh ingredients.
Can you tell us a little bit about your culinary style and what makes your menus and recipes unique?
My style is mainly rustic. I like rustic food for its simplicity and because it is nourishes the body and soul. My menus and recipes are unique, because the ingredients I use are accessible and inexpensive.
Is there a difference in the recipes you create/the food you eat in Italy versus the Italian food here in the United States and what are the main differences?
The difference between food in Italy and food here…? Food in Italy is extremely fresh, mostly organic and seasonal. Its flavor(s) cannot be replicated in dishes cooked outside of the Country. Food in Italy is also quite simple. In fact, most of the best food I have ever eaten there was prepared with just a few ingredients. On the contrary, Italian American food is the result of ‘imported’ traditions and transformations, mostly due the immigrant’s longing for the ‘Old Country’. Immigrants, who arrived here tried to capture flavors and freeze memories, by utilizing similar ingredients grown in a different terroir. Nowadays though, great Italian chefs live here in the States, so the differences between Italian food in Italy and the US is narrowing down.
In your opinion, what are the most important elements when creating a recipe from scratch?
The most important elements are: fresh ingredients, simplicity and focus, Make sure to tastes the food while cooking it.
What is your signature dish or your favorite recipe?
My favorite dish is ‘Roman Style Tripe’, a dish that brings back childhood memories.
What is your favorite spice or ingredient to cook with and why?
I love black pepper, which I use in all savory recipes. Besides liking its pungent flavor, I add it to dishes because it helps improve digestion.
What is your favorite cooking gadget or kitchen item you can’t live without and why?
I own many gadgets and often buy the new ones that are the latest invention in the market, but always tend to use the familiar ones over and over. A gadget I cannot live without is a hand held grater, because it is efficient and does not use too much space in the kitchen.
Do you have any advice for aspiring chefs and home cooks?
Start by cooking a simple recipe, one with 4 or 5 ingredients. Learn basic skills and techniques at first and then move on to a larger repertoire. Patience, practice and repetition are important to achieve success with cooking, as with other things in life.
Is there anything else you’d like to tell us about yourself?
Yes. I am always looking to inspire others to cook. It is a pleasure to see that people are interested in cooking and familiarizing themselves with ingredients. Sharing passion for food and cooking with people is an all-around relaxing experience for me.
Spring Vegetable Soup
Spring Vegetable Soup
Yield: serves 6
2 small carrots, diced
2 celery stalks, diced
1 yellow onion, chopped
2 small zucchini, diced
1 small butternut squash, diced
1 bunch escarole, chopped
½ cup peas, frozen
1 tablespoon basil leaves, chopped
1 tablespoon parsley, chopped
¼ cup Parmigiano Reggiano, grated
6 tablespoons extra virgin olive oil, plus extra for bread and for drizzling on soup
4 quarts chicken stock
1 small ciabatta bread
Sea salt to taste
Pepper to taste
Sauté carrots, celery and onions in a large stock pot over medium heat, for approximately 5 minutes, making sure that you stir the vegetables while they cook.
Add chicken stock to the pan. Increase the heat to high, cover the pan, bring to a boil and then reduce the heat to medium-low. Cook for 10-15 minutes.
Slice bread into 1” thick slices. Brush slices with the additional olive oil on both sides and place in a sauté pan over low heat. Turn bread slices once and cook until they are golden brown. Place bread in a tray and lightly sprinkle with sea salt. Set aside.
Add butternut squash to the stockpot and cook for 3 minutes.
Add zucchini and peas to the stockpot and cook for 3 more minutes.
Add escarole, basil, parsley, salt and pepper and cook for 4 additional minutes.
Remove two ladles of soup from the stockpot and puree in a blender, then return the pureed soup to the pot (the puree will thicken the soup). Stir and cook for 1 minute, then turn off the heat.
Add some grated cheese into the soup and stir. Ladle soup in individual bowls, drizzle oil and sprinkle additional cheese.
I recently took a cooking class at ICE that was all about Southern Cooking. In the spirit of the Kentucky Derby, I wanted share some of the awesome down-home Southern food we made. These are classic Southern recipes you’d find on the Sunday “Supper” table with a large group of friends and family, that scream the words “Southern Comfort” all around. Think Deviled Eggs, Fried Chicken, Collard Greens, Cornbread, Coca-Cola Cake, Fried-Green Tomatoes, Fried Fruit Pies, BBQ Ribs, Biscuits and Sausage Gravy, Sweet Tea, Mint Juleps – savory, homey, sweet, hearty, comforting and yes, FILLING. I guess that’s why they call it ‘comfort food’ because once your done eating and your belly is full, all you really wanna do is take a big NAP (on a nice big hammock on the front porch – Yes Ma’am).
Mississippi
I had my first real taste of true Southern food when I visited Meridian, Missippippi with one of my best friends and her family back in high school. We rode in the back of a station wagon from Upstate NY to Mississippi in the sweltering heat for about 20 hours, and when we arrived I thought I had reached the equator – or HELL for that matter. I wasn’t there for even 2 hours before I got attacked by a swarm of tiny red ants when we visited her Grandfather’s farm house that first day, and almost passed out on the beach after laying out for 5 minutes it was so hot down there. But after a big glass of ice cold homemade sweet tea, some Biscuits and Gravy, a crunchy delicious piece of her Grandmother’s Fried Chicken and a plate of Fried Okra – all the hellfire deceased instantly. (Well at least for the moment!)
University of South Carolina
My second experience tasting Southern food was in Columbia, South Carolina when I went to USC for a few semesters and ended up transferring there because I was so charmed by this unique Southern town. I’ll never forget the game day tailgating parties full of glorious southern banquets (and Bourbon!) that took up the entire parking lot across from the football stadium and lasted all day until we passed out from the heat, or the food (or most likely the Jack and Coke’s we had in our water bottles that we snuck into the game with!)
South Carolina Memories
There was also the local street vendor in Five Points (where all the bars and restaurants are on campus) who walked around selling spicy boiled peanuts to all the crazy drunk kids going in and out of all the bars staggering home to their dorm rooms. If you take a drive down to South Carolina, you can’t miss the huge giant peach water tower in Gaffney on the way down (or the massive retail outlet there!). Peaches are lovely. Peaches are everywhere down South. Peach pie, peach fritters, peach cobbler, peach tarts, peach salads, peach jam….ok, now I’m getting hungry.
Charleston SC
We took roadtrips to Charleston, SC and experienced the low-country cuisine like Shrimp and Gravy, Red Beans and Rice or Frogmore Stew (a South Carolina specialty made with shrimp, corn, new potatoes and sausage). The downtown Sunday market is filled with fresh fruits and vegetables, handmade baskets, art, crafts and great southern and low-country food. If you’ve never been to this town before, you MUST make a trip – the architecture, the Sunday markets, the seafood, cobbled streets, southern hospitality and warm breezes off the ocean will charm the pants right off of you.
Destin, FL
Our Spring Breaks had to be semi-close by because none of us could afford to fly anywhere, so we hopped in our e-roller scooters and took roadtrips to nearby towns like Savannah, GA or to the beach in the Florida panhandle (otherwise known as the Redneck Riveria – Destin, Panama City Beach, Pensacola) and ate spicy boiled Crawfish – “sucking heads and pinching tails”, while slugging down a good ice cold Budweiser or two.
Atlanta
Then, I moved to Atlanta after I graduated from college (swayed by a great friend of mine that I met at the University of SC) and unexpectedly stayed there for 12 years – and that’s where I really learned how to cook and love Southern food. There was something about the flowery, green smell in the air down in Georgia, and the charming friendliness of the people – a realness and down-to-earth manner that made me feel like I belonged in this strange Southern universe (even if I was just a damn Yankee that moved down South to get away from Mom and Dad after college).
Georgia Southern Food
Fried Chicken and Waffles, BBQ, more peaches (every street in Atlanta is named “Peachtree”), trips to the Dillard House in the Georgia mountains, day trips and weekends at the lake – I couldn’t get enough of this place. We grilled out almost every weekend on the deck or at the lake with our friends (and made awesome steaks and burgers with Dale’s Seasoning which are Ah-mazing).
Southern BBQ
My ex was from Alabama and Texas, so you can only imagine the Southern food and hospitality that I was exposed to. We ate the best BBQ south of the Mason-Dixon line in Selma, Alabama at a little truck stop called Lannie’s Barbeque, that served hot fresh bbq pork sandwiches on toasted buns with homemade cole slaw, southern green beans and a side of cornbread with extra sauce for mopping. There was never a trip to Selma without a stop here. Or a mandatory trip to Dreamland BBQ for a whopping plate of messy delicious ribs in Tuscaloosa for Alabama ‘Game Day‘. Roll Tide! (I was always still a diehard Gamecock fan though, even if Alabama kicked our ass).
Alabama Fried Catfish & Grilled Corn
His Mom was an amazing cook too, and every holiday we would go to their “camphouse” in the woods. The men would go deer and bird hunting for the day, and the women would stay home and prep for the big mid-day feast: slow-cooked collard greens with smoked ham, deep-fried turkey, slow-roasted pork butt, fried okra, skillet baked cornbread with jalapenos and cheddar, pecan pie, homemade flaky buttery biscuits, sweet tea, and the list goes on. On Friday nights we always went to “Mac’s Fish Camp” on the Alabama River (which tragically burned down in 2007 and is no longer around). We ate the best cornmeal-crusted fried catfish that would blow your mind – whole, right off the bones, served with fresh corn on the cob, cole slaw and hushpuppies. Even on the sweltering dog-days of Summer like they have down South, there’s something about the savory, buttery, comfort food down there that makes you feel right at home.
A Southern Feast
True Southern food and hospitality is all about eating and sharing big homemade meals with large groups of friends and family. My cooking class was almost 5 hours long and we made so much food you could feed a small Confederate Army. Thus, this post only has half of the food we made for our Southern feast that day so I’m making this Part 1. The recipes below include: Classic Deviled Eggs, Country Smoked Ham with Red-Eye Gravy, Southern Collard Greens, Cornbread, Coca-Cola Cake and of course, some homemade Southern Sweet Tea to wash it all down with. Stay tuned for Part 2 later this week for some more down-home, get-in-my-belly, authentic Southern Comfort food. Don’t worry, you’ll have plenty of time to take a nice, long nap on the hammock between now and then…
—–
Deviled Eggs
Deviled Eggs
6 hard-cooked eggs (1 week old eggs are easier to peel than super fresh eggs)
1 to 1 1/2 tablespoons mayonnaise, or to moisten
1 teaspoon prepared mustard
1/2 teaspoon to taste
1/2 teaspoon salt
2 tablespoons sweet pickle relish, or to taste
Paprika, for garnish
1-2 tbsp chopped Parsley leaves
Equipment: ice water bath
Put eggs in a saucepan that will hold them in one layer. Cover with cold water by 1 inch. Heat just to a boil, turn off the heat and cover the pan. Allow the eggs to “cook” in the hot water for 15 to 17 minutes and then immediately transfer to the ice water bath to cool and stop the cooking.
When well-chilled (you may have to replace the ice water bath with cold water or more ice to keep them cold and fully chill), roll them gently on the countertop and crack the shell all over.
Peel under cold running water and reserve.
Cut the hard-cooked eggs in half length-wise and shave a bit from the bottom of each half so it will lay flat on a serving dish.
Remove and mash the yolks; combine with mayonnaise, mustard, salt and relish.
Refill the centers of the egg whites with the mixture (use a pastry bag fitted with a star tip, ideally). Garnish with paprika and chopped parsley, refrigerate until ready to serve.
Makes 12 deviled eggs.
—–
Country Ham Steak with Red-Eye Gravy
Country Ham with Redeye Gravy
1 bone-in fully cooked ham steak, about 2 pounds (salt-cured country ham or a center-cut slice of ham)
Butter, vegetable oil, lard or shortening, as needed
3/4 cup strong black coffee
Worcestershire sauce
Heat a heavy skillet over medium heat. Melt sufficient butter or other fat to film the bottom of the skillet. Add the cooked ham, and cook to warm through and brown the meat. Reserve the ham.
Over high heat, add the coffee to deglaze the pan; scrape the bottom of the pan with a wooden spoon to loosen any brown bits.
Bring to a boil and cook about 1 minute. Season to taste with freshly ground pepper and Worcestershire sauce.
To serve pour the gravy over the ham to serve with the ham or serve gravy in a separate pitcher.
Serves 6.
Country Ham in Roasting PanHam Steak ready to serveRed-eye GravyTime to pass the Red-eye Gravy
—–
Southern-Style Braised Collard Greens
Southern-style Braised Collard Greens
2 pounds of collard greens (can substitute kale, turnip greens, or mustard greens)
1 ham hock (or 6 slices of cooked bacon)
1 medium onion, sliced or chopped
1 teaspoon crushed red pepper
2 to 3 teaspoons kosher salt
Sherry or cider vinegar, optional (for serving)
Tabasco/Louisiana Hot pepper sauce or pickled pepper juice, optional (for serving)
Clean and wash greens well; remove tough stems and ribs. Cut the greens up into large ribbons or chunks and place in a deep pot; add onion. Wash off the ham hock and add to the pot. Add red pepper and salt. Add enough water to cover greens, bring to a boil and reduce to a simmer. Cook the greens until tender, about 1 hour (up to 2 or 3 hours is fine as long as they don’t get mushy). Add more water as needed, taste and adjust seasonings to your liking. Serve with corn bread, and pass the vinegar and hot sauce.
Serves 4 to 6.
Slow cooking Collard Greens
—–
Classic Southern Cornbread
Classic Southern Cornbread
3 cups all-purpose flour
1 cup yellow cornmeal
1/4 cup sugar
2 tablespoons baking powder
2 teaspoons baking powder
2 teaspoons kosher salt
2 cups milk
3 extra-large eggs, lightly beaten
1/2 pound (2 sticks) unsalted butter, melted, plus extra to grease pan
Combine flour, cornmeal, sugar, baking powder, and salt in a large bowl. In a separate bowl, combine the milk, eggs and butter. With a wooden spoon, stir the wet ingredients into the dry until most of the lumps are dissolved (don’t over mix!). Allow the mixture to site at room temperature for 20 minutes.
Corn Bread Batter
Preheat the oven to 350 degrees F and preheat a 10-inch cast iron skillet.
Melt butter in the hot cast iron pan
When ready to bake, coat the bottom and sides of the hot skillet with butter (and be careful – pan is very hot!)
Pour batter in the pan
Pour the batter into the prepared pan,
Cornbread ready for baking
and smooth the top. Bake for 30-35 minutes or until a toothpick comes out clean. Cool and cut into large squares or wedges. Serve warm or at room temperature with extra butter if desired.
We used to make it with green chilies or jalapenos and cheddar cheese – if you want to try this version, chop the chilies (about 1/2 cup) and some shredded cheddar (about 1 cup) and add it to the batter before pouring into the cast-iron skillet. Delicious!
Makes 1 (10-inch) skillet of cornbread, approx. 8 to 10 slices or squares.
—–
Coca-Cola Cake
Coca Cola Cake
2 cups all-purpose flour
1 1/2 teaspoons baking powder
1/4 teaspoon salt
2 cups granulated sugar
1 cup butter
3 tablespoons unsweetened cocoa powder
1 cup Coca-Cola
1 1/2 cups mini marshmallows
2 teaspoons vanilla extract
1/2 cup buttermilk
2 eggs, beaten
2 teaspoons baking soda
1 cup chopped pecans, optional
Preheat oven to 350 degrees F; grease and flour a 13×9 inch baking pan.
Combine the flour, baking powder, salt and sugar in a large mixing bowl.
Combine 1 cup butter, 3 tablespoons cocoa powder, and 1 cup of Coca-Cola in a saucepan; bring to a boil. Remove from heat and add marshmallows and vanilla, stirring until marshmallows are melted.
Pour mixture over dry ingredients and blend in well. Add the buttermilk, beaten eggs, baking soda and pecans, if using. Beat well.
Spread batter in the pan and bake for 30 to 35 minutes, until the cake bounces back when lightly touched near the center. Cool completely.
Icing:
1/2 cup butter, softened
3 tablespoons unsweetened cocoa powder
1 pound confectioners’ sugar
6 to 7 tablespoons Coca-Cola
1 cup chopped pecans, optional
In a standing mixer fitted with a paddle attachment (or in a large mixing bowl with a hand blender), blend the softened butter with cocoa powder, confectioners’ sugar, and Coca-Cola. Beat ingredients until smooth and creamy; spread on cooled cake with a spatula. If desired, sprinkle finely chopped pecans over the top. Serve warm.
Makes 1 (13×9) cake.
—–
Sweet Tea
Sweet Tea
1 ounce loose black tea
1 quart hot water
1 quart room temperature water
Lemon wedges, for garnish
Infuse hot tea into hot water for 4 to 5 minutes, strain the tea into room temperature water. (we used to bring water to a boil in a large saucepan and then turn it off and infuse large tea bags in the hot water and add additional room temp water). Sweeten with simple syrup if desired and garnish with lemon wedges. Mint leaves are a nice twist too.
Simple Syrup:
3 cups sugar
3 cups cold water
For simple syrup, combine equal parts sugar and water in a small non-reactive pot. Bring to a boil, and cook until sugar is dissolved. Cool completely (before putting ice in it or the tea will turn cloudy and taste bitter).
Can be kept in the refrigerator for a month or more in a tightly sealed container.