Dr Smood: Smart Food for a Good Mood + Maca Pumpkin Couscous

I just discovered an amazing new cafe and store in NYC called Dr Smood – have you seen it? If not, you need to go. Based out of Miami, Dr Smood is a health company that makes “Smart Food for a Good Mood” – and oh how you’re gonna love this place!

They make all their own juices, smoothies, organic products and delicious healthy food based on 6 moodsPower, Beauty, Immunity, Detox, Energy and Health, which you can choose based on your mood and feeling and what you want to gain from the experience.

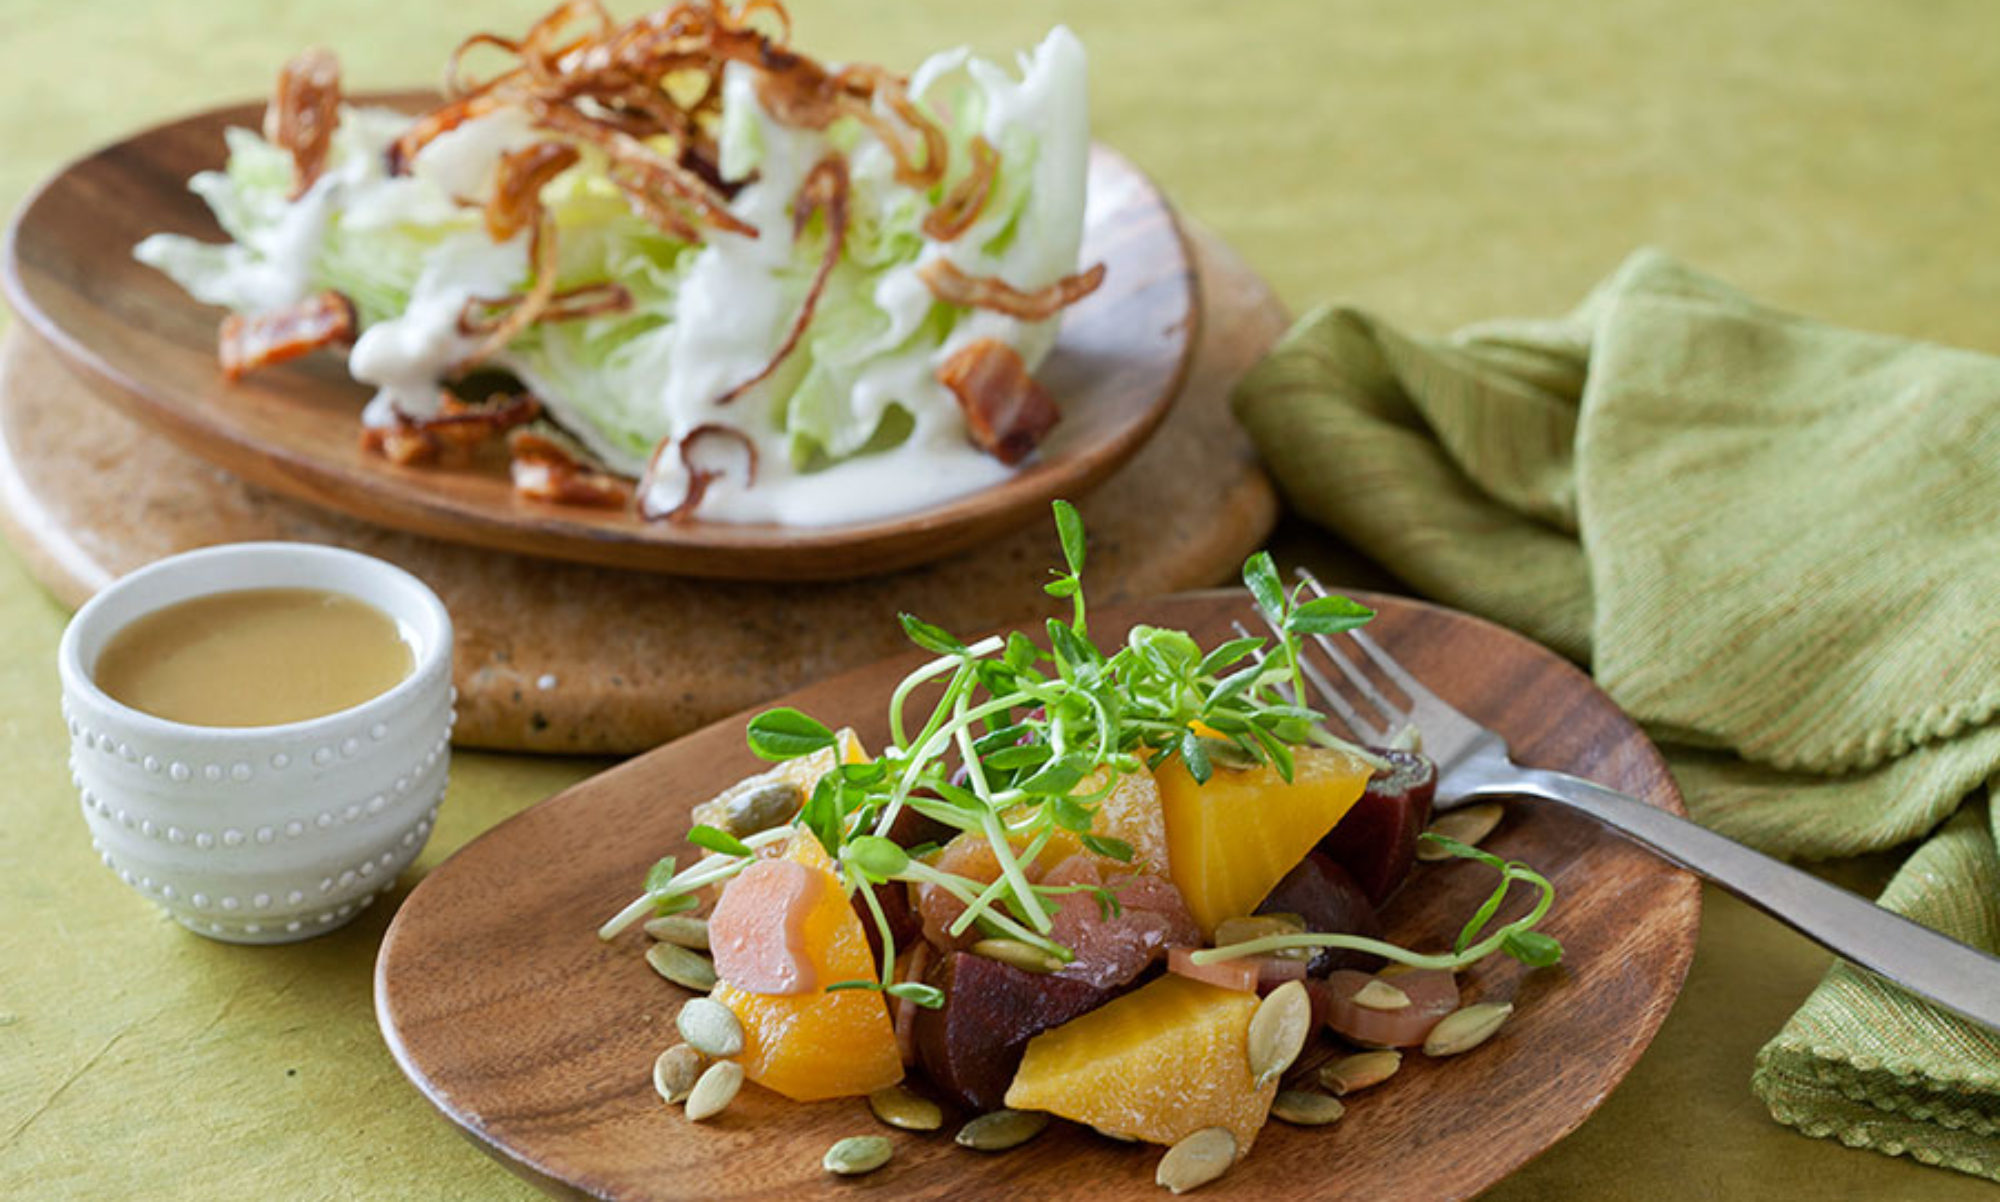
I had the opportunity to visit the Flatiron location in NYC and had a delicious Organic Detox Juice #9made with ginger, lemon, lime, raw honey, echinacea, and cayenne. Then for lunch I tried their Butternut Squash Soup, Turkey and Avocado sandwich on their homemade Performance Bread before browsing the beautiful cafe and store of amazing products including organic tea, coffee, chocolate, health and beauty supplements and organic dried foods.


dr smood mushroom powder

Dr Smood’s Organic Superfood Powders

Dr Smood’s Organic Superfood Powders would make a wonderful gift for the health and wellness-obsessed foodies on your list. They’re full of health-boosting goodness and are easy to use (they can be easily mixed into smoothies or juices, on yogurt or cereal or added to energy balls and no-bake treats).

There are a total of 13 beautifully packaged superfood powders, including Raw Cacao Powder, Spirulina Powder and Red Maca Powder. Each powder comes with an information packet, including a recipe and serving suggestions, and can be purchased at one of the five Dr Smood cafés in NYC.

Dr Smood Red Maca Superfood Powder

Dr Smood Red Maca Powder is an adaptogenic herb that helps the body to adjust to stress. Maca is an excellent source of phytochemicals and protein and helps to regulate the endocrine system and hormones, boost libido and increases energy, stamina and endurance. Enjoy maca in homemade granola or add it to tea, juice, smoothies, oatmeal or cereal. (SRP: $21.95)

Dr Smood Spirulina Powder

Dr Smood Spirulina Powder contains over 60% complete protein—almost 3x as much as beef—and is one of the few good sources of plant-based B12. This algae can also boost your immunity and promote a healthy digestive tract. Use it to make a semi-raw soup with sweet potatoes and carrots, spirulina cacao clusters or add it to your favorite juice or smoothie. (SRP: $14.95)

Dr Smood Cacao powder

Dr Smood Raw Cacao Powder contains approximately 40x more antioxidants than blueberries, which help the body to resist and repair damage from free radicals; plus it’s a natural mood booster and can promote beautiful skin, nails and hair. Use it to make hot cacao with coconut cream and almond milk this season and you will never want the standard version of hot chocolate again! You can also add it to coffee, yogurt, fresh fruits or smoothies. (SRP: $10.95)

Red Maca Pumpkin Couscous with Shallots, Bacon + Crispy Sage

I picked up a jar of the Red Maca powder at the store and created a new recipe for Maca Pumpkin Couscous w/ Shallots and Bacon and Crispy Sage that turned out absolutely delicious! Maca powder is a great supplement to add to sweet recipes like juices and smoothies and organic raw desserts, or savory recipes like soups, sauces, gravies, or to sprinkle on roasted veggies.

Maca Pumpkin Couscous w/ Shallots and Bacon and Crispy Sage

Maca Pumpkin Couscous w/ Shallots and Bacon and Crispy Sage

Prep Time: 15 minutes

Cook Time: 1 hour, 15 minutes

Total Time: 1 hour, 30 minutes

Yield: Serves 4.

Serving Size: 1 cup

A delicious and healthy way to incorporate Red Maca powder into a lovely fall savory dish. Roasted pumpkin, sautéed garlic and shallots and bacon tossed into a basil and herb couscous topped with crispy sage and pumpkin seeds.

Ingredients

  • 1 small sugar pumpkins, halved, seeds removed, skin on
  • 3 tablespoons olive or coconut oil, divided
  • Sea salt and freshly cracked black pepper
  • 1 tablespoon Dr Smood Red Maca Superfood Powder
  • Dash of cayenne pepper
  • 2 tablespoons maple syrup
  • 2 shallots, sliced
  • 1 garlic clove, chopped
  • 6 slices of bacon, cooked, drained and crumbled
  • 1 package of Near East Basil and Herb couscous
  • 6-8 sage leaves
  • Roasted pepitas or pumpkin seeds, for garnish
  • Parmesan cheese, grated, for garnish

Instructions

  1. Preheat oven to 400 degrees F.
  2. Drizzle each pumpkin half with 1 tablespoon of oil. Season with salt and pepper, Red Maca powder and cayenne. Place the pumpkin halves cut side down onto a lightly greased baking sheet. Roast in oven for 1 hour, until fork tender and golden brown. Remove from oven and let cool for 5 minutes.
  3. Remove skin from pumpkin, cut into 1-inch cubes and toss with maple syrup; set aside.
  4. Meanwhile, bring a large saucepan of salted water to a boil. Cook the couscous according to package directions and set aside.
  5. Cook bacon in oven on a large foil lined baking sheet for about 20 minutes until crispy and brown, drain and crumble; set aside.
  6. Heat another tablespoon of oil in a sauté pan over medium heat; cook shallots and garlic for approximately 5 minutes until soft and golden (be careful not to burn!). Add sage leaves and sauté until crispy and browned.
  7. Add the cooked pumpkin, bacon, garlic, shallots to the couscous and toss together.
  8. Transfer to individual serving bowls, garnish with crispy sage, roasted pumpkin seeds and grated parmesan cheese.

Notes

You can also substitute roasted butternut squash or any other hearty veggies like eggplant, zucchini, mushrooms and bell peppers. Omit the bacon and cheese to make it vegetarian and dairy free.

https://www.theartfulgourmet.com/2017/11/drsmood-smartfood-for-a-goodmood/

Here’s another fun easy recipe you can make when you have a sweet tooth:

Maca, Coconut and Cashew Granola (gluten-free, vegan)

1 1/2 cups gluten-free rolled oats
1 cup raw, unsalted cashews, coarsely chopped
1 cup coconut flakes
4 tablespoons pure maple syrup
2 tablespoons coconut oil
1 tablespoon Dr Smood Red Maca Superfood Powder
pinch Himalayan fine grain sea salt

Preheat your oven to 300° F. Line a medium-sized baking sheet with parchment. Mix all ingredients in a bowl. Spread all ingredients in an even layer on a pan. Bake for 15 – 20 minutes. Allow to fully cool on the pan. Granola will firm and turn crunchy once cooled. Store in a sealed container in the fridge.

Check out the gallery below to see more photos of their amazing store and food and products I discovered!

To find a Dr Smood cafe and retail store near you, please visit their website at http://drsmood.com

Dr Smood Facebook Page

Dr Smood Instagram Page

Maple Balsamic Quinoa Salad

Maple Balsamic Quinoa Salad

Hey guys! I’ve been so busy working on client projects I haven’t had the time to post many new recipes lately so I wanted to share a super delicious one I created for a client that I know you’re gonna love!

Maple Balsamic Quinoa Salad

This recipe for Maple Balsamic Quinoa Salad is absolutely delicious! I made a dressing with Seven Barrels Maple Balsamic vinegar and olive oil and tossed it with quinoa, chickpeas, dried tart cherries, arugula, celery, green onions and crunchy pecans.

Maple Balsamic Quinoa Salad

Not only is this super healthy and light but absolutely delicious! It has the perfect balance of tangy vinegar with a slight sweetness from the maple balsamic, agave and tart cherries, and a delightful crunch from the celery, chickpeas and green onions.

Maple Balsamic Quinoa Salad

This is a perfect side dish to make ahead for a Summer picnic and it’s full of protein and veggies and fiber making it the perfect meal on it’s own.

You can also substitute dried cranberries for the tart cherries if you can’t find them, and use a variety of nuts like cashews, almonds, or walnuts instead of pecans. Throw in some edamame or black beans too if you want more protein. Or how about a little crispy bacon???? YUM.

Hope you’re enjoying your Summer – enjoy!

Maple Balsamic Quinoa Salad

Prep Time: 20 minutes

Cook Time: 10 minutes

Yield: Serves 4-6

Ingredients

  • 2 cups quinoa, rinsed
  • 1 cup pecans
  • 1/3 cup extra-virgin olive oil
  • 1/3 cup Seven Barrels Maple balsamic vinegar
  • 1/3 cup agave syrup or honey
  • 1 cup dried tart cherries
  • 1/2 cup celery, sliced
  • 4 scallions, thinly sliced
  • Handful of baby arugula
  • 1 tsp sea salt, plus additional to taste
  • Freshly ground black pepper, to taste

Instructions

  1. Cook quinoa according to package directions. Let cool completely.
  2. Toast the pecans for about 5 to 7 minutes over medium-low heat in a saute pan, let cool and chop coarsely.
  3. Make the dressing: Whisk together the olive oil, Maple Balsamic vinegar and agave syrup (or honey) in a small mixing bowl.
  4. Add 3/4 cup dressing to the cooked quinoa. Mix in the chopped toasted pecans, tart cherries, celery, scallions, and sea salt. Serve refrigerated or at room temperature; just before serving, stir in remaining 1/4 cup dressing, arugula and season with salt and pepper, to taste.

Notes

You can also substitute dried cranberries for the tart cherries and use any type of nuts (cashews, walnuts, almonds).

https://www.theartfulgourmet.com/2017/08/maple-balsamic-quinoa-salad/

Expert Interview Series with FoodyDirect.com!

I was recently invited as a guest for the FoodyDirect.com Expert Interview Series to talk about great tasting and looking food, and I’m honored to share the interview with you! I discuss my background and how I got into Food Styling and Photography as a full-time freelance profession, along with some of my favorite things to cook, food trends, hot spots in NYC and some simple rules for great food photography on social media.

Expert Interview Series with FoodyDirect.com

I also included one of my favorite go-to recipes in the article, my Rochester-Style Chicken French with Broccolini which I know you’re gonna love!

Chicken French

Check out the interview below or on FoodyDirect.com (the best online mail order source for gourmet food and gifts!

FoodyDirect.com

——-

Kristen Hess is a New York City food stylist, photographer, recipe developer, and author of the food blog, The Artful Gourmet.  We recently chatted with Kristen about her favorite cuisines, cooking trends, and NYC eateries, and also asked her to share her food stylist expertise with us to help foodies take better photos of their gastronomical creations.

Tell us a bit about yourself. Why did you decide to dive headfirst into learning about cooking and food photography?

I’ve always loved food and cooking but never considered it as a full-time career until I moved to NYC and started taking a series of cooking classes at The Institute of Culinary Education. I was working in advertising at the time and thought it was a fun hobby, but then that hobby became more serious as I discovered food media as a blossoming career path and started taking more classes in food styling, photography, and food writing and then started my blog.
Out of all of the different styles of cuisine and cooking in your repertoire, which one was the most fun to learn about?

My all-time favorite is Italian food because I love the simplicity of the gorgeous ingredients, rustic flavors, and cooking techniques. Whether it’s homemade pasta and sauce, homemade pizza, a gorgeous salad, an antipasti dish, or a roasted chicken with vegetables, I love it all!

Name a cooking trend, tool, or category that you’re currently excited about. 

Alternative flours and coconut everything! I try to live a healthy lifestyle, but sometimes it’s hard when you work in the food industry (esp. in NYC!) surrounded by delicious temptations every day. Alternative flours made out of chickpeas, coconut, almond, bananas, brown rice, farro, buckwheat, chia, and arrowroot are great for low-carb and paleo/gluten-free cooking – and they’re healthier, too. You can make pizza crust, bread, pasta, pancakes, tortillas, pastry, crepes, socca, and all kinds of dishes with it. And I love coconut oil, cream, and milk as an alternative to full-fat regular dairy sometimes because it has a nice subtle coconut flavor and is great to cook with at high heat. I’ve made curries, smoothies, baked goods, and more with it. Great stuff.

Many people have a basic idea of what a food stylist does – but could you tell us about some types of food photography that you’ve done that people may not associate with the craft? 

I do some interesting gigs with agencies for their food clients who are doing on-site media tours promoting food products and recipes to food editors for all the major food magazines. For example, The Jackfruit Company launched their new products and I toured around with the owner and PR agency making tacos, salads, burgers, and sandwiches on-site in the editors’ board rooms while they pitched the product to the editors and writers (to gain press and brand affection, of course!).

Another new type of job that is getting popular is styling food for Facebook Live segments for cookbook authors and chefs, health experts, and bloggers. I did quite a few of these for Keri Glassman and Andy Boy Broccoli Rabe, making recipes for them which were demoed live on Facebook at PureWow Magazine and Cosmo.com. I also did this for Halloween making super fun recipes by blogger Elise Strachan at People Food and Food and Wine.

When you see people posting pictures of food on their social media pages, what are some of the “mistakes” you see that make the dish look really unappetizing?

I always say lighting is a huge factor for any good food photo. If it’s too yellow or too blue, you need to fix the hue or it looks unappetizing. Also, never use flash or take photos with overhead lights as they give harsh shadows and blow out the food. Try to shoot food with natural light as much as possible. Bad angles are a no-no too. Don’t shoot burgers or sandwiches overhead. You can’t see what’s inside. Pizza is great for overhead shots because you want to see what’s on it. Don’t be afraid to crop into the shot too for some detail. Finally, consider your composition; what’s the hero in the shot? Focus on that dish. Not the glass behind it. Let the hero shine!

Finish this sentence: “If you’re a true foodie, the next time you visit New York City, you definitely need to stop by…”

For pizza, you need to check out DiFara on Ave J in Brooklyn. The wait is kinda long, but it’s soooo good and super worth the trip and the wait. I also love RubiRosa pizza in Soho.

Pearl Oyster Bar in the West Village is amazing for fresh oysters, seafood, wine, etc.

My favorite taco joint is La Esquina in Nolita. They make authentic Mexican style tacos on small corn tortillas with fresh cilantro, pork, steak, chicken, and homemade salsa. Plus, the grilled street corn is to die for!

You can’t go to NYC without getting a delicious burger, fries, and milkshake from the Shake Shack in Madison Square Park. Again, the line is long, but so worth the wait!!!

And lastly, go to Katz’s Deli in the Lower East Side for a pastrami on rye New York City style. Delish.

What types of desserts do you enjoy making for friends and family?

I’m definitely more of a savory cook than a pastry cook, but I absolutely love making pies and tarts. I always make lovely fruit-based pies or tarts in the summer around the 4th of July using berries, peaches, and mascarpone on a puff pastry sheet. Thanksgiving is always fun; I love experimenting with new pie recipes (something different than pumpkin or apple pie) like Christina Tosi’s Crack Pie or my Bourbon Buttermilk Pecan Pie.

Finally, could you share with us one recipe that’s always a hit when you prepare it? 

I have so many recipes that I love but one of my absolute favorites is my “Rochester-Style Chicken French with Broccolini.” It’s actually not a French recipe; it’s an Italian recipe similar to a piccata dish, but with a light coating of egg batter, butter, white wine, lemon, and parsley on thinly-pounded chicken, sautéed in a pan and then coated in the luscious buttery lemon sauce. It’s easy to make, tastes amazing, and everyone loves it. I serve it with sautéed broccolini, but you could also serve it with green beans or sautéed spinach, over pasta or rice, or alongside some crusty french bread to mop up the sauce. Goes great with a tangy white wine like Pinot Grigio and a simple green salad with shaved Parmesan cheese and a tangy wine vinaigrette.

Chicken French

Rochester-Style Chicken w/ Broccolini

Prep Time: 20 minutes

Cook Time: 20 minutes

Yield: Serves 4.

This delicious Italian dish originated in Rochester, NY and is a great meal for a special occasion or any night of the week. Thin chicken cutlets are coated in a light egg and parmesan batter then sautéed until crispy and brown. They are coated in a luscious lemon butter and wine sauce and served with a side of fresh broccolini. Goes great with a crisp white wine such as Pinot Grigio and a green salad with shaved Parmesan and a tangy vinaigrette.

Ingredients

  • CHICKEN FRENCH:
  • 1/4 cup olive oil/canola oil blend for sauteing (I used Colavita Garlic Oil Blend)
  • 1 1/2 pounds boneless, skinless chicken breast cutlets
  • 2-3 eggs
  • 1/4 cup shredded Parmigiano-Reggiano cheese
  • Kosher salt and fresh ground black pepper
  • Dash of cayenne pepper
  • 1 tablespoon fresh chopped parsley
  • 1/2 cup of superfine flour (Pan Searing flour or Wondra)
  • LEMON BUTTER SAUCE:
  • 1-2 garlic cloves, minced
  • 1/2 cup white wine or sherry
  • 1 cup chicken broth
  • Juice from 1 1/2 lemons (about 1/4 cup)
  • 1 teaspoon red pepper flakes (optional)
  • 2 tablespoons cold butter, cut into pieces
  • Lemon wedges, for garnish
  • 1-2 tablespoons fresh chopped parsley, for garnish
  • BROCCOLINI:
  • 1 bunch broccolini, trimmed
  • Lemon Butter sauce (see above)
  • lemon, S&P for garnish

Instructions

  1. CHICKEN FRENCH:
  2. Heat oil in a large non-stick saute pan over medium heat.
  3. Meanwhile, whisk together eggs, cheese, salt and pepper, cayenne, and fresh parsley in a large mixing bowl.
  4. Place flour in another flat bowl and season with salt and pepper to taste.
  5. Rinse and pat dry chicken breasts, then dredge each one in flour first (left hand), then egg mixture (right hand).
  6. Place chicken into the heated saute pan and cook for 6 minutes on one side. Flip chicken over and saute for another 6 minutes until golden brown.
  7. Remove from pan and set aside, covered with a foil tent.
  8. LEMON BUTTER SAUCE:
  9. In the same skillet, saute the minced garlic for 1-2 minutes, being careful not to burn.
  10. Add the wine and bring liquid to a boil over high heat, scraping up the brown bits in the pan.
  11. Pour in the chicken broth, lemon juice, and red pepper flakes (if using) and let reduce by half, another 5-7 minutes.
  12. Stir in the butter and whisk until it melts.
  13. Add chicken back into the pan with the sauce and let simmer another 5-10 minutes.
  14. Place chicken on serving plate with the steamed broccolini and spoon lemon butter sauce over the top of both.
  15. Garnish with lemon wedges and additional chopped parsley if desired.
  16. BROCCOLINI:
  17. Steam broccolini for about 5 minutes, covered. Remove lid and steam for another 5 minutes until fork tender but still bright green.
  18. Top broccolini with Lemon Butter sauce, additional lemon, salt, and pepper to taste.

Notes

You can also substitute veal for the chicken or artichokes for a vegetarian option.

https://www.theartfulgourmet.com/2017/06/expert-interview-series-foodydirect-com/

Are you jonesing for authentic New York-style foods? Check out FoodyDirect.com selection today!

Happy Memorial Day! Grilling, Cocktails + Recipes

Happy Memorial Day

Happy Memorial Day

Happy Memorial Day! A time to reflect all of those brave soldiers and military servicemen and women who have sacrificed their lives and families for the safety of ours.  Big applause and respect goes out to them and I’m grateful we have a safe and secure country to live in because of them. Especially now.

Memorial Day Cake

In honor of the holiday, I rounded up a few of my favorite recipes to celebrate. Wishing you all a lovely holiday, hopefully filled with family and friends, food and drinks with grateful hearts to our heroes that keep us safe. EVERY DAY. XO

Dr Pepper Ribs

Spicy Dr. Pepper Ribs

Beach BBQ Burger

Beach BBQ Burgers

Thai BBQ Shrimp

Thai BBQ Shrimp

Sambal Chicken Skewers

Grilled Sambal Chicken Skewers

Lobster and Potato Chip Rolls

Lobster and Potato Chip Rolls

Coffee Marinated Steak

Coffee Marinated Steak 

Grilled Corn and Poblano Salad

Grilled Corn and Poblano Chile Salad

Watermelon Feta & Mint Salad

Watermelon Feta & Mint Salad

Roasted Garlic Potato Salad

Roasted Garlic Potato Salad

Summer Berry Shortcake

Summer Berry Shortcake


Hope you enjoy the weekend and here’s a few more links to Memorial Day recipes and menu ideas!

http://chicago.cbslocal.com/2017/05/26/memorial-day-recipe-guide/

http://www.foxnews.com/food-drink/2017/05/29/memorial-day-weekend-barbecue-recipes-best-dishes-for-summer-cookout.html

http://www.tasteofhome.com/recipes/holiday—celebration-recipes/memorial-day-recipes

http://www.foodnetwork.com/holidays-and-parties/packages/memorial-day/memorial-day-picnic-

Zucchini & Sweet Potato Pancakes w/ Homemade Apple Sauce

Zucchini Sweet Potato Pancakes

Now that the fall season has finally arrived, it’s time to start cooking with seasonal ingredients that are richer in color and warmer in flavor. One of my favorite dishes to make in the fall are Potato Pancakes, served with applesauce and sour cream, just like my Grandma used to make.

KitchenAid Juicer


I recently got a KitchenAid® Juicer and Sauce Attachment for my Stand Mixer and decided to do a twist on this traditional family recipe by making Homemade Applesauce and making the pancakes out of zucchini and sweet potatoes to add some healthy color and fall flavors to the dish. I used my KitchenAid® Stainless Steel 3-Quart Saucepan, which was perfect for cooking the applesauce in, and a fantastic KitchenAid® Copper Core 12″ Nonstick Skillet, great for cooking the pancakes with it’s large base and even, quick heat distribution.

Homemade Apple Sauce

Homemade Apple Sauce

Zucchini Sweet Potato Pancakes

Zucchini and Sweet Potato Pancakes with Cinnamon Sour Cream

Healthy, delicious and super easy to make!

CLICK HERE FOR THE FULL RECIPE ON THE KITCHENAID BLOG

Cooking with Color 4 Kids TV Summer Edition + Recipes from Spring Show

#CookingwithColor4Kids


My #CookingwithColor4Kids TV Show Summer Edition is LIVE and what a fun show we have for you…Thanks to all the amazing kids and parents who were on the show and for cooking and sharing all your awesome Summer recipes with us, even to the little ones who came in their Bob-2016-Revolution-Flex stroller!

CWC_SummerFoods

Lily McGee & Jennifer Hess McGee made us some fresh and healthy Summer Jar Salads

Maxwell Leduc from Canada talks about his favorite Summer dishes to make and how he cooks gluten-free

Ava Llorca makes us fresh Strawberry Shortcake from scratch – her favorite Summer dish

Deborah Berg from Israel makes us a delicious Beet Salad fresh from her garden

Jacob and Cooper Nixon from Charlotte NC make Strawberry Shortcakes and Caprese Salads with fresh fruits and veggies from their Dad Jeff Nixon‘s garden

Jonathan and Nichelle Pace talk about how they make homemade Pancakes and BBQ Chicken

LIVE on our YouTube Channel at – https://youtu.be/MDVf1k-3Eng

BRIC

Also airs on Brooklyn Public Network television tomorrow Sat July 18 at 11:30 am EST in Brooklyn on:
Cablevision channel 67
Time Warner channel 34
RCN channel 82
AND in all 5 boroughs of #NYC on Verizon channel 42

VIEW ONLINE LIVE at BCAT TV Network Channel 1 Sat July 18 at 11:30 am – http://bricartsmedia.org/community-media/watch-brooklyn-public-network

COOKING WITH COLOR 4 KIDS SPRING 2015 SHOW

AND…if you missed our Spring Show from May – you can also watch it online at https://youtu.be/YYVsNgMpZig

I made some fresh and healthy Caprese Salad Skewers, Straw and Hay Pasta with Peas & Pancetta in a light creamy Parmesan Sauce and a delicious Strawberry Rhubarb Eton Mess for dessert! I also had a Guest Chef from our video crew make a big batch of Mediterranean Tabbouleh for us on the show..so good!

HealthCorps Kids

Also check out the video also on our Spring show of the HealthCorps kids from a high school in the Lower East Side, NYC cooking Fish Tacos for Cinco de Mayo – so many healthy and fresh things going on over there!

This slideshow requires JavaScript.

Cooking with Color 4 Kids was also just featured in Lodging Magazine this month – read the article online here!

Below are my #recipes from the Spring show..hope you enjoy and Happy Summer!

Caprese Salad

Caprese Salad Skewers

Ingredients
1 container of cherry tomatoes
1 bunch of fresh basil
1 container fresh mozzarella balls
1/2 cup extra virgin olive oil
1/2 cup balsamic vinegar or 1 cup for glace
Sea salt
Freshly cracked black pepper

Preparation
Assemble tomatoes, rolled basil leaves and mozzarella balls on medium-sized toothpicks or small wooden skewers.

Drizzle with olive oil, 1/4 cup of balsamic vinegar and salt and pepper.

To make balsamic glace (a thicker cooked down version of balsamic vinegar), add one cup of balsamic vinegar to a sauce pan over medium heat. Once it comes to a boil, reduce the heat to simmer and cook for about 10-15 minutes until it reduces to a syrupy consistency. Dip a spoon into the vinegar to check for thickness. As it cools the syrup will also thicken.

Drizzle balsamic glace evenly over the caprese skewers and serve immediately.

Makes 12 skewers.

Straw and Hay Pasta

Straw and Hay Pasta 

Ingredients

Kosher salt and freshly ground pepper
4 scallions
2 cloves garlic, minced
2 tablespoons olive oil
1 cup frozen baby peas, defrosted
4 ounces (1/2 cup) diced pancetta
2/3 cup chicken broth
1/2 cup heavy cream or half and half
1/2 pound dry egg fettucine or linguine
1/2 pound dry spinach fettucine or linguine
1/2 cup grated Parmesan cheese
Fresh parsley, chopped, for garnish

Preparation

Bring a large pot of salted water to a boil over high heat.

Meanwhile, heat olive oil in a large saucepan over medium heat.

Trim the scallions and slice into thin strips and then crosswise about 3 inches long. Add the scallions to the pan and cook for about 1 to 2 minutes until wilted.

Add the diced pancetta, and cook for about 5 minutes or so until it gets crispy and browned.

Pour in the broth and bring to a boil. Reduce the sauce to a simmer and cook until the liquid is reduced by half. Add the heavy cream and continue to simmer another 2-3 minutes.

Stir the pasta into the salted boiling water and let return to a boil, then cook for 9 minutes until al dente (slightly firm and chewy).

Remove the cooked pasta from the water with a slotted spoon and add to the sauce in the skillet, stirring to coat. Cook over high heat until liquid reduces to a creamy sauce.

Remove from the heat and stir in the Parmesan cheese. Garnish with black pepper and freshly chopped parsley, if desired.

Serves 6.

Strawberry Rhubarb Eton Mess

Strawberry Rhubarb Eton Mess

Ingredients

Meringues
2 egg whites
1/2 cup sugar
1/4 teaspoon vinegar
1/4 teaspoon corn starch
1/2 teaspoon vanilla extract
Strawberry Rhubarb Compote
1 cup chopped rhubarb
1 cup sliced strawberries
1/2 cup orange juice
1/4 cup sugar or honey
1 teaspoon orange or lemon zest

Whipped Cream
1 1/2 cups heavy cream
2 tablespoons sugar
1/2 teaspoon vanilla extract

Preparation

Make the Meringues:
Preheat oven to 250 degrees F. Line a large baking sheet with parchment paper or silicone mat.

Whisk the eggs with a mixer on medium speed until soft peaks form. Increase speed to medium high and slowly add the sugar, one spoonful at a time. Continue beating until sugar is completely incorporated and the stiff peaks form. Gently fold in the vinegar, cornstarch and vanilla with a spatula.

Spoon the meringue into twelve large dollops on the baking sheet.

Bake for 90 minutes or until the surface of the meringues are dull and they feel dry to the touch. Let the meringues cool for at least an hour or overnight.

Strawberry Rhubarb Compote:
Preheat a sauce pan over medium high heat, and add the rhubarb, strawberries, OJ, sugar and orange or lemon zest.

Bring to a boil and stir occasionally, then reduce the heat to low and simmer for about 10 minutes until the fruit is soft and starts to fall apart.

Set aside and let cool to room temperature (or store in an airtight container in the refrigerator if making ahead for up to 1 week).

Whipped Cream: (can also use store-bought if you prefer to not make your own)
In a large mixing bowl, whip together the heavy cream, sugar and vanilla with a whisk until soft peaks form.

Assemble the Eton Mess:
Crumble meringues into a large mixing bowl.

Top with spoonfuls of whipped cream and strawberry rhubarb compote in layers and fold until just barely combined.

Divide evenly between six dessert bowls or glasses and serve immediately.

Serves 6.

tabbouleh

Mediterranean Tabbouleh

Ingredients

1/2 cup fine bulgur
3 tablespoons olive oil
1 cup boiling hot water
2 cups finely chopped fresh parsley
1/2 cup chopped fresh mint
2 medium tomatoes, cut into 1/4 inch pieces
1/2 seedless cucumber, peeled, cored and cut into 1/4 inch pieces
3 tablespoons fresh lemon juice
Kosher salt and freshly ground black pepper, to taste

Preparation

Stir together bulgur and 1 tablespoon oil in a heatproof bowl. Pour boiling water over the bulgur, then cover bowl tightly with plastic wrap and let stand 15 minutes. Drain in a fine mesh colander, pressing on bulgur to remove any excess liquid.
Transfer bulgur to a bowl and toss with all the ingredients, and 2 tablespoons of olive oil, until combined well.
This dish can be served as a side salad or main dish, along with an assortment of grilled meats, pita bread and falafel with hummus.

Makes 4 to 6 servings.

Download the recipes below as a PDF:

CWCMay2015_CapreseRecipe

CWCMay2015_EtonMessRecipe

CWCMay2015_StrawHayPastaRecipe

CWCMay2015_TabboulehRecipe

#cookingwithcolor #cookingwithkids #kristenhess #theartfulgourmet #artfulgourmet #ediningnews #bric #foodtv #springrecipes #summerrecipes


Shrimp & Veggie Pasta Salad with Lemon-Herb Vinaigrette

Seashell Shrimp Salad

Seashell Shrimp Salad

One of my favorite recipes to make for a summer BBQ or outdoor party is  Shrimp and Veggie Pasta Salad with Lemon-Herb Vinaigrette. It has a light, lemony herb dressing with fresh basil, parsley, dill and tarragon, along with a touch Dijon mustard, Champagne vinegar, olive oil and fresh lemon.

I love using big seashell pasta and adding plenty of fresh veggies including cucumbers, celery, roasted red peppers, grilled corn and scallions for crunch, and adding fresh sautéed shrimp, which you can also grill if you prefer. It goes perfectly with grilled chicken, burgers, skewers and fresh fruit like watermelon, pineapple and mango.

Shrimp

First cook your seashell pasta, drain and set aside. Then you can either grill the shrimp or sauté it for a few minutes in a large sauce pan with some fresh lemon, herbs, seasonings and olive oil and let cool while you prep the other ingredients.

corn

Season and grill the corn, shave off the kernels and add to the salad with the rest of the veggies (celery, cucumbers, roasted red peppers, green onions). Feel free to sub whatever fresh veggies you like to the salad to make it colorful and healthy!

dressing

Make the Lemon-Herb Vinaigrette by whisking together some extra virgin olive oil, Champagne vinegar, Dijon mustard, fresh lemon, salt and pepper and chopped fresh herbs.

Salad Ingredients

Pour over the pasta, veggies and shrimp in a large mixing bowl and fold together. I like to put the salad in the fridge and let the flavors meld together  – you can really taste the fresh herbs and zingy lemon when you let it sit together for a bit.

shrimp veggie pasta salad

So easy, so light and refreshing and perfect for a backyard BBQ or beach party.

Shrimp & Veggie Pasta Salad with Lemon-Herb Vinaigrette

Prep Time: 30 minutes

Cook Time: 15 minutes

Total Time: 45 minutes

Yield: 6-8 servings

Serving Size: 1 cup

Ingredients

  • 1 pound of pasta (medium-large shells or rotini)
  • 2 tablespoons olive oil
  • 4 scallions, thinly sliced
  • 1 pound small shrimp, peeled, cleaned and deveined, tails removed
  • 1 teaspoon red pepper flakes
  • 1 teaspoon Old Bay Seasoning
  • Sea salt, to taste (for shrimp and salad dressing)
  • 1/2 teaspoon freshly ground black pepper
  • 1/4 cup extra-virgin olive oil
  • 1/4 cup champagne vinegar
  • 1 tablespoon Dijon mustard
  • 1 clove garlic, minced
  • 1 tablespoon fresh squeezed lemon juice
  • 1 teaspoon lemon zest
  • 1 teaspoon dried dill or 1 tablespoon fresh dill
  • 1/4 cup fresh herbs, roughly chopped (tarragon, basil, parsley)
  • 2 fresh sweet corn cobs or 1 cup frozen
  • 1 cup English cucumber, diced
  • 2 ribs celery, finely chopped
  • 1/4 cup roasted red peppers, diced
  • 2 lemon wedges, squeezed for garnish

Instructions

  1. Cook pasta in salted boiling water according to package directions (usually about 9-11 minutes for al dente). Drain, rinse under cool water and set aside.
  2. Meanwhile, heat 1 tablespoon of oil in a large skillet over medium heat. Slice scallions and cook until soft about 5 minutes. Increase heat to medium-high; add one more tablespoon of oil then add shrimp, red pepper flakes, Old Bay seasoning and sea salt; sauté together stirring constantly until shrimp are opaque, about 2-3 minutes. Remove from heat and set pan aside to let shrimp mixture cool.
  3. In a large mixing bowl add salt and pepper, vinegar, mustard, garlic, lemon juice and zest. Use the KitchenAid® 3-Speed Hand Blender with the whisk attachment to blend ingredients together and slowly pour in the olive oil in small amounts until the dressing is emulsified and mixed well. Chop the fresh herbs, mix into the Lemon-Herb dressing and set aside.
  4. Prepare the fresh corn by grilling it – add a little olive oil, salt and pepper, then char it over a medium-high grill for about 15 minutes. Shuck the cooked kernels off the cob and set aside in a separate mixing bowl. If using frozen sweet corn, simply boil in 1-2 tablespoons of water in a small pot over medium-high for 3-4 minutes, then drain and place into a bowl, set aside.
  5. Add the cucumbers and celery to the accompanying mixing bowl of the KitchenAid® 3-Speed Hand Blender, and pulse a few times until chopped into a small to medium dice. Chop each vegetable separately to avoid overfilling the blender bowl. Chop the roasted red pepper into medium diced pieces. Throw all the chopped veggies into a bowl and set aside.
  6. Pour the cooked pasta, shrimp and scallion mixture, corn and all the prepped veggies into a large mixing bowl and add the Lemon-Herb dressing. Gently mix all the ingredients together with a large spoon. Garnish pasta salad with additional chopped herbs, fresh lemon juice and additional salt and pepper to taste, if desired. Cover the bowl in plastic wrap and store in the refrigerator or cooler until ready to serve.
Schema/Recipe SEO Data Markup by Yummly Rich Recipes
https://www.theartfulgourmet.com/2015/07/shrimp-veggie-pasta-salad-with-lemon-herb-vinaigrette/

READ THE FULL POST ON THE KITCHENAID BLOG TO SEE HOW I MADE IT WITH MY KitchenAid® 3-Speed Hand Blender + TIPS FOR PLANNING THE PERFECT BEACH BASH

Buttery Maple-Mustard Chicken Thighs w/ Roasted Curry Cauliflower

Maple- Mustard Chicken

One-pot savory dishes are one of those things I crave when it’s cold outside because it’s cozy and warming and just plain darn tasty and easy to make. I also love roasting veggies in the Winter because they’re no-fuss when I’m busy doing other things and don’t want to stand over a stove all day washing dishes for hours afterwards. (Can you tell I’m ready for a holiday vacation? lol)

Maple Mustard Chicken 2

This recipe for Maple-Mustard Chicken Thighs is a perfect one-pot dish with a buttery, sweet, tangy sauce made with maple syrup, Dijon mustard (Kozlik’s is my favorite!), garlic and some Indian hot red pepper and Tandoori spices (a great blend of coriander, cumin, paprika, garlic, ginger, cardamom and saffron).

Roasted Curry Cauliflower

It’s baked together into a big pot of savory goodness (in my new purple KitchenAid ceramic baking dish..which I LOVE!), served with some Roasted Curry Cauliflower tossed in olive oil, cumin, curry powder, and garlic salt. Super easy and super delicious. I got my Indian spices at Penzey’s at Grand Central Market in NYC and the Dekalb International Farmer’s Market in Atlanta GA, but you can find them in almost any gourmet spice store or market or online on Amazon.com.

Maple Mustard Chicken 3

Savor every buttery, spicy, tasty bite.

Roasted Curry Cauliflower 2

Happy Holidays! xo

Maple Mustard Chicken w/ Roasted Curried Cauliflower

Buttery Maple-Mustard Chicken Thighs w/ Roasted Curry Cauliflower

Prep Time: 15 minutes

Cook Time: 45 minutes

Total Time: 1 hour

Yield: 2-4

This is a savory Indian dish made with a buttery, maple-mustard sauce, served with roasted curry cauliflower with a hint of Tandoori spices and cumin.

Ingredients

  • Buttery Maple-Mustard Chicken Thighs:
  • 8 tablespoons unsalted butter
  • 1/2 cup maple syrup
  • 1/4 cup Dijon mustard
  • 1/4 teaspoon Indian red pepper
  • 1/4 teaspoon garlic salt
  • 1 teaspoon Tandoori spices
  • Freshly ground black pepper
  • 1 - 1 1/2 pounds boneless chicken thighs
  • Roasted Curry Cauliflower:
  • 4 tablespoons extra virgin olive oil
  • 1/2 teaspoon cumin seeds
  • 1/2 teaspoon curry powder
  • 1/2 teaspoon garlic salt
  • Dash of freshly ground black pepper
  • 1 large head cauliflower, cut into florets
  • Non-stick cooking spray

Instructions

  1. Buttery Maple-Mustard Chicken Thighs:
  2. Preheat oven to 375 degrees.
  3. Add butter (cut into pieces), maple syrup, mustard, red pepper, garlic salt, Tandoori spices and black pepper to a ceramic or glass baking dish and melt butter with spices for about 5-7 minutes. Remove dish from oven and whisk ingredients together.
  4. Add chicken thighs to the baking dish, coating both sides of chicken with the buttery spicy sauce and bake in the oven for about 35-40 minutes, until chicken is cooked through.
  5. Serve chicken hot, with additional sauce drizzled over, with a side of Roasted Curry Cauliflower (recipe follows).
  6. Roasted Curry Cauliflower:
  7. Combine olive oil, cumin, curry, garlic salt and black pepper in a large mixing bowl.
  8. Wash and cut cauliflower into large florets and toss with olive oil and spice mixture, coating cauliflower evenly.
  9. Spray a large baking sheet with non-stick cooking spray and arrange cauliflower in a single layer.
  10. Roast at 375 degrees for about 45 minutes to an hour, until cauliflower is tender and browned. Toss the cauliflower occasionally while roasting to evenly brown.
  11. Serve hot with Maple-Mustard Chicken and some extra sauce on top, if desired.

Notes

Maple-Mustard Chicken recipe adapted from Apricot Lane Farms.

https://www.theartfulgourmet.com/2014/12/buttery-maple-mustard-chicken-thighs-w-roasted-curry-cauliflower/


A Non-Traditional Thanksgiving Side: Fall Harvest Galette w/ Maple Sweet Potatoes, Caramelized Onions, Bacon & Gruyere

FallGalette1

#Thanksgiving is one of my favorite holidays of the year, simply because it’s a time to spend with friends and family and a great excuse to gather around the table and celebrate our blessings with some delicious bountiful food!

Whenever I go home to cook with my family, my mom takes care of the turkey and dressing, my sister makes a dessert, and I am in charge of making all the delicious side dishes. We normally make the usual green bean or broccoli casserole, squash, Brussels sprouts and mashed potatoes, and have enough food to feed the entire neighborhood!

KA-Mixer

I recently got a gorgeous new KitchenAid® Artisan® Series Stand Mixer and decided I wanted to use it to make a non-traditional Thanksgiving side dish this year. The Stand Mixer comes in 30 vibrant colors (I got Grape – my favorite) and makes cooking for the holidays so much easier, especially when it comes to making pie, tart dough and sauces. It comes fitted with a ceramic flat beater, dough hook and a wire whisk, has 10 speeds, and also has a plastic one-piece pouring shield to help keep ingredients in place when you’re mixing. And I also got the new KitchenAid® Ceramic Bowl in white to replace the metal one, which is a great accompaniment. The KitchenAid® Stand Mixer also has plenty of cool attachments that are available including food grinders, ice cream and pasta makers, juicers and more!

Fall_Galette

Using my new #KitchenAid® Artisan Stand Mixer, I decided to make a beautiful Fall Harvest Galette, with roasted maple sweet potatoes, caramelized onions, crispy bacon, sage and Gruyere cheese. The pastry dough was made in my Stand Mixer in less than 10 minutes and came out perfectly. The galette has the delicious warm flavors of fall and it’s a lovely addition to the Thanksgiving table as a colorful, healthy side dish that will blow that green bean casserole away.

CLICK HERE TO SEE THE FULL POST WITH THE RECIPE AND MORE PHOTOS ON THE KITCHENAID BLOG!

The Perfect Beach Bash + An Amazing Shrimp & Veggie Salad w/ Lemon-Herb Dressing

TableHeroShot_Crop

Summer is here and it’s absolutely my favorite time of the year! The sun is shining, the trees are in bloom, and everyone is outside enjoying the weather making it prime time for entertaining family and friends with barbecue and cocktails by the beach, lake or even in the backyard by the pool. I’ve put together some party planning and decorating tips for the perfect summer outdoor beach party, along with some menu ideas featuring lots of fresh seafood, finger foods, and refreshing fruits and veggies.

ShrimpPastaSalad-RecipeShot

One of my favorite recipes to make for a summer outdoor beach party is a Shrimp and Veggie Pasta Salad with Lemon-Herb Vinaigrette. It has a light, lemony herb dressing with fresh basil and tarragon, lots of veggies including cucumbers, celery, roasted red peppers, grilled corn and scallions for some extra crunch, and fresh sautéed savory shrimp. It goes perfectly with grilled chicken, burgers, skewers and fresh fruit like watermelon, pineapple and mango.

Standalone_1175X1290

I made this amazing summer salad using my KitchenAid® 3-Speed Hand Blender – check out the full post on KitchenEnthusiast.com for the full recipe and all my fun tips on creating the Perfect Beach Bash this Summer!

CLICK HERE FOR PARTY PLANNING TIPS AND THE FULL RECIPE! http://blog.kitchenaid.com/tips-perfect-beach-party-recipe/