I recently did a photo shoot for The Works Catering group in NYC. I worked with their corporate Executive Chef and Food and Beverage Director to pull together a new library of food photography for their website and advertising/marketing materials. I shot over 25 photos of their delicious mouthwatering appetizers, entrees and desserts with my team stylist Laurie Knoop and assistants Maike Paul and Liz Mazzei, on the rooftop and inside rooms of their facility in the Lower East Side.
Here’s a few sample shots of the delicious goodies that were meticulously styled and photographed and also some fun behind the scenes photos from the shoot.
Click on the arrows left or right to scroll through the photo gallery:
Summer Veggie Pasta with Roasted Garlic, Tomatoes, Zucchini & Corn
There’s nothing better in the Summer than a visit to the Farmer’s Market to get some super fresh veggies that are ripe in the peak of the season. Some of my favorites are fresh cherry tomatoes, zucchini and corn that are lightly roasted or sauteed tossed with some roasted garlic, fresh herbs, extra virgin olive oil and freshly grated parmesan cheese over pasta. It’s light, healthy and refreshing for a Summer dinner with a glass of wine with some friends at a table out on the back patio served with a green salad and some crusty bread.
Summer Veggie Pasta with Roasted Garlic, Tomatoes, Zucchini & Corn
Yield: 4
A light and healthy Summer pasta dish with farm market fresh vegetables including roasted garlic, cherry tomatoes, corn and zucchini topped with fresh herbs and shaved Parmigiano-Reggiano cheese. Delicious!
Ingredients
1 package fresh or dried spaghetti (can sub fettucine, penne or tagliatelle)
3 tablespoons extra virgin olive oil
1 small to medium garlic bulb
4 cups cherry tomatoes, halved
1 medium zucchini, sliced into ribbons
1 or 2 ears of corn, husked
1/2 teaspoon sea salt
1/4 cup fresh mint or basil leaves, torn
Freshly ground black pepper, to taste
½ cup shaved Parmigiano-Reggiano cheese
Instructions
Preheat oven to 400 degrees.
Shave off ¼” of the top of garlic bulb and peel away the outer layers of the garlic bulb skin. Drizzle with extra virgin olive oil and wrap in foil. Roast for 45 minutes up to one hour and let cool. Squeeze out the garlic bulbs, slice or mash, and place in a bowl to the side.
Bring a pot of water to a boil (you can add a teaspoon of sugar and milk to the water if you like sweeter corn), and add the corn, bringing water back to a boil (about 5-7 minutes.) Once water is back to a boil, remove the corn ears. Let cool, shave off kernels and set aside.
Cut zucchini in half lengthwise and then cut in half again into quarters. Shave zucchini into thin ribbons and set aside.
In another large pot, bring salted water to a boil. Cook pasta according to package directions until al dente. Drain; place pasta in a large serving bowl.
While pasta cooks, heat 1 tablespoon of olive oil in a medium saucepan over medium heat. Add zucchini to pan; and sauté for 5-7 minutes until soft and cooked through, stirring often. Add cooked corn kernels and roasted garlic and sauté together for another minute or so.
Add 2 tablespoons of olive oil to the pan along with tomatoes and ½ teaspoon salt; cover and cook 4-6 minutes. Add tomato-garlic-corn mixture to the cooked pasta; toss to combine. Top with torn mint or basil leaves, shaved Parmigiano-Reggiano cheese and freshly ground black pepper.
Notes
Serve with a green salad and crusty bread and a glass of crisp white wine such as Pinot Grigio or Sauvignon Blanc.
I was asked to create three veggie portraits of Jennette and The Couch hosts Carolina Bermudez and John Elliot using Birds Eye Vegetables to feature on the show. I picked up a few packages of frozen carrots, peas, green beans and corn and had a fun evening drawing faces and glueing veggies on white plates to create the portraits. Not as easy at it looks! Here’s a few photos of them along with some photos and videos from the TV Segment. Read on to find out Jennette’s Dinnertime Rules for eating healthier by incorporating fresh veggies into your kids meals!
Food Styling for Birds Eye and Jennette McCurdy segment on CBS The CouchVeggie Portraits for Birds Eye & Jennette McCurdy CBS TV SegmentOn set with Jennette McCurdy on CBS The Couch
McCurdy and Birds Eye have some suggestions for getting started ‘Rewriting the Dinnertime Rules.’
Rule #1: Role Reversal. Kids pick the menu and the veggies, help shop for the groceries and are in charge (with a little help from mom and dad) in the kitchen. Plus, they get to pick the theme and dress and decorate accordingly, whether it’s hitting the “beach,” bringing out your family’s wild side in the “jungle” or cheering on your favorite sports team.
Rule #2: Play with Your Birds Eye Veggies! You can use your veggies to make smiley faces or create colorful rainbows on your plate. You can even give your broccoli a mohawk haircut (really!) – just have fun!
Rule #3: Celebrate Every Bite. It can take up to 12 times for a kid to try a new type of veggie, or any new food before he or she begins liking it (http://www.choosemyplate.gov). So, keep it up! And while you’re at it, give yourself a high five for every bite your kid takes.
Rule #4: Be a Veggie Explorer. There are all sorts of cool and surprising ways to serve veggies. Like smoothies (mixed veggies with yogurt, OJ and honey), popsicles (carrots and OJ) and salad dressings (carrot ginger). You AND your kids will be amazed at all the cool ways you can eat your veggies.
For easy advice on getting kids to eat their veggies, more dinner “rules” and recipe ideas created for and tested by kids, visit www.BirdsEye.com.
Enter to win a trip to Nickelodeon’s Worldwide Day of Play on September 21st in New York City!
CLICK HERE to watch the video from the TV Segment on CBS The Couch
Last week I had the fantastic opportunity to cook and do food styling for a special healthy food segment on the “Joy Behar: Say Anything!” TV Show featuring Dr. Neal D. Barnard, M.D., founder and president of the Physicians Committee for Responsible Medicine (PCRM). Dr. Barnard sits down with guest host Marilu Henner to discuss how saturated fat makes you sluggish and which colored foods are good for your brain and improve memory. Barnard says, “Greens, foliage — that contributes folate, which is a B vitamin which protects the brain.” He adds, “So when you see the greens, you know that’s good for the brain.” He also goes into discussing what foods to avoid such as heavy carb and fat-laden foods that make us tired and lack energy.
Power Foods For the Brain
I was asked to cook and style four of Dr. Barnard’s recipes from his new book “Power Foods for the Brain: An Effective 3-Step Plan to Protect Your Mind and Strengthen Your Memory” to display during the TV interview food segment. The recipes were all colorful and healthy and made with Power Foods and all-natural ingredients: Summer Salad made with Rainbow Chard, tomatoes, corn, onions and garlic and pecans, Minted Fruit Kebabs made with a Citrus Lime and Mint light dressing, Marinated Grilled Veggie Kabobs marinated in a balsamic and herb dressing, and Super Raspberry Protein Brownies made with black beans, raspberry jam, cocoa powder and figs.
Could that glass of milk affect your memory? Is that aluminum can increasing your risk for Alzheimer’s disease? Can a banana be a brain booster? Everyone knows that good nutrition supports your overall health, but did you know that certain foods can protect your brain and optimize its function?
In POWER FOODS FOR THE BRAIN, Dr. Neal Barnard has gathered the most important research and studies to deliver a program that can boost brain health, reducing the risk of Alzheimer’s disease, stroke, and other less serious malfunctions, including low energy, poor sleep patterns, irritability, and lack of focus. The plan includes information on:
The best foods to increase cognitive function and boost folate, vitamin B6, and vitamin B12
The dangers dairy products and meats may have on memory
The role alcohol plays in Alzheimer’s risk
The latest research on certain toxic metals, like aluminums found in cookware, soda cans, and common antacids
Plus, 50-75 recipes and timesaving kitchen tips.
Here are the recipes I made and styled for the show. Enjoy!
Summer Salad
Summer Salad – The more naturally colorful your meal is, the more likely it is to have an abundance of immune-boosting antioxidants and phytochemicals. The same foods that are good for your heart are good for your brain.
Chard’s slight bitterness is beautifully balanced by the sweetness of the corn and grapes, resulting in a surprising depth of flavor.
Ingredients
½ small white onion
3 cloves garlic
Leaves from 1 bunch chard
4 Roma tomatoes, diced
1 ½ cups fresh corn kernels
¼ cup pecan halves
1 cup seedless black grapes
Pinch of sea salt
½ teaspoon freshly ground black pepper
Instructions
Mince the onion and garlic, then smash them together a couple times with the back of a knife or with a mortar and pestle.
Wash the Swiss chard thoroughly, as it tends to be gritty, then slice it into ribbons by tightly bunching the leaves together and slicing them with a sharp, heavy knife. Place the chard in a salad bowl, add the remaining ingredients, and toss.
Marinated Grilled Veggie Kebabs – these are super easy to make and super colorful, and healthy. Marinated in a dressing made with balsamic vinegar, orange juice, honey, mustard and maple syrup with Italian season before grilling, they are super tasty too.
Serve these savory kebabs over a brown rice pilaf for a satisfying and easy meal.
Ingredients
16 cherry tomatoes
2 red onions, each cut into 8 bite-size chunks
2 green or red bell peppers, cored, seeded, and cut into 8 pieces each
16 button mushrooms
1 small yellow summer squash, cut into 8 pieces
1 small zucchini, cut into 8 pieces
Marinade:
½ cup balsamic vinegar
½ cup orange juice
2 tablespoons maple syrup
2 tablespoons prepared mustard
1 teaspoon dried Italian seasoning
½ teaspoon sea salt
¼ teaspoon ground black pepper
8 metal skewers, or bamboo skewers soaked in water for 30 minutes
Instructions
Place the cherry tomatoes, red onions, bell peppers, mushrooms, squash, and zucchini in a large bowl.
In a small bowl, combine the marinade ingredients and whisk well. Pour the marinade over the vegetables and stir to coat. Marinate for 15 minutes.
Heat a charcoal or gas grill or your oven’s broiler. Onto one skewer, thread the ingredients in the following manner: 1 tomato, 1 red onion chunk, 1 pepper piece, 1 mushroom, 1 yellow summer squash slice, 1 tomato, 1 zucchini slice, 1 red onion chunk, 1 pepper, and 1 mushroom. Repeat with remaining ingredients and skewers. Place the kebabs on the hot grill or a broiler pan and brush with the marinade. Grill for 7 minutes, or until desired tenderness, turning the kebabs a few times. Serve immediately.
Minted Fruit Kebabs – Power up with blueberries and grapes. These “brain berries” get their deep colors from anthocyanins, powerful antioxidants shown to improve learning and recall in studies at the University of Cincinnati.
Fresh fruit makes a striking appearance in these antioxidant-rich kebabs. Enjoy them for a refreshing, light dessert!
Ingredients
8 red or green grapes
4 large strawberries
4 1-inch-square cantaloupe chunks
4 1-inch-square honeydew chunks
4 1/2-inch-thick slices peeled kiwi
4 1-inch-square watermelon chunks
1/4 cup orange juice
2 teaspoons fresh lime juice
2 tablespoons finely chopped fresh mint leaves
1 teaspoon pure vanilla extract
4 10-inch bamboo skewers
Instructions
Thread 1 grape, 1 strawberry, 1 cantaloupe chunk, 1 honeydew chunk, 1 slice kiwi, 1 watermelon chunk, and 1 more grape onto a skewer. Repeat with the remaining fruit and skewers. Place the finished skewers in a shallow container.
In a small bowl, whisk together the orange juice, lime juice, mint, and vanilla. Pour the marinade over the fruit kebabs, cover, and chill for at least 30 minutes (or up to 3 hours) in the refrigerator before serving.
Super Raspberry Protein Brownies – A brownie made with black beans? You bet! Beans are high in fiber, calcium, and protein, making them a nutrition powerhouse. Beans are free from saturated and trans fats. Researchers find people consuming the most saturated fat in their diets have more than triple the risk of developing Alzheimer’s disease.
A brownie made with black beans? You bet! Beans are high in fiber, calcium, and protein, making them a nutrition powerhouse.
Beans are free from saturated and trans fats. Researchers find people consuming the most saturated fat in their diets have more than triple the risk of developing Alzheimer’s disease.
Ingredients
1/4 teaspoon safflower oil
2 15-ounce cans low sodium black beans, drained and rinsed
1 cup pitted dates
1 cup all-fruit raspberry jam
1 tablespoon pure vanilla extract
1/4 cup whole-wheat pastry flour
1 cup unsweetened cocoa powder
1/4 teaspoon sea salt
Instructions
Preheat the oven to 350 degrees F and grease an 8x8-inch baking pan with the oil.
Combine the black beans, dates, jam, and vanilla in a food processor and process until smooth. Add the flour, cocoa powder, and salt and process again.
Pour into the prepared pan and smooth the top with a spatula. Bake for 30 minutes or until the top looks set. Remove from the oven and cool completely, then cut into 16 squares. The brownies will keep, refrigerated in a covered container, for up to 1 week.
June has been a busy busy month! I’ve partnered with an agency in New York to do some custom food styling and photography for their new Stoli cocktail photo library and shot 11 drink recipes with the agency art director and account team. Here’s some of the photos I did for them – Bloody Marys, Martinis, Stoli O Rouge, Blueberry Lemonade and more. Stay tuned for the updated photos on Stoli.com website in their cocktail recipe section 🙂
Summer is in the air and it’s that time of year to cool down with some refreshing Stoli cocktails and light small bites for the patio or beach. I love melon in the Summer time, especially paired with cucumbers with their light flavors that make a great refreshing cocktail.
I created a Cucumber-Melon Martini that’s made with Stoli vodka, cucumber liqueur, agave cayenne lemonade (or regular lemonade or limeade), garnished with cucumbers, mint and cubes of honeydew melon. It has a hint of sweetness from the lemonade and a lovely refreshing flavor from the melons and cucumbers and a spike of minty freshness and kick of heat from the cayenne lemonade.
A great small bite pairing to go with the martinis are Prosciutto, Melon and Feta Bites. They’re super easy to make and just as light and refreshing as the cocktails that go with them.
A little bit sweet, a little bit tangy and a whole lot delicious. Here’s to the lazy days of Summer! ENJOY 🙂
—–
Stoli Cucumber-Melon Martini
1 part Stoli vodka
1 part cucumber liqueur
2 parts lemonade or limeade
Garnish with Cucumber slices, honeydew melon cubes and fresh mint sprigs
Pour vodka and lemon or limeade into a drink shaker over ice. Shake well and strain into martini glasses. Drop cubes of melon into the martini. Garnish with cucumber slices and fresh mint sprigs.
Makes 1 cocktail.
—–
Prosciutto-Melon-Feta Bites
1 package of prosciutto, sliced thin and cut in half (about 20 slices)
1 package of feta cheese, sliced into ¼ inch sliced cubes
8 ounces honeydew melon, cubed
8 ounces cantaloupe melon, cubed
Prep all ingredients by cutting the feta cheese and melons into similar size chunks. First layer the melon with the feta, then top with a slice of prosciutto folded into small squares and secure with toothpicks. Serve on a platter along with the Cucumber-Melon Martinis.
Makes approximately 20 small bites.
Note: You can also include watermelon in the mix for some extra flavor or serve the bites over arugula with a cucumber melon vinaigrette. Simply throw the melon and cucumber slices in a blender with some olive oil and vinegar, a dash of salt and pepper; then drizzle over the bites.
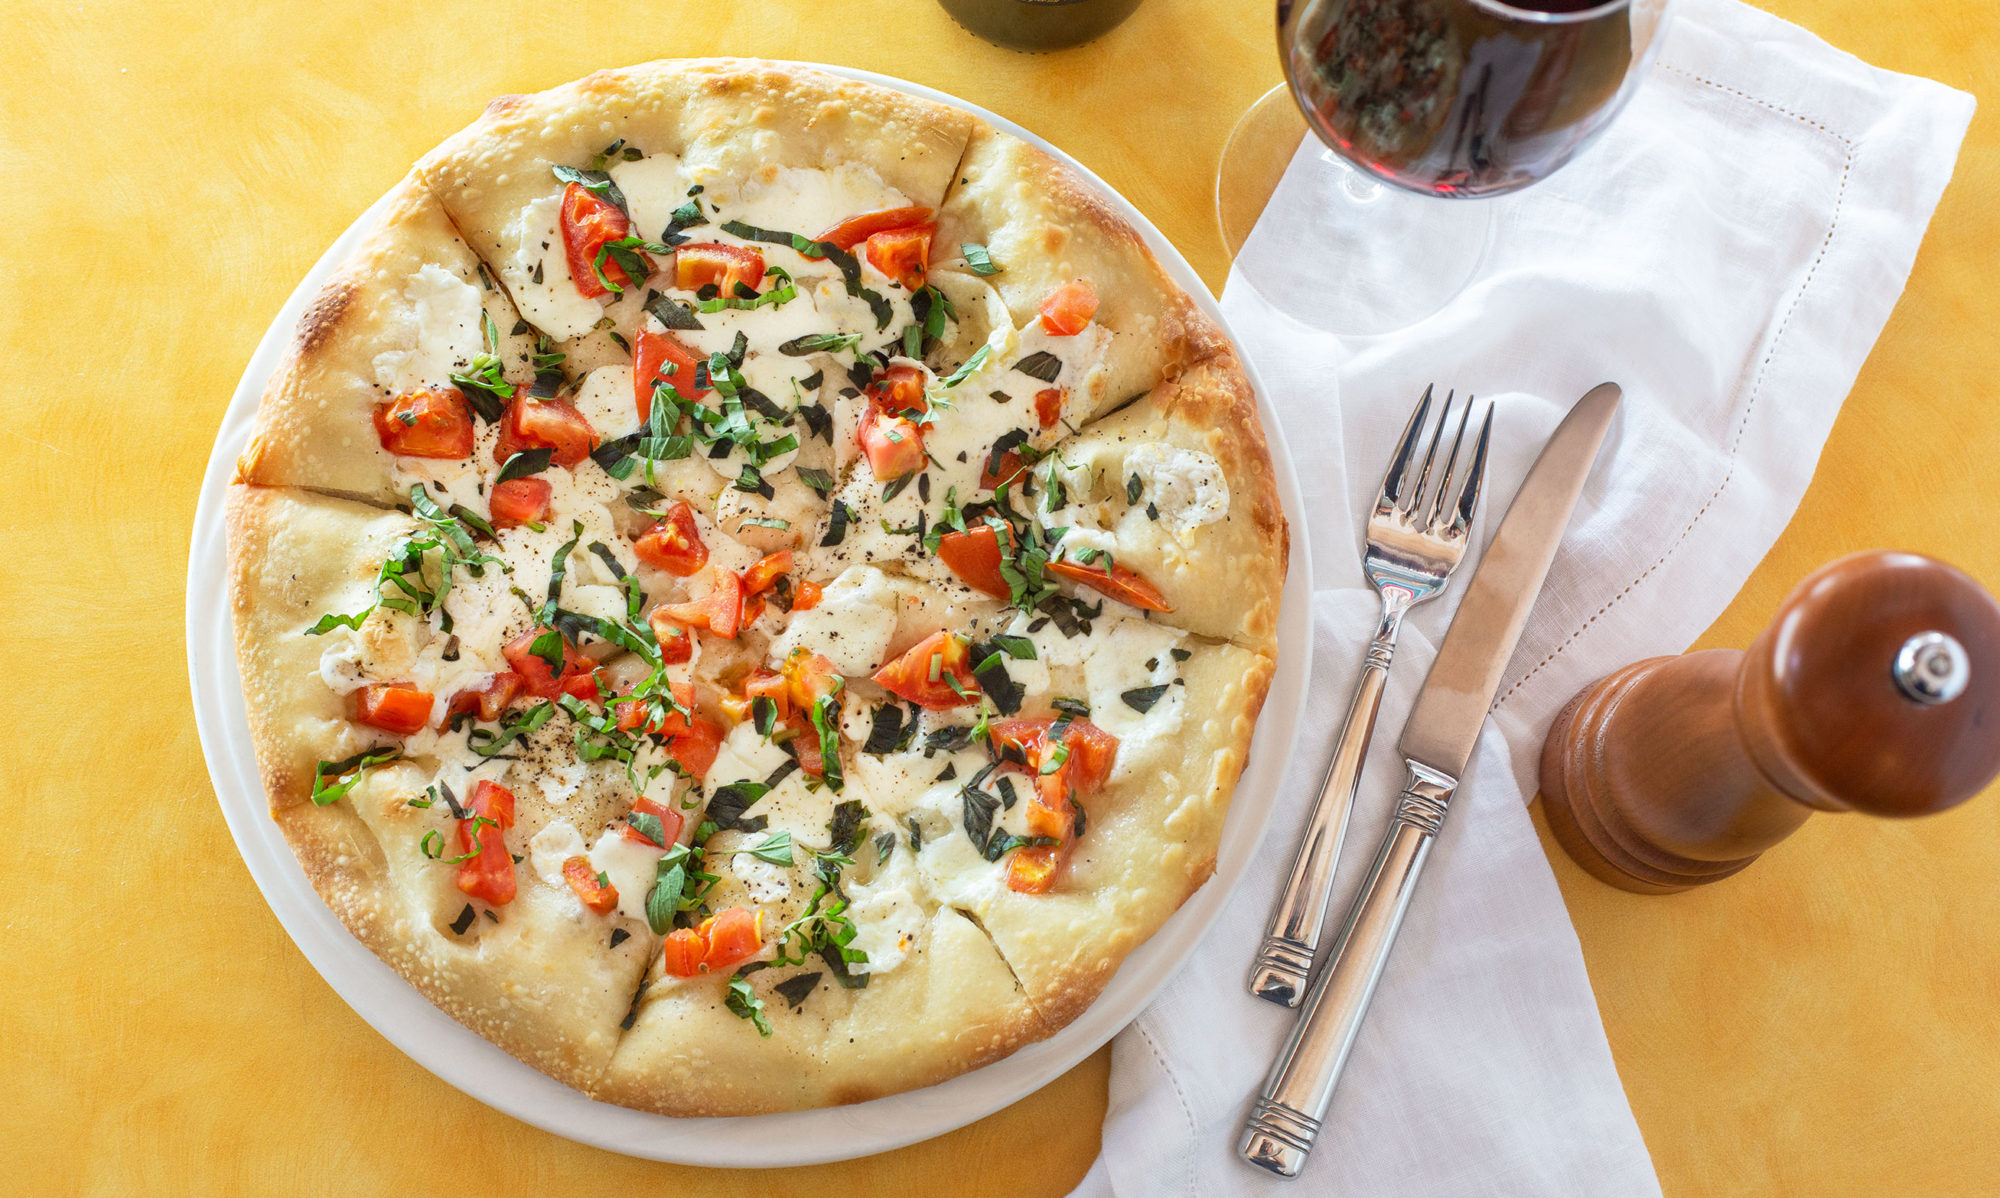
Summer has quickly arrived and it’s that time of year again to shed a few pounds and hit the beach. I’ve decided to muster up some will power and started experimenting with a low carb diet with grand visions of lazy days on the beach in that bikini I need to fit back into. The bad news is whenever I decide to go on a diet, my brain automatically starts thinking about all the evil foods I CAN’T eat – pizza being one of the first things I start craving.
I decided to make a low-carb pizza using a parmesan garlic cauliflower crust. It sounds weird, but it’s absolutely delicious and healthy and a great substitute for traditional pizza dough when you want a healthier option to cut some carbs out of your diet (while satisfying your cravings for pizza which are absolutely NOT allowed when you’re doing low carb!) I’m absolutely in LOVE with spinach artichoke dip and thought I would make a lighter version mixed with some fresh ricotta, garlic, onion and parmesan cheese to top the pizza.
I found a gorgeous head of bright yellow Carnival cauliflower and simply shredded and chopped it into a fine crumble (you can also do this in a food processor or blender). Then I chopped up some garlic and threw them both in the microwave for about 8 minutes, then drained and let cool.
You simply need to mix in some grated parmesan cheese (or any other shredded cheese you like), an egg, garlic, dried minced onion, herbs de Provence (or dried oregano or basil), a few sesame or chia seeds (optional), some yeast, almond flour and sea salt and black pepper. Then pat the mixture on to a greased pizza sheet or Silpat mat, then bake for about 10-15 minutes until the crust is lightly golden brown.
In the meantime, to make the luscious (and healthy) spinach, artichoke and ricotta topping – simply sauté the spinach with some garlic and olive oil, mix in some chopped up artichoke hearts (precooked), fresh minced garlic, ricotta cheese and shredded parmesan cheese, then top the pizza crust spreading the mixture in an even layer. Top with some additional shredded cheese (I used sharp white cheddar but you can use mozzarella or Monterey jack or any other cheese you like that melts well), and then scoop some light and fluffy ricotta cheese on top of the mixture and bake for another 7-10 minutes until the cheeses are melted and bubbly.
In my experiment I found that you shouldn’t spread the pizza crust out on the pan too thin, as it is more fragile than a traditional dough crust and needs to be a bit thick to hold up the ingredients. So try to keep the crust about ¾” to 1 inch thick evenly all around to the edges or it will burn.
Also, let the pizza cool for about 5 minutes or so before slicing it. Top with additional salt and pepper, red pepper flakes if desired, and grated parmesan cheese.
Devour. Repeat.
Preheat the oven to 425. Prepare the cauliflower crust ingredients and pat down on a greased pizza pan.
Bake at 425 degrees for about 10-15 minutes until it starts to get golden brown around the edges.
Top pizza crust with spinach artichoke mixture, shredded cheese and ricotta. Bake for another 10 minutes.
Let pizza cool down for 5-10 minutes and cut into slices.
Garnish with additional salt and pepper, parmesan cheese and red pepper flakes.
½ teaspoon herbs de provence (or dried basil or oregano)
½ teaspoon dried minced onion
sea salt and fresh ground black pepper
red pepper flakes (optional)
Instructions
Preheat the oven to 425.
Grease a 9-10” round pizza pan or place Silpat mat on a rectangular baking sheet.
Shred and chop cauliflower into fine crumbles (either by hand with a large Chef’s knife or with a food processor).
Mince the garlic and add to the cauliflower in a microwave-safe large bowl.
Microwave covered with plastic wrap for about 7-8 minutes.
Uncover, drain and let cool for about 5-10 minutes.
Add the next nine ingredients and mix together well.
Bake the crust for about 10-15 minutes until golden brown. Remove the crust from oven and set aside.
Notes
In my experiment I found that you shouldn't spread the pizza crust out on the pan too thin, as it is more fragile than a traditional dough crust and needs to be a bit thick to hold up the ingredients. So try to keep the crust about ¾” to 1 inch thick evenly all around to the edges or it will burn.
1 package frozen artichokes, defrosted (or 1-14 oz can, drained)
1-15 oz container ricotta cheese, divided in half
1 cup parmesan cheese, grated
sea salt and fresh ground black pepper, to taste
½ cup white cheddar cheese (can sub Monterey jack or mozzarella), shredded
dash of red pepper flakes (optional)
Instructions
Preheat a large sauté pan over medium-low heat.
Place the spinach in a large microwave-safe bowl and cover with plastic wrap. Cook for about 8 minutes on HIGH.
Mince the shallots and garlic cloves and drain the spinach (pressing out extra liquids).
Add one tablespoon of olive oil and sauté the shallots for about 5 minutes. Add the garlic and sauté for another minute.
Add the additional tablespoon of olive oil and sauté the spinach for another few minutes, mixing all ingredients together. Remove from heat and let cool for about 5 minutes.
Microwave the artichokes in a large microwave-safe bowl and cover with plastic wrap. Cook for about 5-6 minutes on HIGH and drain. (if using canned artichokes, simply drain).
Chop the artichokes up into small pieces and place into a large mixing bowl.
Add half of the container of ricotta cheese, 1 cup parmesan cheese, salt and pepper and mix well.
Stir in the spinach, shallots and garlic mixture.
Drizzle or spray some olive oil lightly on to the parbaked cauliflower pizza crust.
Spread the spinach, artichoke and ricotta mixture evenly over the crust.
Sprinkle with shredded cheddar cheese, salt and pepper, red pepper flakes and scoop out a few large tablespoons of ricotta cheese and place on top of the pizza.
Bake at 425 degrees for another 7-10 minutes until the cheeses are melted and bubbly and the crust edges are light golden brown. (Watch crust edges to make sure they don't burn).
Remove pizza from oven and let cool for about 5 minutes.
Slice into wedges (or squares if making rectangular pizza) and top with additional red pepper flakes and parmesan cheese.
Notes
In my experiment I found that you shouldn't spread the pizza crust out on the pan too thin, as it is more fragile than a traditional dough crust and needs to be a bit thick to hold up the ingredients. So try to keep the crust about ¾” to 1 inch thick evenly all around to the edges or it will burn.
WOW. I recently had the opportunity this past January to assist on a photo shoot for Sandra Lee at her house in Westchester for a series of food and holiday shots for Sandra Lee magazine with my photographer friend, Jill Lotenberg. We set up and shot 15 different photos of Sandra in various settings around her home and kitchen, with gorgeous food and cocktails for her holiday and entertainment-themed magazine spreads with recipes. The house had a full crew and production team including food stylists, prop stylists, makeup artists, photographers and a team of assistants working around the clock to set up the lighting, food and drinks, props and sets around the house, and of course styling Sandra herself to be gorgeous and photo ready for the perfect final beauty shots for the magazine. The photos turned out great, and it was a cool opportunity to meet Sandra and her team in person. The shot above is currently in the March 2013 issue out on newsstands..stay tuned for more as they are published!
The holidays are here, and what better way to celebrate by throwing a holiday cocktail party with friends and family? I’ve teamed up with Colavita this season to celebrate with all of you, by creating some delicious Holiday Appetizer recipes using their World Selection andPrivate SelectionExtra Virgin Olive Oils and Flavored Cooking Oil blends.
Colavita Olive Oil Giveaway!
*THIS GIVEAWAY HAS ENDED – Congratulations to Manda Kay, the winner of our Colavita holiday giveaway! Hope you cook up lots of goodies with your EVOO & Balsamic Glace! Happy Holidays 🙂
I’ve teamed up with Colavita this holiday season and giving away some of their delicious olive oils and balsamic vinegars so you can celebrate the season by cooking up some holiday goodies of your own! The winner will receive: one (1) 3/4 liter of Colavita Private Selection Fruttato EVOO, one (1) 32 oz Roasted Garlic EVOO plus one (1) 29.5 oz bottle of their Balsamic Glace.
All you have to do to enter the giveaway is leave me a comment at the end of this post telling me what your favorite Holiday Appetizer to make with olive oil is.
*For extra entries, just follow me on twitter, facebook, pinterest, google+, tumblr or sign up for my newsletter (at the top right hand side of this page) and tell me you did so in the comments section. **As an added bonus, Colavita is also offering a 25% discount to all of my readers on any purchase in their online store. Simply enter the code ‘AG25’ to receive the discount upon checkout!
**This giveaway begins on Sunday, Dec 9th and ends Sunday Dec 23rd at midnight EST, where one person will be selected by random from the comments section below.**
Colavita World Selection Olive Oils are a new collection of extra virgin olive oils exploring the tradition in countries outside of italy from estates and farms in Australia, Argentina, California, Greece, Spain and Portugal as well as other prime olive oil growing nations. Read more about a few of my favorites that I used in my recipes below!
Colavita 100% Californian EVOO
The warm climate in the “Golden State” of California fosters both grape and olive cultivation perfect for wines and olive oils. The Colavita 100% Californian EVOO is pressed from olives grown in the Sacramento and San Joaquin valleys of California. The mild flavor makes this oil perfect for all culinary applications. Enrich your favorite meal with a drizzle of EVOO and a glass of wine.
Colavita Roasted Garlic EVOO is a product originally created exclusively for BJ’s Wholesale Stores. To many it has become the “gateway product” that exposes customers to the entire Colavita family of products. It is raved about on their online store so we wanted to share it with all of you! It’s the perfect finishing oil and wonderful for enhancing garlic already present in your dish. Try it on Garlic Bread or my Homemade Pita Chips (recipe below).
The Argentina EVOO was a hands-down favorite at this year’s New York Wine and Food Festival. Arbequino, Coratina and Manzanilla olive cultivars grown in the Catamarca and Mendoza regions of Argentina give this EVOO and intense, fruity aroma and taste. Pair this EVOO with soups, roasted fish, grilled vegetables and red meat for an unbeatable duo.
Colavita’s Fruttato Oil has recently been inducted into the Colavita “Private Selection” line. This line was created to highlight the products which have received the honor of being marked a Colavita family favorite. It is made by cold pressing new harvest olives just before their peak ripeness. The result is a full bodied EVOO which is slightly pungent with peppery flavor notes.
This Colavita Premium Blend is an all-purpose cooking, frying, and salad dressing oil which combines the delicate hint of roasted garlic in a light Canola Oil and Virgin Olive Oil Blend. It is a versatile oil that is naturally low in saturated fats and has no trans fats.
These yummy sweet and spicy Asian Chicken bites combine honey, soy sauce, orange and Sriracha to make a fun bite-sized appetizer with a delicious glaze.
This is a lovely tart recipe that combines sweet and savory flavors. The caramelized onions give it a sweet flavor with a hint of fig balsamic vinegar, balanced out by creamy ricotta, nutty Gruyere cheese, fresh herbs and crispy pancetta.
Ingredients
1 package pancetta (8 thin slices)
3 tablespoons Colavita Fruttato EVOO
2 sweet Vidalia onions, halved lengthwise and sliced thin
1 tablespoon brown sugar
Kosher salt
Fresh ground black pepper
1-1 1/2 tablespoons Fig balsamic vinegar (Tavern Direct brand)
1 cup fresh ricotta
1 egg yolk
1 tablespoons dried Fines Herbes (or 2 tablespoons fresh herbs)
1/2 cup shredded Gruyere cheese
1 frozen pie shell, defrosted, or homemade tart dough
Instructions
Preheat oven to 350 degrees.
Heat a saute pan over medium heat and cook pancetta until browned but not fully cooked, about 5 minutes. Drain fat from pan and place pancetta on paper towels to drain to the side. Once cooled, chop pancetta into small pieces.
Peel onions, remove top and bottom stems and cut in half lengthwise.
Slice onions thin (about 1/8" thick or desired thickness).
In the same saute pan, add 3 tablespoons olive oil and heat over medium high heat.
Add onions and cook over medium high for about 10 minutes.
Sprinkle brown sugar, salt and pepper over onions and stir well, cook another 10-20 minutes, reducing heat to medium low if onions start to brown too quickly.
Continue cooking and stirring onions over medium low for another 15 minutes, add a few teaspoons of water if desired.
Add the fig balsamic vinegar to the onions, turn heat down to low and let cook until they are caramelized, soft and sweet, up to an hour total.
Combine the ricotta, egg yolk and Fines Herbes together in small mixing bowl.
Spread the ricotta mixture over the pie shell in a 9" tart pan with removeable bottom.
Sprinkle Gruyere cheese over ricotta.
Top with caramelized onions and pancetta.
Bake the tart in the oven for approximately 30-45 minutes until pastry and filling are golden brown, and pancetta is crispy.
Let tart cool on a cooling rack for 10-15 minutes before serving.
Serve tart cut into wedges.
Notes
If you prefer to make your own tart dough rather than using a frozen pie crust, Martha Stewart has a great recipe for Flaky Tart Dough on her website at http://www.marthastewart.com/319448/flaky-tart-dough
Hot Artichoke dip is one of my all time favorite holiday dip recipes, and this one is extra special, using Colavita's California EVOO, lemon zest and minced garlic with lots of gooey cheese. Instead of using mayonnaise, I substitute a light sour cream to cut some of the fat and calories. Serve with my homemade baked pita chips or crackers.
Ingredients
2 tablespoons Colavita California extra virgin olive oil
1 package frozen artichokes, defrosted
1 tablespoon minced garlic
zest and juice from 1/2 lemon
Garlic salt with parsley (to taste)
Fresh cracked black pepper (to taste)
1/2 cup shredded parmesan cheese
1 cup shredded light monterey jack cheese, plus 1/2 cup for topping
1/2 cup light sour cream
dash of cayenne (optional)
dash of paprika (for garnish)
1 green onion, sliced thin (for garnish)
Instructions
Heat oil in a saute pan over medium high heat. Add artichokes and minced garlic, saute about 5-7 minutes until heated through.
Add lemon juice, zest, garlic salt and pepper, mix well and cook another few minutes, set aside.
Meanwhile, add shredded cheeses and sour cream together in a mixing bowl.
Add sauteed artichokes, garlic and lemon to cheese and sour cream.
Sprinkle with a dash of cayenne (if desired), mix well and transfer to a casserole dish.
Sprinkle additional monterey jack cheese over the top and bake in the oven for about 20-30 minutes until bubbly and cheese is melted on top.
Let cool a few minutes, sprinkle with paprika and green onions. Serve with homemade baked pita chips (recipe follows), crackers or crudites.
Making homemade pita chips is super easy and way better than buying the storebought kind for your holiday party. Mine are made with whole wheat pita bread, drizzled with EVOO, and sprinkled with garlic salt and cumin for some extra flavor. So delicious and crispy straight out of the oven and so addicting you'll never buy them again! Serve with Hot Parmesan Garlic Artichoke Dip or any of your other favorite party dips.
Ingredients
6 whole wheat pita rounds
2 tablespoons Colavita California EVOO
1 tablespoon garlic salt
1/2 tablespoon cumin
Instructions
Preheat oven to 400 degrees.
Cut pita rounds into triangles (6 wedges per pita).
Lay out pita wedges on a baking sheet and brush each wedge with olive oil.
Sprinkle garlic salt and cumin on top.
Flip over pita wedges, repeat coating with oil, salt and cumin.
Place baking sheet(s) in oven and cook pita wedges for about 15 minutes (checking to make sure they don't burn!)
Let cool, and serve with Hot Parmesan Garlic Artichoke Dip.
Everyone loves cocktail meatballs at holiday parties! These lovelies have a hint of lemon and sage and are light and fluffy, made with ground pork or chicken. They are first browned on the stovetop and then finished in the oven until golden brown. They're delicious alone, or dipped in a hot pepper jelly (Williams-Sonoma brand is great), balsamic pear jam (there's one by Academia Barilla that is to die for) or simply dipped in balsamic vinegar glace.
Red Pepper jelly, for dipping (Williams Sonoma brand)
Balsamic Pear jam, for dipping (Academia Barilla brand)
Colavita Balsamic Glace, for dipping
Instructions
Preheat oven to 350 degrees F.
Remove crusts from bread and tear into small pieces in a large mixing bowl, add milk and let soak for 10-15 minutes.
Mix in ground pork or chicken, sage, garlic, onion, lemon juice and zest, cheese, pepper flakes, egg, salt and pepper with soaked bread crumbs with your hands in a claw-like motion to keep meatballs light and fluffy.
Roll meat mixture into small to medium size meatballs (small makes approximately 36, medium makes approximately 18).
Heat olive oils in a large saute pan over medium heat (if not using cooking oil blend, mix EVOO with a tablespoon of butter to avoid temperature from getting too high and splattering).
Cook meatballs in batches in the oil for about 5 minutes each batch until meatballs are browned on all sides, drain on paper towels.
Once all meatballs are browned, place them on a large rimmed baking sheet coated with cooking spray to avoid sticking.
Bake in the oven for approximately another 15 minutes until cooked through and to keep warm.
Top with additional garlic salt (if desired), fresh chopped sage, and serve with red pepper jelly and balsamic pear jam, and Colavita Balsamic Glace for dipping.
These zucchini sticks are a great appetizer for any holiday party. They have a light crunchy coating of Japanese Panko seasoned bread crumbs and are finished with a splash of lemon and sprinkling of sea salt. They go perfect with the cool and creamy yogurt dill sauce or even a ranch dressing for dipping.
Ingredients
CRUNCHY ZUCCHINI STICKS
Colavita Roasted Garlic Cooking Oil Blend
4 medium zucchini, cut into half, into long strips
1 cup all-purpose flour
1 cups Panko Japanese-style seasoned breadcrumbs
Sea salt and fresh ground pepper
2 large eggs
Sea salt, for sprinkling, to taste
Lemon wedges, for garnish
Fresh minced dill, for garnish
YOGURT DILL SAUCE
1 cup of Greek yogurt
2-3 tablespoon minced dill
Sea salt and pepper, to taste
Instructions
CRUNCHY ZUCCHINI STICKS
Heat olive oil over medium high heat in a large deep saute pan, about 2 inches high.
Trim ends off zucchini, cut in half and then in half again lengthwise.
Cut zucchini into large strips about 1/2 an inch thick.
Pour the flour and Panko breadcrumbs into one large bowl and season with salt and pepper.
Beat eggs in a separate bowl.
Dip zucchini sticks in egg, shaking off excess, then dip in bowl to coat with flour and breadcrumbs.
Place coated zucchini on a baking sheet.
Fry in batches until golden brown, draining excess oil on another baking sheet lined with paper towels.
Squeeze some fresh lemon juice on top of zucchini and sprinkle with fresh dill and additional sea salt to taste.
YOGURT DILL SAUCE
In a medium bowl, mix together greek yogurt, dill, salt and pepper to taste.
*This is a sponsored post by Colavita, but as usual, all opinions expressed are my own. I received 5 bottles of Colavita olive oil samples to create the recipes for this article and holiday promotion. Winners of the giveaway will receive the prizes directly from Colavita by mail and should expect 2-3 weeks delivery time due to the holidays.
**All photographs, recipes and copy are copyrighted by Kristen Hess/The Artful Gourmet 2012 and cannot be republished without my permission or credit on the reposted original material from this article or website.
Potato Latkes with Caramelized Honey Apples & Cinnamon Sour Cream
In the spirit of the Jewish New Year holiday Rosh Hashana, I created a delicious dish for my client miditto, to pair with some of their late Summer and early Fall wine selections for our September photo shoot. Apples and honey are often eaten together to celebrate the New Year, and are typical symbols of hope for sweet and healthy new beginnings. What better way to serve them than with classic Potato Latkes? I used a traditional latke recipe with shredded onions and potatoes mixed with flour and egg and seasonings, then fried in oil into crispy potato cakes. Rather than serving them with traditional applesauce, I thought it would be a tasty variation to caramelize the apples in butter and brown sugar and top the latkes with the apples and a drizzle of honey and cinnamon sour cream. Delicious, heartwarming, and definitely something to celebrate! Shanah Tova. Happy New Year!
Combine potato and onion in a colander. Drain 30 minutes, pressing with the back of a spoon until barely moist. Combine potato mixture, flour, and next 4 ingredients (through egg) in a large bowl; toss well.
Heat a large skillet over medium-high heat. Add 2 tablespoons olive oil to pan, and swirl to coat. Spoon 1/4 cup potato mixture loosely into a dry measuring cup. Pour mixture into pan, and flatten slightly. Repeat to form 6 latkes. Cook in batches by sautéing them 3-4 minutes on each side or until golden brown. Remove latkes from pan, and keep warm in an oven on low heat.
Repeat procedure with the remaining 2 tablespoons olive oil and potato mixture to yield 12 latkes total. Combine sour cream and cinnamon in a bowl. Serve with Sauteed Caramelized Apples over the latkes. (recipe follows)
Makes 6 servings.
Recipe adapted from myrecipes.com
—–
Sauteed Caramelized Apples with Honey
4 tablespoons unsalted butter
4 large red or green apples
3/4 cup brown sugar
1 teaspoon cinnamon
1 tablespoon fresh thyme leaves or fresh chopped parsley
2 tablespoons honey
Preparation
Peel and core apples and cut into thin wedges.
Melt butter over medium-high heat in a large nonstick skillet.
Add apples, brown sugar and cinnamon to pan and sauté apples about 10 minutes until lightly caramelized.
Sprinkle with chopped fresh thyme or parsley leaves and let cool. Serve over latkes with a drizzle of honey and a side of sour cream mixed with cinnamon and additional parsley or chives.
Serves 4-6.
Pair the Latkes and Caramelized Apples with a full-bodied Pinot Noir or smooth Cabernet Sauvignon. See Miditto.com for more great organic and vegan wine recommendations and selections!